Blogs

Amp Up Your Shoulder Workout With These 5 Best Side Delt Exercises

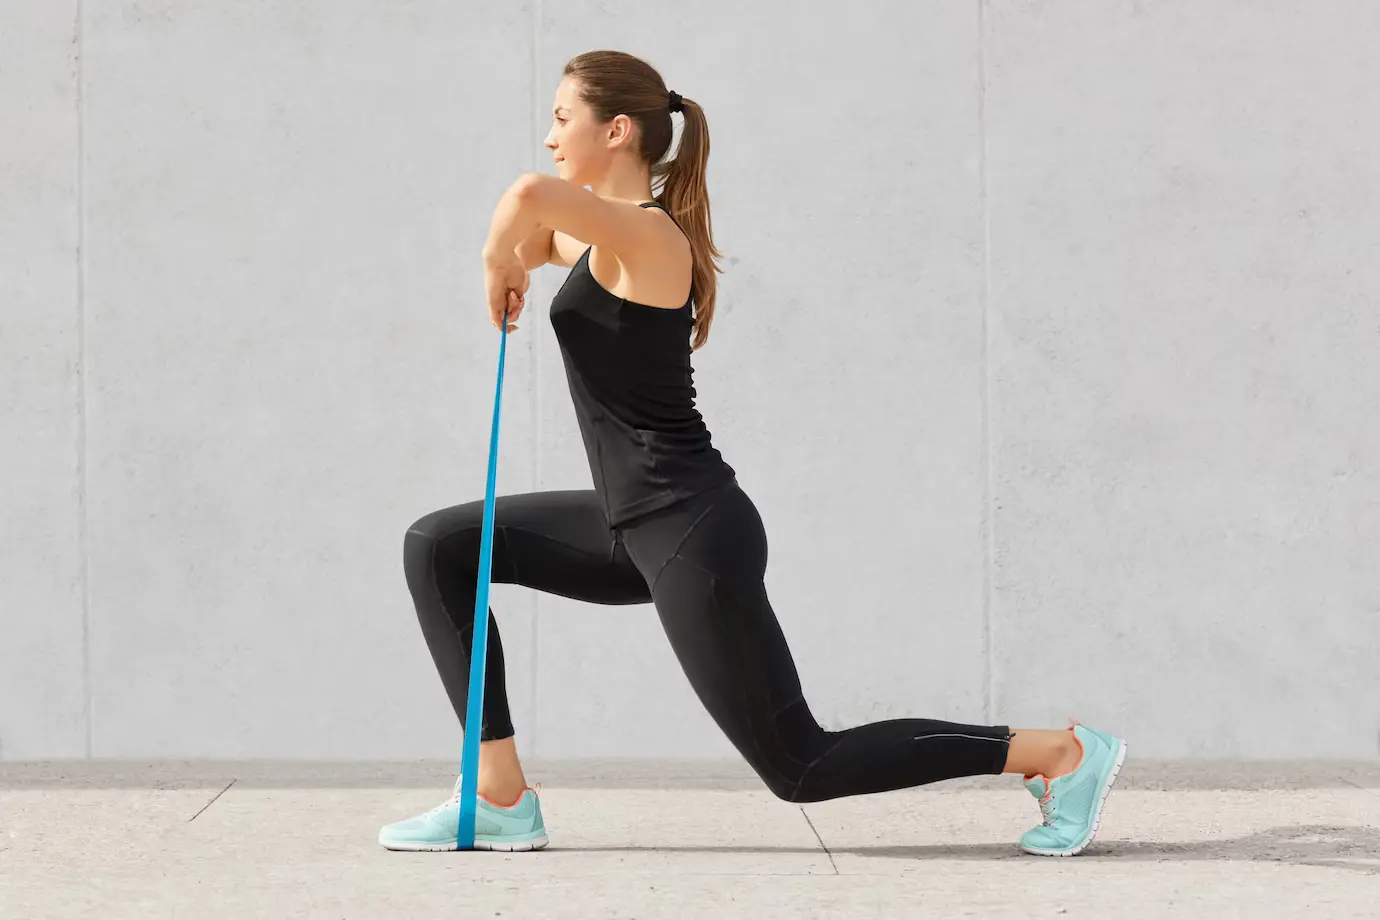
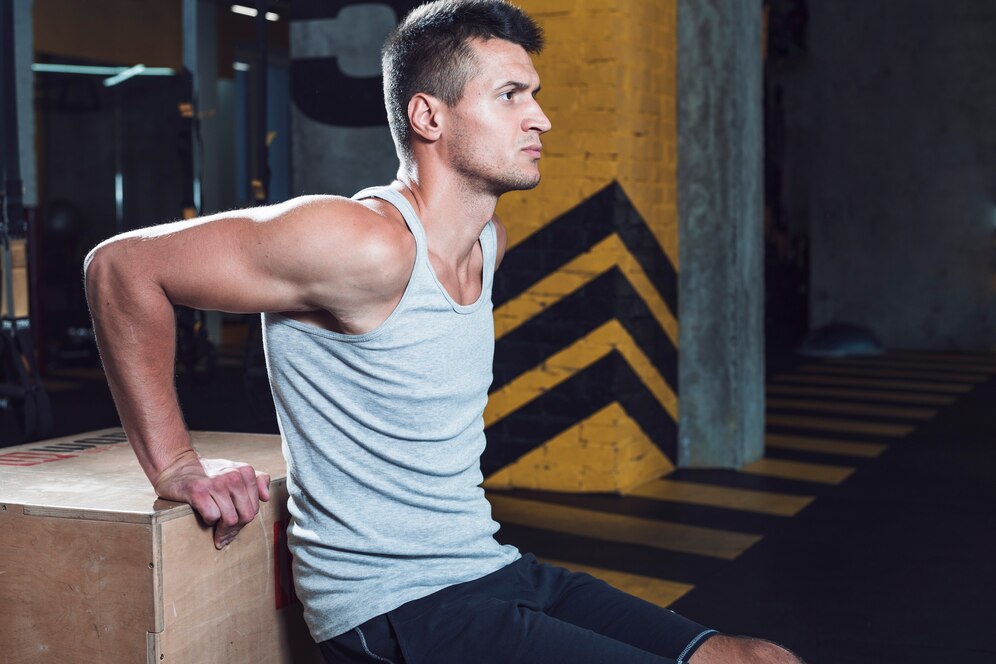
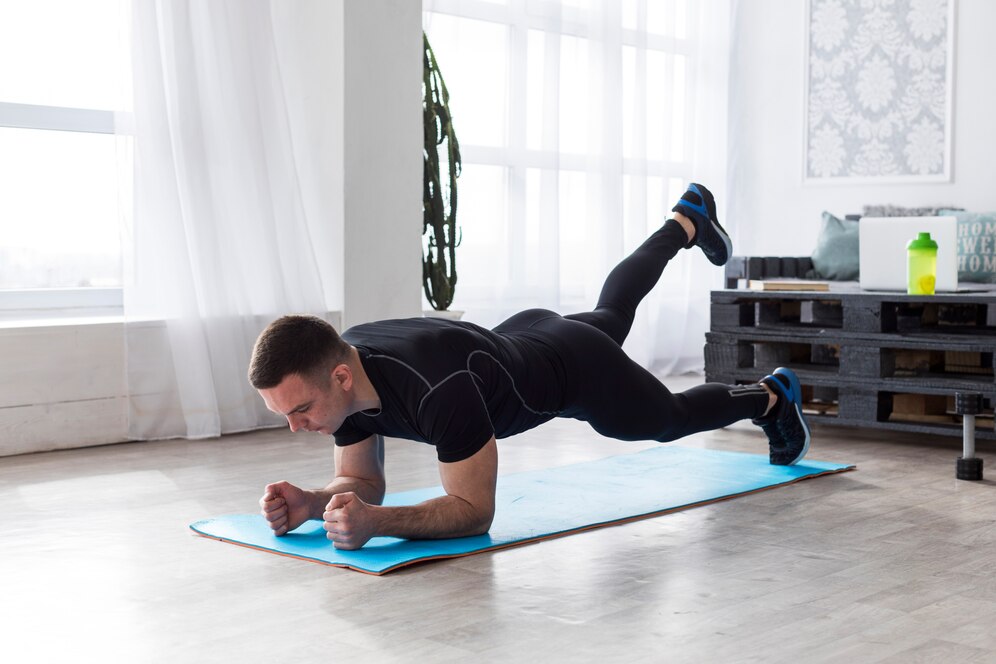
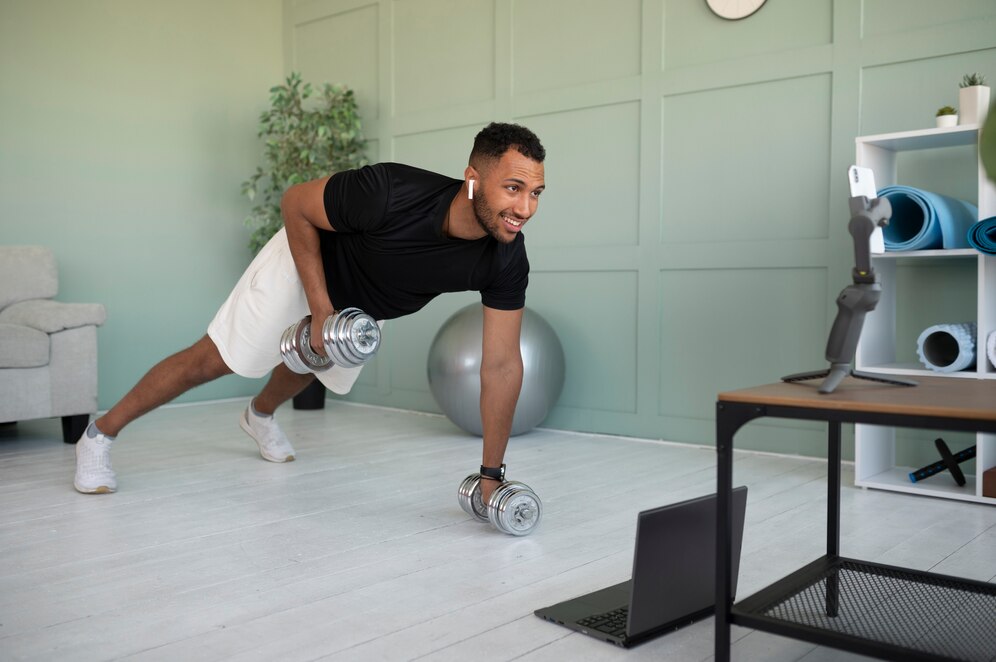
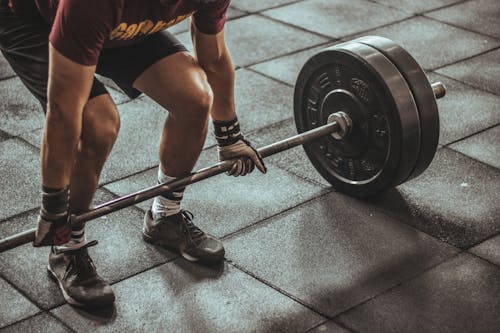
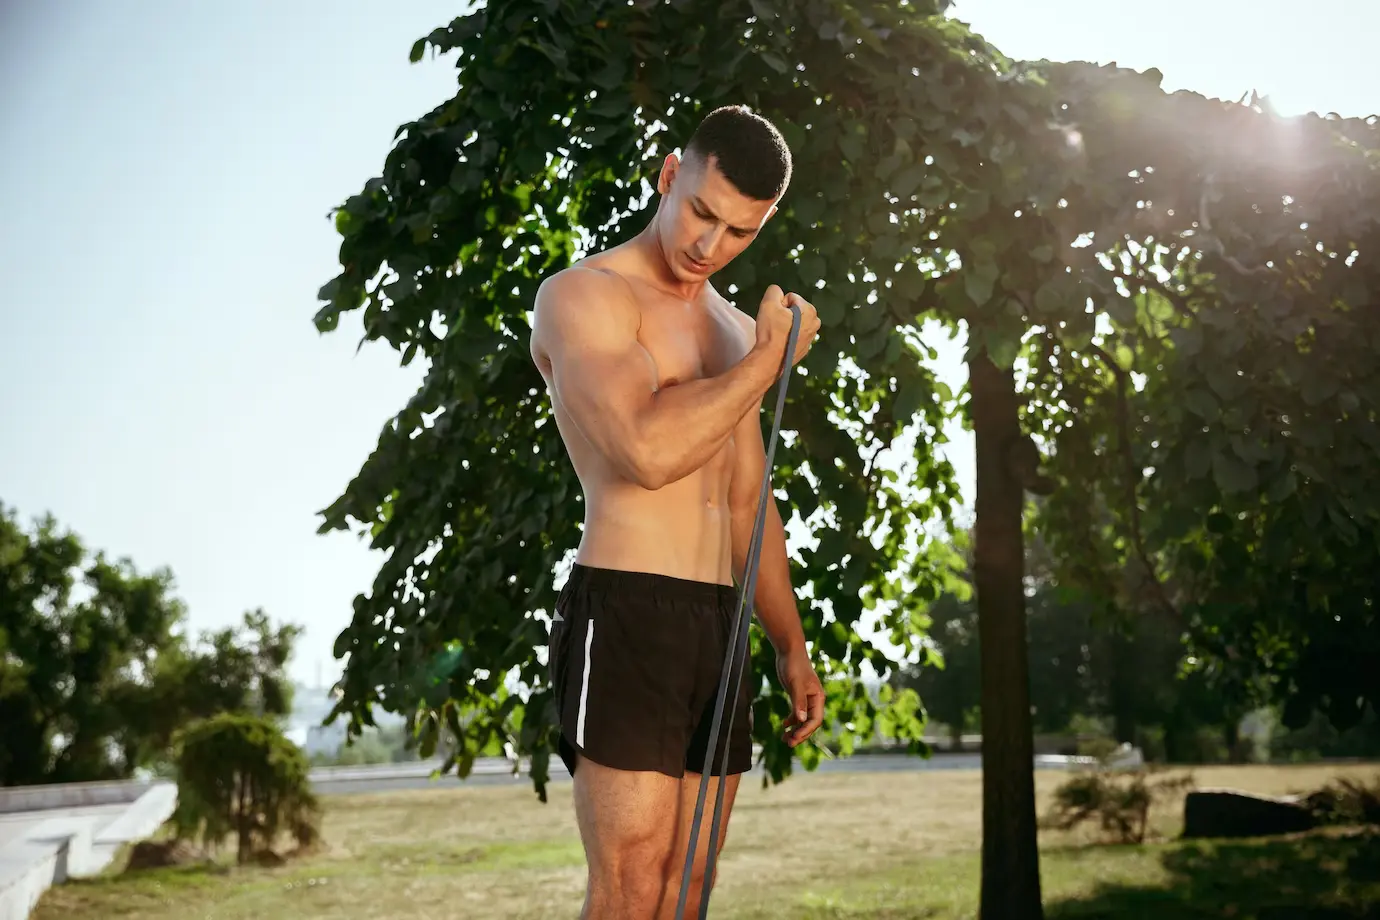
Are you looking for an effective way to work out your side deltoid muscle? If so, then you’ve come to the right place. Your goal may be to build muscle and size in your shoulders or maybe even just add definition; whatever it is, these side delt exercises are sure to help. Not only can they give shape and strength training benefits but also added stability and posture improvements. You’ll find there’s no better way to get those coveted V-shaped upper body muscles than through strong side delts. So what are you waiting for? Read on, and let’s start getting that back going today with these side delt exercises: Best Side Delt Exercises For Mass Listed below are some of the best side delt workouts you can do at home with minimal equipment: 1.      Seated Arnold Press Image Source The Seated Arnold Press is a versatile shoulder exercise that engages the side deltoids, front deltoids, and triceps. By pressing the dumbbells overhead with a rotational movement, it significantly emphasises the side delts, helping to create a broader and more defined shoulder appearance. This exercise also improves shoulder stability and mobility while allowing for a full range of motion. Muscles Targeted: Side delts, front delts, triceps How To Perform? Sit on a sturdy bench with a backrest, or use an adjustable weight bench with back support. Place your feet flat on the ground and maintain an upright posture. Hold a dumbbell in each hand at shoulder height, with your palms facing your body (neutral grip). Your elbows should be bent at a 90-degree angle. Start with the dumbbells near your chest. Press them upward and outward while rotating your palms to face forward as you extend your arms. Continue to press the dumbbells overhead until your arms are fully extended but not locked out. Slowly reverse the movement, bringing the dumbbells back to the starting position while rotating your palms back to a neutral grip. Perform 3-4 sets of 8-12 reps with controlled movements. 2.      One-Arm Cable Raise Image Source The One-Arm Cable Raise is an excellent isolation exercise for the side deltoids. By lifting the cable handle laterally against resistance, it directly targets and strengthens these muscles. The benefit of using a cable machine is that it provides constant tension throughout the entire range of motion, resulting in better muscle engagement and development. Muscles Targeted: Side delts How To Perform? Attach a single-hand cable handle to a low pulley machine and set the desired weight. Stand with your side to the cable machine and grab the handle with your far hand (the hand farthest from the machine). Your near hand should be placed on your hip. Stand with a slight bend in your knees and maintain a straight back. Keeping your arm mostly straight (with a slight bend at the elbow), lift the cable handle upward and outward to the side until your arm is parallel to the ground. Hold the contraction for a moment, feeling the tension in your side delt. Slowly lower the handle back to the starting position. Complete 3-4 sets of 10-15 reps on each side. 3.      Seated Behind-The-Neck Press While Seated Behind-The-Neck Press primarily works the front deltoids, it also engages the side deltoids to a significant extent. This compound side delt exercise helps in developing overall shoulder strength and size, contributing to a balanced and aesthetic shoulder profile. However, it’s crucial to perform this exercise with proper form to avoid any unnecessary strain on the shoulder joints. Muscles Targeted: Side delts, front delts, triceps How To Perform? Sit on a bench with a backrest and set up a barbell in a squat rack at about shoulder height. Grip the barbell slightly wider than shoulder-width apart with a pronated (palms facing forward) grip. Unrack the barbell and lower it behind your neck. Ensure that your back is straight, and your chest is up. Press the barbell upward until your arms are fully extended but not locked out. Lower the barbell back down to behind your neck with control. Perform 3-4 sets of 6-10 reps with proper form. 4.      Dumbbell Lateral Raise Image Source The Dumbbell Lateral Raise is one of the most effective side exercises with dumbbells for directly targeting them. It allows you to isolate and work on this muscle group, resulting in better lateral shoulder development. By lifting the dumbbells to shoulder level or slightly higher, you can enhance the width of your shoulders, creating a more V-shaped upper body appearance. Muscles Targeted: Side delts How To Perform? Stand upright with a dumbbell in each hand at your sides. Keep your feet hip-width apart and a slight bend in your knees. Maintain a slight bend in your elbows throughout the exercise. Slowly raise both dumbbells out to the sides until they are at shoulder level or slightly higher. Keep your palms facing downward during the movement. Hold the top position for a brief moment to feel the contraction in your side deltoids. Lower the dumbbells back down to your sides in a controlled manner. Aim for 3-4 sets of 12-15 reps with controlled motions. 5.      Side Plank Image Source While primarily known as a core-strengthening exercise, the Side Plank also engages the side deltoids. This no-equipment side delt exercise helps stabilize the shoulder girdle and improves shoulder endurance, making it an essential component for overall shoulder health. Strong side deltoids assist in maintaining proper posture and shoulder stability during daily activities and other workouts. Muscles Targeted: Side delts, obliques, core How To Perform? Lie on your side on a mat or the floor with your legs straight and stacked on top of each other. Prop your upper body up on your elbow, which should be directly under your shoulder. Keep your body in a straight line from head to heels, engaging your core muscles to maintain stability. Lift your hips off the ground, creating a straight line from your feet to your shoulders. Hold this position for as long as you can

Read More »

Lift Your Fitness Game: Top Upper Lat Exercises For A Stronger Back

Are you looking for ways to build strength and tone up your upper body? Do you find shoulders, arms, and back exercises intimidating or hard to stick with? Then upper lat exercises are the perfect way to help you reach all your fitness goals. Upper lat exercises involve a range of strength-building movements targeting specific muscles in the shoulder, arm, and back area. Not only do these workouts help increase strength and definition, they also improve posture by encouraging correct alignment of the spine while building muscle stability throughout the entire core. With a little dedication and consistency when it comes to following an effective upper lat exercise program – no matter if you’re just starting out or training as a competitive athlete–you will see real results in no time at all: Best Upper Lat Exercises & Workouts Let’s get to know about the most ingenious workouts specifically targeted for upper lats: 1.     Lat Pulldowns Image Source Lat pulldowns are a fundamental exercise for building a strong and well-defined upper back. By targeting the latissimus dorsi muscles, they help create that desirable V-shape in your physique. Additionally, this upper lat exercise aids in improving grip strength, enhancing posture, and promoting better shoulder stability. Lat pulldowns can be customized by adjusting the weight and grip width, making them suitable for individuals of varying fitness levels. Equipment Needed: Lat pulldown machine. How to do it? Sit down on the lat pulldown machine and adjust the thigh pad so that it comfortably rests on your thighs. Grasp the wide bar attachment with an overhand grip, hands slightly wider than shoulder-width apart. Sit upright with your chest up and your back straight. Start with your arms fully extended, and your shoulders relaxed. Exhale as you pull the bar down towards your chest by flexing your elbows. Focus on using your lats to pull the bar down and squeeze your shoulder blades together at the bottom of the movement. Hold the contracted position for a second, feeling the tension in your lats. Inhale as you slowly return the bar to the starting position with your arms fully extended. Repeat for the desired number of repetitions. 2.     Pendlay Row Image Source  Pendlay rows are a versatile compound exercise that targets the upper back, lats, and traps. They are particularly effective for building thickness and strength in the middle and upper back. Pendlay rows also engage the core muscles as they require stabilization during the movement, promoting overall core strength and stability. This exercise is excellent for enhancing functional strength, which can have practical benefits in daily life and sports. Equipment Needed: Barbell, weight plates, and a flat bench. How to do it? Place a barbell with the desired amount of weight on the floor in front of you. Stand with your feet hip-width apart, toes pointing forward, and the barbell over the middle of your feet. Bend at your hips and knees to lower your torso until it’s almost parallel to the floor. Maintain a neutral spine. Bend your knees slightly and bend forward at the hips to grasp the barbell with a shoulder-width, overhand grip. Brace your core, keep your chest up, and your back straight. Lift the barbell off the floor by extending your hips and standing up. Pull the barbell towards your lower chest while keeping it close to your body, retracting your shoulder blades. Lower the barbell back to the floor in a controlled manner, touching it between each rep. Perform the desired number of repetitions. 3.     Seated Cable Rows Image Source Seated cable rows are a staple in back training routines, working the lats, rhomboids, and mid-back muscles. The use of a cable machine provides constant tension throughout the range of motion, making it an effective exercise for muscle growth and definition. Furthermore, seated cable rows are amongst the top lat workouts that contribute to better posture, as they strengthen the muscles responsible for scapular retraction and shoulder stability. Equipment Needed: Cable row machine with a V-bar attachment. How to do it? Sit down at the cable row machine, place your feet on the footrests, and adjust the knee pad to fit snugly against your thighs. Grasp the V-bar attachment with both hands using a neutral grip (palms facing each other). Sit up straight with a slight lean forward from your hips and your chest up. Start with your arms fully extended, keeping your shoulders relaxed. Exhale as you pull the V-bar towards your lower ribcage by retracting your shoulder blades and bending your elbows. Squeeze your lats at the fully contracted position. Inhale as you extend your arms, returning the V-bar to the starting position. Repeat for the desired number of repetitions. 4.     Single Arm Dumbbell Rows Image Source Single-arm dumbbell rows are essential for targeting the lats and upper back while also working the biceps. They provide the advantage of isolating each side of the body, helping to address muscle imbalances. This exercise promotes balanced development and enhances overall core strength by engaging the core for stability. Single-arm dumbbell rows are suitable upper lat exercise for both beginners and advanced lifters, as the weight can be adjusted to match individual capabilities. Equipment Needed: Dumbbell and a flat bench. How to do it? Place a dumbbell on the floor next to a flat bench. Stand on the left side of the bench and place your left knee and left hand on the bench for support. Bend your left knee slightly and keep your back straight. Grasp the dumbbell with your right hand using an overhand grip. Keep your right arm fully extended and let it hang straight down. Exhale as you pull the dumbbell towards your hip by bending your elbow and retracting your shoulder blade. Squeeze your lat at the top of the movement. Inhale as you lower the dumbbell back to the starting position. Repeat for the desired number of repetitions on each side. 5.     Dumbbell Pullovers Image Source Dumbbell pullovers are a unique exercise that primarily

Read More »

Unlocking Massive Gains With These 5 Powerful Back Cable Exercises

Picture this: you’re standing tall, ready to conquer the world, and your back is your mighty armor, showcasing strength, confidence, and resilience. But how do you forge this powerful fortress of muscle? Fret not, for the answer lies in the art of cable back exercises. As if harnessed from the gods of strength training, these exercises wield the power to sculpt your back into a masterpiece of functional muscle and aesthetic appeal. In this guide, we are about to present the back cable exercises that will help you chisel your way to a back worth boasting about. Top Back Cable Workouts Let’s take a look at the most recommended back cable exercises that will help you build heavy back: 1.      Seated Cable Row Image Source The Seated Cable Row is an excellent back cable exercise for developing a strong, well-defined back. It primarily targets the middle and lower portions of the latissimus dorsi muscles, along with the rhomboids and trapezius. This exercise enhances back thickness, promotes better posture, and helps prevent imbalances in shoulder development. By engaging the entire back and promoting scapular retraction, it also contributes to improved shoulder health. Step-By-Step Guide Sit down on the rowing machine and place your feet on the platform with your knees slightly bent. Grab the handle attachment with a neutral (palms facing each other) or overhand grip, depending on the machine. Keep your back straight, chest up, and shoulders down and back. Pull the handle towards your lower ribcage by retracting your shoulder blades and squeezing your back muscles. Pause for a moment at the fully contracted position. Slowly return the handle to the starting position, fully extending your arms. 2.      Cable Shrugs Cable Shrugs are a targeted exercise that specifically works the trapezius muscles. This exercise helps build upper back strength and size by isolating the traps. It’s particularly effective for improving the aesthetics of the upper back and creating that sought-after “V” shape. Additionally, Cable Shrugs reduce the risk of injury by allowing for controlled and constant resistance throughout the movement. Step-By-Step Guide Stand in the middle of a cable machine with a D-handle attached to the low pulley. Hold the handle with both hands, palms facing your body. Keep your arms fully extended, and your feet shoulder-width apart. Elevate your shoulders as high as possible while keeping your arms straight. Hold the contracted position for a moment to squeeze your traps. Lower your shoulders back down to the starting position. 3.      Close Grip Lat Pulldown Image Source The Close Grip Lat Pulldown is a versatile exercise that primarily targets the latissimus dorsi but also engages the biceps and other upper back muscles. It helps widen the back, creating a more impressive V-taper and enhancing overall upper body strength. The close grip recruits the biceps more, making it an excellent compound back cable exercise for simultaneously building back and arm strength. Step-By-Step Guide Sit down at a lat pulldown machine and secure your legs under the provided pads. Grab the bar attachment with a grip slightly narrower than shoulder-width apart, palms facing forward. Keep your chest up, shoulders down and back, and a slight arch in your lower back. Pull the bar down towards your upper chest while squeezing your shoulder blades together. Pause at the bottom of the movement, then slowly return the bar to the starting position, fully extending your arms. 4.      Cable Pullover Image Source The Cable Pullover is a unique exercise that targets the lats, chest, and serratus anterior muscles. It’s an effective way to expand the ribcage and develop width in the upper body. This exercise is also beneficial for improving shoulder mobility and flexibility. It’s often used as a finishing exercise in back workouts to ensure thorough muscle engagement and complete development. Step-By-Step Guide Attach a rope or straight bar to the high pulley of a cable machine. Lie on your back on a bench or the floor, perpendicular to the cable machine. Hold the rope or bar with both hands, palms facing down, and arms extended over your chest. Keep a slight bend in your elbows and maintain a neutral spine. Lower the rope or bar in an arc motion over your head while keeping your arms extended. Feel the stretch in your lats and then pull the rope or bar back over your chest to the starting position. 5.     Cable Reverse Fly Image Source Cable Reverse Fly is a fantastic exercise for strengthening the rear deltoids, upper traps, and rhomboid muscles. By targeting the posterior deltoids, it helps balance out shoulder development and improves posture by countering the effects of forward shoulder rotation. This exercise also enhances shoulder stability, which is essential for various upper-body movements. Additionally, the constant tension provided by the cable machine makes it an effective isolation exercise for the rear deltoids and upper back. Step-By-Step Guide Set the pulleys on a cable crossover machine to the lowest position. Stand in the middle of the machine and hold one handle in each hand with your palms facing each other. Step forward slightly and bend your hips and knees slightly to maintain balance. Keep a slight bend in your elbows and a straight back. Open your arms wide, squeezing your shoulder blades together as you do so. Hold the peak contraction for a moment. Slowly return your arms to the starting position without letting the weight stack touch. Over To You So, there you have it – a comprehensive guide to the best back cable exercises that can elevate your back game to Olympian heights. Remember, consistency and proper form are your loyal companions on this journey. Here’s to a back that stands strong, a back that stands out, and a back that speaks volumes about your commitment to fitness.

Read More »

5 Exercises For Apple-Shaped Women To Transform Into Hourglass Figures

Hey there, fabulous apples! 🍎 So, you’re rocking that beautiful apple-shaped figure and want to keep it healthy and happy, right? Well, you’ve landed in the right orchard of fitness advice. We get it; those curves are your pride, and you’re not looking to become a pear or a banana any time soon. Fear not, because we’ve got your back, or should we say, your core? In this juicy blog post, we’re going to spill the beans on the best exercises for apple shaped women. We’ll help you whittle that waistline, boost your confidence, and have you feeling like the apple of everyone’s eye in no time. So grab a water bottle and a sweatband, because it’s time to crunch and squat our way to fitness glory: Best Workouts For Apple Shaped Body Let’s take a look at the best exercises that are tailor-made for apple-shaped women: 1.      Bicycle Crunches Image Source Bicycle crunches effectively target the abdominal muscles, helping to tone and strengthen the core. Engaging the core in this way can aid in reducing abdominal fat, which is a common concern for apple-shaped individuals. Step-By-Step Guide Lie on your back with your hands behind your head, fingers lightly supporting your head. Lift your legs off the ground and bend them at a 90-degree angle. Bring your right elbow and left knee toward each other while straightening your right leg. Simultaneously twist your torso to the right. Repeat on the opposite side, bringing your left elbow and right knee together while straightening your left leg. Continue this pedaling motion, alternating sides, for the desired number of repetitions. Mistakes To Avoid Neck Strain: Don’t pull on your neck with your hands; keep your hands lightly supporting your head, and focus on bringing your shoulder blades off the ground. Jerky Movements: Perform the exercise in a controlled, fluid motion to engage the core effectively and prevent straining the lower back. 2.      Russian Twists Image Source Russian twists are amongst the best exercises for apple-shaped bodies as they work the oblique muscles, helping to create a more defined waistline. Strengthening the obliques can also improve posture and spinal stability, which is important for those with excess weight in the midsection. Step-By-Step Guide Sit on the floor with your knees bent and your feet flat on the ground. Lean back slightly, keeping your back straight and your core engaged. Clasp your hands together in front of you or hold a weight with both hands. Lift your feet off the ground, balancing on your sit bones. Rotate your torso to the right, bringing the weight or your clasped hands toward the ground beside your right hip. Return to the center and then rotate to the left, bringing the weight or your hands beside your left hip. Continue alternating sides for the desired number of repetitions. Mistakes To Avoid Hunching Your Back: Maintain good posture by keeping your back straight and chest up; avoid rounding your back, which can strain your lower back. Using Excessive Weight: Start with a manageable weight to maintain proper form; using too heavy a weight can lead to poor technique. 3.      Dumbbell Row Image Source Dumbbell rows target the upper back and shoulders, helping to balance the overall physique. These compound exercises and workouts for apple shaped women engage multiple muscle groups, aiding in calorie burning and overall fat loss. Step-By-Step Guide Stand with your feet shoulder-width apart, holding a dumbbell in each hand. Bend your knees slightly and hinge at your hips, keeping your back straight. Let the dumbbells hang in front of you, arms fully extended. Pull the dumbbells toward your hips, squeezing your shoulder blades together. Lower the dumbbells back down with control. Repeat for the desired number of repetitions. Mistakes To Avoid Improper Form: Avoid using your lower back to lift the weights; instead, engage your upper back muscles while keeping your core stable. Overarching the Back: Keep your spine neutral; don’t arch or round your back during the exercise. 4.      Donkey Kicks Image Source Donkey kicks focus on the glutes, helping to lift and shape the buttocks, which can balance the body’s proportions. The leg movement involved also contributes to calorie expenditure. Step-By-Step Guide Start on your hands and knees in a tabletop position. Keep your wrists under your shoulders and your knees under your hips. Engage your core and lift your right knee off the ground, keeping it bent at a 90-degree angle. Push your right foot up toward the ceiling, straightening your leg. Lower your leg back to the starting position. Repeat for the desired number of repetitions on one side before switching to the other. Mistakes To Avoid Lifting the Leg Too High: Focus on lifting your leg to hip level, rather than arching your back or kicking too high. Neglecting Core Engagement: Keep your core engaged throughout the movement to support your lower back and maintain stability. 5.      Side Leg Lifts Image Source Side leg lifts target the hips and thighs, helping to tone and firm these areas. Working on the hips and thighs can enhance lower body symmetry, making this a result driven apple shaped body workout. Step-By-Step Guide Lie on your side with your legs straight and stacked on top of each other. Rest your head on your lower arm or use your hand for support. Lift your top leg as high as you can without moving your torso. Lower it back down with control. Repeat for the desired number of repetitions on one side before switching to the other. Mistakes To Avoid Lifting Too High: Lift your leg to a comfortable height; lifting too high can strain your lower back and hip. Using Momentum: Perform the exercise slowly and with control; avoid swinging your leg to prevent injury. Final Verdict Getting in shape and staying healthy isn’t about conforming to some one-size-fits-all ideal. It’s about understanding your unique body and giving it the love and attention it deserves. With these fabulous exercises for apple shaped body in

Read More »

5 Insane Compound Triceps Exercises: A Shortcut To Sculpted Arms

Are you tired of endlessly searching for the perfect triceps exercises to sculpt those killer arms? Well, we’ve got the ultimate triceps workout solution for you. In this blog post, we’re about to discuss compound triceps exercises – the secret sauce to achieving those toned and powerful arms you’ve always dreamed of. We get it; time is precious, and you want workouts that deliver maximum results in minimal time. Compound triceps exercises are here to save the day. These exercises target your triceps and engage multiple muscle groups, giving you a bang for your buck. Let’s try them out: Best At Home Compound Triceps Exercises Listed below are the best compound triceps workouts that are sure to become your new favorite: 1.      Parallel Bar Dips Image Source Parallel bar dips are an exceptional triceps compound exercise that targets the triceps and engages the chest and shoulders. By consistently performing this exercise, individuals can effectively increase triceps strength and size while also improving overall upper body strength. It’s particularly beneficial for enhancing the definition and tone of the triceps muscles. Setup: Find a set of parallel bars or dip bars. Stand between the bars, facing forward. Grip the bars with your palms facing down and your arms fully extended. Execution: Lower your body by bending your elbows until your upper arms are parallel to the ground or slightly below. Keep your torso upright and your chest up. Push yourself back up to the starting position by straightening your arms. Tips: Keep your shoulders down and back to avoid unnecessary stress on them. To increase difficulty, you can add weight using a dipping belt or hold a dumbbell between your feet. 2.      Diamond Push-Ups Image Source Diamond push-ups are a versatile no-equipment compound triceps exercise that isolates the triceps muscles. This exercise can be an excellent addition to a home or gym workout routine for those looking to sculpt and strengthen their triceps without the need for equipment. It’s a valuable exercise for enhancing muscular endurance and promoting well-defined triceps. Setup: Start in a standard push-up position with your hands close together, forming a diamond shape with your thumbs and index fingers. Keep your body in a straight line from head to heels. Execution: Lower your body by bending your elbows while keeping them close to your sides. Lower yourself until your chest is just above the diamond formed by your hands. Push yourself back up to the starting position. Tips: Keep your core engaged and maintain a straight line from head to heels throughout the exercise. If standard diamond push-ups are too challenging, you can start with your knees on the ground and gradually progress to full push-ups. 3.      Close-Grip Bench Press Image Source The close-grip bench press is a classic strength training exercise that focuses on the triceps, making it an indispensable addition to any chest and triceps workout. By using a narrower grip on the barbell, individuals can place greater emphasis on the triceps while still engaging the chest and shoulders. This exercise is particularly advantageous for building raw triceps strength and supporting overall upper-body development. Setup: Lie on a flat bench with your back, shoulders, and hips firmly on the bench. Grip the barbell with your hands closer than shoulder-width apart, palms facing forward. Lift the barbell off the rack and position it over your chest with your arms fully extended. Execution: Lower the barbell by bending your elbows while keeping them close to your body. Lower the barbell until it touches your chest. Push the barbell back up to the starting position, fully extending your arms. Tips: Maintain a tight grip on the barbell and keep your wrists straight. Use a spotter when lifting heavy weights to ensure safety. 4.      Dumbbell Tate Press Image Source The Tate press is a highly targeted compound triceps exercise with dumbbells that isolate the triceps brachii. This movement allows individuals to focus on the full extension of the triceps while minimizing involvement from other muscle groups. As a result, it is effective in sculpting well-rounded, strong triceps and can be instrumental in achieving a balanced upper body appearance. Setup: Lie on a flat bench with a dumbbell in each hand. Extend your arms over your chest, palms facing each other. Execution: Bend your elbows and lower the dumbbells to the sides of your chest. Keep your elbows bent and close to your sides throughout the movement. Extend your arms, pushing the dumbbells back up to the starting position. Tips: Maintain control throughout the exercise and avoid swinging the weights. Start with a light weight to ensure proper form before increasing resistance. 5.      Elevated Pike Push-Up Image Source The elevated pike push-up is an effective bodyweight exercise that primarily challenges the triceps, shoulders, and upper chest. By incorporating this exercise into their routine, individuals can enhance triceps endurance and develop shoulder strength. Moreover, it improves core stability and balance, making it a valuable addition to any calisthenics or bodyweight training regimen. Setup: Assume a push-up position with your feet elevated on a stable surface, such as a bench or step. Walk your hands closer to your feet, forming a pike position with your hips raised. Execution: Lower your body by bending your elbows. Lower yourself until your head is just above the ground or floor. Push yourself back up to the starting position. Tips: Maintain a strong core and engage your glutes to keep your body in a straight line. If the exercise is too challenging, you can perform it with your feet on the ground instead of elevated. Final Words No more wasting time with endless sets of isolation exercises when you can get more done with fewer moves. Compound triceps exercises save you time and deliver better overall results by engaging multiple muscle groups simultaneously.

Read More »
compound resistance band exercises

Looping Your Way To Fitness: 5 Best Compound Resistance Band Exercises

Are you tired of the same old gym routine? Looking to spice up your workouts without breaking the bank on fancy equipment? Well, you’re in for a treat because today, we’re about to discuss some of the best compound resistance band exercises. Forget about bulky machines and pricey gym memberships – these versatile bands are about to become your new best workout buddies. We’re about to show you how to turn those colorful bands into your secret weapon for a full-body, muscle-sculpting, calorie-burning extravaganza. It’s time to stretch, flex, and have a ton of fun while you’re at it! Let’s get started! 🚀 Best Compound Resistance Band Exercises Let’s take a look at the top compound resistance band workouts that will up your fitness game: 1.      Resistance Band Floor Press Image Source The Resistance Band Floor Press primarily targets the chest, triceps, and shoulders. This resistance band compound exercise is highly effective for building upper body strength and muscle definition. It also engages the stabilizer muscles as you work to control the resistance band’s tension throughout the movement. Additionally, resistance bands allow for a full range of motion, helping to improve muscle engagement and flexibility in the shoulders and chest. Muscles Targeted: Chest, Triceps, Shoulders Equipment Needed: Resistance band, sturdy anchor point Step-by-Step Guide Setup: Attach one end of the resistance band to a sturdy anchor point (e.g., a pole, door frame, or wall) at chest height. Lie on your back with your knees bent and your feet flat on the floor. Band Placement: Hold the other end of the resistance band in each hand, making sure it’s even on both sides. Your hands should be slightly wider than shoulder-width apart. Press: With your elbows bent and your palms facing away from you, press the band upward until your arms are fully extended. Squeeze your chest muscles at the top of the movement. Lower: Slowly lower the band back to the starting position, keeping your elbows at about a 90-degree angle. Repetitions: Perform the desired number of repetitions, maintaining control throughout the movement. 2.      Single-Leg Banded Deadlift Image Source The Single-Leg Banded Deadlift is an excellent exercise for targeting the hamstrings, glutes, and lower back while also enhancing balance and stability. By isolating one leg at a time, it helps to address muscular imbalances that can occur in the lower body. The resistance band adds resistance throughout the entire range of motion, making this exercise particularly effective for strengthening the posterior chain and improving hip mobility. It’s a valuable addition to any lower body workout routine and can help prevent injuries related to weak glutes and hamstrings. Muscles Targeted: Hamstrings, Glutes, Lower Back Equipment Needed: Resistance band Step-by-Step Guide Setup: Stand on the center of the resistance band with your feet hip-width apart. Hold the band’s handles in each hand. Single Leg: Shift your weight to one leg while keeping a slight bend in the knee of your non-weight-bearing leg. This is your starting position. Hinge Forward: Keeping your back straight, hinge at your hips and lower your torso toward the ground. As you do this, extend your non-weight-bearing leg behind you for balance. Stretch: Feel the stretch in your hamstrings and maintain a straight back throughout the movement. Return: Push through your heel and return to an upright position while squeezing your glutes at the top. Repetitions: Perform the desired number of repetitions on one leg before switching to the other. 3.      Resistance Band Push-Ups Image Source Resistance Band Push-ups are a dynamic variation of the classic push-up, adding an extra challenge to your chest, shoulders, triceps, and core. These exercises intensify the effort required in both the push-up and the push-up return phases due to the band’s resistance. As a result, they promote greater muscle activation and development in the upper body. By adjusting the band’s tension, you can easily customize the difficulty level, making it a suitable compound resistance band workout for various fitness levels. Incorporating resistance bands into push-ups can help individuals progress toward performing more traditional push-ups with perfect form. Muscles Targeted: Chest, Shoulders, Triceps, Core Equipment Needed: Resistance band Step-by-Step Guide Setup: Place the resistance band around your back, just below your shoulder blades. Hold one end of the band in each hand, and get into a push-up position with your hands shoulder-width apart. Push-up: Lower your chest toward the ground while keeping your body in a straight line. The resistance band provides added tension as you push up. Push-up Variation: You can vary the resistance by adjusting the placement of the band on your back or using a thicker band. Repetitions: Perform the desired number of push-ups while maintaining proper form. 4.      Banded Side Plank Pull Image Source The Banded Side Plank Pull is an outstanding exercise for strengthening the obliques, shoulders, and core. By incorporating a resistance band, it adds a unique challenge to the side plank position, making it more effective for building stability and muscle endurance in the core and shoulders. This exercise is particularly beneficial for athletes involved in rotational sports or anyone looking to improve core strength and posture. It also enhances shoulder mobility and can aid in preventing lower back pain by reinforcing the muscles responsible for lateral stability. Muscles Targeted: Obliques, Shoulders, Core Equipment Needed: Resistance band Step-by-Step Guide Setup: Lie on your side and loop the resistance band around your top foot. The band should be anchored on the bottom foot, and you should be in a side plank position with your elbow directly beneath your shoulder. Side Plank: Lift your hips off the ground, keeping your body in a straight line. Pull: Reach your free arm over your head and grab the band. Pull the band down toward your hip while keeping your core engaged and your body in a straight line. Return: Slowly release the band and return to the starting side plank position. Repetitions: Perform the desired number of repetitions on one side before switching to the other. 5.      Banded X

Read More »

Quick & Effective: 5 Chest Warm-Up Stretches You Shouldn’t Skip

Are you tired of your workouts feeling like a chilly morning jog through a snowstorm? Well, you’re in for a treat because today, we’re going to thaw out those icy chests and get you prepped for a fiery workout session. We’ve all been there – the struggle of attempting to lift weights or nail that push-up when your chest feels tighter than a clamshell. But fear not, my friends, because we’ve got a solution that’s hotter than a jalapeño on a summer day. In this blog post, we’re going to present some of the top-notch chest warm-up stretches. These stretches aren’t just your run-of-the-mill “touch your toes” routines; we’re talking about the kind of stretches that’ll make your chest muscles feel like they just got a front-row seat at a rock concert – pumped up and ready to rock and roll. Let’s fire up those chest muscles and get ready to conquer your workouts like a true fitness champ: Best Chest Warm Up Stretches At Home Let’s take a look at some of the warm up stretches and exercises for chest: 1.     Child’s Pose Image Source  Child’s Pose is a gentle stretch that offers several benefits for the chest. When you sink your chest toward the floor and extend your arms forward, this pose helps open up the front and shoulders. It’s particularly effective at relieving tension and tightness in the pectoral muscles, which can be especially beneficial if you spend long hours at a desk or in front of a computer. Child’s Pose also promotes relaxation and deep breathing, allowing you to release stress and improve your overall posture. Step-By-Step Guide Start by kneeling on the floor with your big toes touching and knees spread apart. This is your starting position. Sit back on your heels, ensuring that your toes remain touching and your knees are comfortably spread. Reach your arms forward on the floor, extending them as far as you can. Lower your chest and forehead toward the ground while keeping your arms extended. Allow your forehead to rest on the floor and relax your neck completely. Keep your hips pressed back towards your heels. Hold this stretch for 20-30 seconds or longer, focusing on deep, rhythmic breathing. Feel the gentle stretch in your lower back, shoulders, and arms. To release, gently walk your hands back towards your body, lifting your upper body, and return to a kneeling position. 2.     Thread the Needle Stretch Image Source  Thread the Needle Stretch targets the chest and shoulders with precision. As you thread one arm under the other while in a tabletop position, you stretch and release tension in the upper chest and shoulder area. This chest warm up stretch can be particularly helpful for individuals who experience tightness in their chest due to activities like weightlifting or carrying heavy loads. It provides relief and greater flexibility in the chest muscles, promoting a better range of motion in the shoulders. Step-By-Step Guide Begin on your hands and knees in a tabletop position, with your wrists under your shoulders and knees under your hips. Inhale and reach your right arm up toward the ceiling, opening your chest to the right. Exhale and thread your right arm under your left arm, lowering your right shoulder and cheek to the floor. Keep your left hand on the ground for support and gently slide it forward. Feel the stretch in your right shoulder and upper back. Hold the stretch for 20-30 seconds, allowing your body to relax into it. To release, slowly unwind by lifting your right arm back up to the ceiling, then placing it back on the ground. Repeat the stretch on the opposite side. 3.     Shoulder Blade Squeeze The Shoulder Blade Squeeze is less of a stretch and more of an isometric exercise for chest muscles. By actively squeezing your shoulder blades together, you engage the muscles of the upper back and open up the chest. This movement promotes better posture and can alleviate the effects of slouching or sitting hunched over a computer. It also strengthens the muscles that support the chest and shoulders, reducing the risk of developing poor posture-related issues. Step-By-Step Guide Stand up straight with your feet shoulder-width apart, and let your arms hang naturally by your sides. Take a deep breath in, expanding your chest. As you exhale, gently draw your shoulder blades together. Imagine trying to pinch a pencil between your shoulder blades. Hold the squeeze for 5-10 seconds, maintaining good posture with your shoulders down away from your ears. Release the squeeze while inhaling. Repeat this stretch 5-10 times. 4.     Doorway Stretch Image Source The Doorway Stretch is a targeted stretch for the chest and front shoulder muscles. By pressing your forearms against a door frame and leaning forward slightly, you create a deep stretch in the chest area. This is especially helpful for individuals who may have tightness in the chest due to activities like weightlifting or excessive sitting. Regularly practicing the Doorway Stretch can increase chest flexibility and reduce the risk of developing rounded shoulders. Step-By-Step Guide Stand in a doorway with your feet shoulder-width apart. Raise your arms to shoulder level and bend your elbows at 90-degree angles. Place your forearms and palms on the door frame, one on each side. Step one foot forward, leaning into the doorway, allowing your chest to open up. You should feel a deep stretch in the front of your shoulders and chest. Hold the stretch for 20-30 seconds, maintaining a slight lean forward. Focus on your breathing; inhale deeply and exhale fully. Step back to release, and repeat the stretch several times, gradually moving your arms higher on the door frame for different angles of stretch. 5.     Cat-Cow Stretch Image Source  Cat-Cow Stretch is a dynamic yoga sequence that benefits the chest in a different way. In the Cow Pose, the chest is expanded, and the shoulder blades draw together, promoting openness in the chest and improved posture. In contrast, the Cat Pose rounds

Read More »

Booty Boot Camp: 5 Cheeky Butt Exercises For Men To Build A Stronger Rearview

We’re about to discuss a topic that often gets overshadowed in the world of fitness: butt exercises for men. Sure, we’ve all seen those impressive biceps and chiseled chests gracing the covers of fitness magazines, but let’s not forget about the powerhouse that is your posterior. Whether you’re looking to enhance your athletic performance, rock those fitted jeans, or simply have a stronger backside, we’ve got your back… well, your butt, to be precise. In this no-nonsense guide, we’ll present the best butt exercises for men that sculpt those glutes and provide a slew of functional benefits. So, grab your workout gear and get ready to give your backside the attention it deserves. But remember, the road to a killer booty is paved with sweat, determination, and yes, a dash of humor. So, let’s get cheeky: How To Improve Buttocks For Male At Home? Listed below are the best glute workouts for men: 1.     Glute Bridges Image Source Glute bridges are the unsung heroes of butt workouts. By targeting your gluteus maximus and hamstrings, they not only help sculpt a rounder, firmer butt but also provide functional benefits. Strong glutes can enhance your athletic performance, improving your speed and power in activities like running and jumping. Additionally, they play a crucial role in stabilizing your pelvis and lower back, reducing the risk of lower back pain and injury. How To Do It? Lie flat on your back with your knees bent at a 90-degree angle and your feet hip-width apart. Ensure that your feet are flat on the ground. Place your arms by your sides, palms facing down, and your fingertips lightly touching your heels. Take a deep breath in and exhale as you engage your core muscles. Push through your heels to lift your hips off the ground while keeping your upper back and shoulders on the floor. Continue lifting until your body forms a straight line from your shoulders to your knees, with your knees and hips in alignment. At the top of the movement, make sure to squeeze your glutes tightly to maximize the contraction. Hold the bridge position for a moment, feeling the tension in your glutes. Slowly lower your hips back down to the ground, one vertebra at a time, while maintaining control. Complete the desired number of repetitions, aiming for 3 sets of 12-15 reps. 2.     Romanian Deadlifts Image Source  Romanian deadlifts are a powerhouse butt exercise for men that will produce results for your posterior chain, including your glutes, hamstrings, and lower back. They help shape your butt, improve your posture, and reduce the risk of back pain. These deadlifts enhance your hip hinge movement pattern, essential for lifting heavy objects and maintaining a strong, functional core. Strengthening your lower back and hamstrings can also lead to improved balance and stability, making everyday movements feel more effortless. How To Do It? Stand with your feet hip-width apart and your toes pointing forward. Hold a barbell or dumbbells in front of your thighs with an overhand grip, hands shoulder-width apart. Keep your knees slightly bent, maintaining a natural arch in your lower back. Initiate the movement by pushing your hips back while keeping your chest up and your back straight. Lower the weights along the front of your thighs, maintaining a slight bend in your knees throughout the movement. Continue lowering the weights until you feel a stretch in your hamstrings, or your back starts to round. Your back should remain flat throughout. Once you’ve reached the bottom of the movement, reverse it by driving your hips forward and standing back up. Squeeze your glutes at the top of the movement to fully engage them. Aim for 3 sets of 8-10 reps with proper form. 3.     Step-Ups Image Source Step-ups are not just about building an impressive butt; they also boost your lower body’s overall strength and stability. This men glute at-home exercise engages your glutes, quadriceps, and calves while challenging your balance and coordination. Beyond aesthetics, step-ups can enhance your functional fitness, making activities like climbing stairs or hiking more manageable. They also target each leg independently, helping to correct any muscle imbalances and reducing the risk of injuries related to strength disparities between your legs. How To Do It? Find a sturdy bench or platform that is knee-high. Stand in front of it with your feet hip-width apart. You can choose to hold dumbbells at your sides for added resistance. Step onto the bench with one foot, ensuring that your entire foot is on the platform. As you step up, push through your heel to lift your body up. Bring your other foot up to join the first one, fully extending your knee. Stand straight at the top of the step, with both feet on the bench. Step back down with one foot at a time, returning to the starting position. Alternate legs for each repetition. Aim for 3 sets of 10-12 reps per leg. 4.     Donkey Kicks Image Source Donkey kicks are the secret sauce for isolating your glutes and building that coveted roundness. They’re fantastic for targeting the gluteus maximus, and their range of motion allows for a deep contraction in each repetition. Plus, these kicks improve your hip mobility and flexibility, making them a valuable addition to your lower body routine. How To Do It? Start on all fours, with your hands directly under your shoulders and your knees under your hips. Ensure your wrists, elbows, and shoulders are aligned, and your knees, hips, and ankles are in line as well. Keep your knee bent at a 90-degree angle and flex your foot on one leg. Lift one leg up, keeping it bent, until your thigh is parallel to the ground. Focus on squeezing your glutes at the top of the movement. Lower your leg back down without touching the ground to maintain tension in your glutes and hamstrings. Repeat the lift for the desired number of reps. Complete the set on one leg before switching to the

Read More »

The Timeless Charm Of Goatee Beards: A Comprehensive Style Guide

In the world of grooming and style, few things are as iconic and debated as the humble goatee. It’s that classic chin curtain that’s been sported by everyone from Hollywood legends to your friendly neighborhood barista. But what’s the deal with goatees, and who should rock them with confidence? Well, you’re in luck because we’re about to enter into the world of goatee beards to answer your burning questions. What Is A Goatee Beard? Image Source A goatee beard, often simply referred to as a “goatee,” is a style of facial hair that consists of hair grown on the chin and sometimes the lower lip. The typical goatee is characterized by a small, neatly trimmed tuft of facial hair on the chin, resembling the shape of a goat’s beard, hence the name. Types Of Goatee Beard There are several variations of the goatee, including: Classic Goatee: This is a small, rounded or pointed beard that only covers the chin area. It is often paired with a clean-shaven upper lip and cheeks. Full Goatee: A full goatee extends slightly beyond the chin area, covering the lower lip as well. Extended Goatee: This style combines a goatee with a mustache, creating a continuous line of facial hair that extends from the chin to the upper lip. Soul Patch: A soul patch is a very small, isolated patch of hair just below the lower lip, often considered a minimalistic version of a goatee. How To Style & Trim A Goatee Beard? Image Source Trimming and styling a goatee beard requires some patience, precision, and the right tools. Here’s a step-by-step guide to help you achieve the desired goatee style: Tools you’ll need: Electric trimmer or beard clippers Sharp scissors Beard comb Mirror Shaving cream or gel (if you plan to shave the surrounding areas) Step-By-Step Process Of Styling A Goatee Beard? Grow your beard: Allow your facial hair to grow out for a few days or longer to ensure you have enough length to work with. Choose your goatee style: Decide on the specific goatee style you want, whether it’s a classic goatee, full goatee, extended goatee, or soul patch. Having a clear vision will help you achieve the desired look. Trim the surrounding areas: If you’re going for a clean-cut look, shave or trim the areas around your goatee. This includes your cheeks, upper lip, and neck. Use a mirror to ensure clean and precise lines. If you want a natural look, you can skip this step. Wash and comb your beard: Cleanse your beard with warm water and a gentle beard shampoo to remove dirt and soften the hair. Afterward, use a beard comb to untangle any knots and ensure your beard is even and ready for trimming. Start shaping the goatee: Use an electric trimmer or beard clippers with an appropriate guard attachment to begin shaping your goatee. Start with a longer guard and gradually decrease the length as needed. Pay close attention to the shape you desire. For a classic goatee, focus on the chin area. For an extended goatee, trim the mustache and connect it to the chin. Define the shape: As you trim, periodically check your progress in the mirror. Ensure that both sides are symmetrical and that the goatee’s shape aligns with your chosen style. You can use a clear shaving gel or cream to help you see the edges clearly while shaping. Trim the length: Continue to trim the goatee to your desired length, keeping it neat and even. Be cautious not to trim too much, as it’s easier to remove more hair later than to fix an overly short goatee. Detailing with scissors: For precision, use sharp scissors to fine-tune the edges and any stray hairs. This step is essential for achieving a polished look. Final touches: Check your goatee from various angles to ensure it’s symmetrical and well-defined. Make any necessary adjustments. Maintenance: To keep your goatee looking its best, trim it regularly. The frequency of trimming will depend on how fast your facial hair grows and your desired length. Conclusion So, there you have it, folks. The lowdown on goatee beards, from shaping and styling to considering face shapes and personal preferences. Whether you’re a seasoned goatee guru or just dipping your razor in the facial hair waters, we hope this guide has been enlightening and entertaining. Remember, your grooming choices are all about you, your style, and your confidence. So, trim, style, and wear that goatee with pride. FAQs What face shape is best for goatee? Goatees can suit various face shapes, but they tend to look particularly good on individuals with square or oval face shapes. These shapes provide a balanced canvas for the goatee’s distinct style. Is goatee a good beard style? Yes, the goatee is a popular and versatile beard style. It offers a polished and edgy look when well-maintained, making it a good choice for those seeking a distinctive facial hair style. Do girls like goatee beard? Personal preferences vary among individuals, including women. Some may find goatees attractive, while others may prefer different beard styles or a clean-shaven look. Ultimately, the appeal of a goatee will depend on individual tastes and grooming habits.

Read More »

No Pull-Up Bar? No Problem! 5 Dumbbell Lat Exercises For A Strong Back At Home

When it comes to building a well-defined and powerful back, one of the key areas to focus on is the latissimus dorsi, commonly known as the “lats”. These muscles contribute to a V-shaped torso and play a crucial role in maintaining good posture and overall upper body strength. Whether you’re a fitness enthusiast or a beginner taking your first steps into the world of exercise, incorporating dumbbell lat exercises into your routine can be a game-changer. In this guide, we’ll walk you through a selection of easy-to-understand and effective dumbbell exercises that will help you target and transform your lats: Top Lat Exercises with Dumbbells Listed below are the dumbbell lat workouts that are sure to do wonders: 1.     Bent Over Dumbbell Row Image Source  The Bent Over Dumbbell Row is a classic compound exercise that offers exceptional benefits for developing the lats. By targeting the latissimus dorsi muscles, this exercise promotes enhanced width and thickness in the upper back. As you pull the dumbbells toward your hips, the lats engage in a powerful contraction, promoting muscle growth and strength. Additionally, this movement contributes to improved posture and spinal stability, as it engages the muscles responsible for maintaining an upright position. Incorporating the Bent Over Dumbbell Row into your routine can lead to a well-defined and formidable back, while also aiding in overall functional strength. Step-By-Step Guide Stand with your feet shoulder-width apart, holding a dumbbell in each hand, palms facing your torso. Hinge at your hips and bend your knees slightly to lean forward. Keep your back straight and chest up. Let the dumbbells hang at arm’s length toward the floor, with your arms fully extended. Engage your core, retract your shoulder blades, and pull the dumbbells towards your hips while exhaling. Focus on using your back muscles to initiate the movement. Squeeze your shoulder blades together at the top of the movement and hold for a brief moment. Slowly lower the dumbbells back to the starting position while inhaling. Perform the desired number of repetitions, maintaining proper form throughout. 2.     Dumbbell Renegade Row Image Source The Dumbbell Renegade Row is a dynamic and challenging dumbbell lat exercise that not only engages the lats but also involves the core and stabilizing muscles. By performing rows in a high plank position, this exercise requires optimal muscle engagement to control the movement and prevent rotation. The lats work synergistically with the core to stabilize the body, enhancing both upper-body strength and core stability. This exercise is particularly beneficial for those seeking functional strength, as it mimics movements required in everyday activities. Integrating the Dumbbell Renegade Row into your routine can lead to a balanced and strong physique while enhancing overall body control. Step-By-Step Guide Start in a high plank position with a dumbbell in each hand, wrists aligned with shoulders, and core engaged. Keep your body in a straight line from head to heels. Feet should be slightly wider for stability. Perform a row with one dumbbell, pulling it towards your hip while keeping your elbow close to your body. Focus on squeezing your lat muscles. Lower the dumbbell back to the ground and perform a row with the other arm. Alternate rows, making sure to stabilize your body and avoid excessive twisting. Continue alternating rows for the desired number of repetitions on each side. 3.     Dumbbell Pullover Image Source The Dumbbell Pullover is an underrated exercise that targets the lats while also engaging the chest and triceps. By elongating the lat muscles through a controlled stretch, this movement contributes to improved flexibility and mobility in the upper body. As you pull the dumbbell back up, the lats contract, facilitating muscle growth and definition. The Dumbbell Pullover can also help enhance your ribcage’s expansion capacity, potentially improving breathing mechanics. Including this exercise in your regimen can lead to a more sculpted back and a greater range of motion in the shoulders. Step-By-Step Guide Lie flat on a bench with your upper back and shoulders supported. Hold a single dumbbell with both hands, palms gripping the inside of the weight plate. Extend your arms over your chest, keeping a slight bend in your elbows. Keeping your core engaged and maintaining a slight arch in your lower back, slowly lower the dumbbell behind your head in an arc-like motion. Feel the stretch in your lats as you lower the dumbbell as far as your flexibility allows. Engage your lats to pull the dumbbell back up to the starting position, exhaling as you do so. Repeat for the desired number of repetitions, maintaining control throughout the movement. 4.     Dumbbell Reverse Fly Image Source The Dumbbell Reverse Fly is specifically designed to target the often-neglected rear deltoids and upper back muscles, including the lats. By focusing on the posterior muscles, this exercise helps balance out the shoulder girdle, which is crucial for overall shoulder health and posture. Engaging the lats during the movement assists in achieving a strong and well-rounded upper body aesthetic. Additionally, the Dumbbell Reverse Fly contributes to improved shoulder stability, which is essential for various upper body movements. Incorporating this exercise into your routine can lead to a more symmetrical and functionally strong upper back. Step-By-Step Guide Stand with your feet hip-width apart, holding a dumbbell in each hand by your sides, palms facing each other. Hinge at your hips to lean forward slightly, keeping your back straight and a slight bend in your knees. With a slight bend in your elbows, raise the dumbbells out to your sides until they reach shoulder level. Keep your arms slightly lower than your shoulders. Squeeze your shoulder blades together at the top of the movement to engage your rear deltoids. Slowly lower the dumbbells back to the starting position in a controlled manner. Perform the desired number of repetitions while focusing on maintaining proper form. 5.     Dumbbell Kroc Row Image Source The Dumbbell Kroc Row is an advanced variation of the bent over dumbbell row that offers intense benefits for lats development. By

Read More »
Scroll to Top