Blogs

Anterior Deltoid Workout

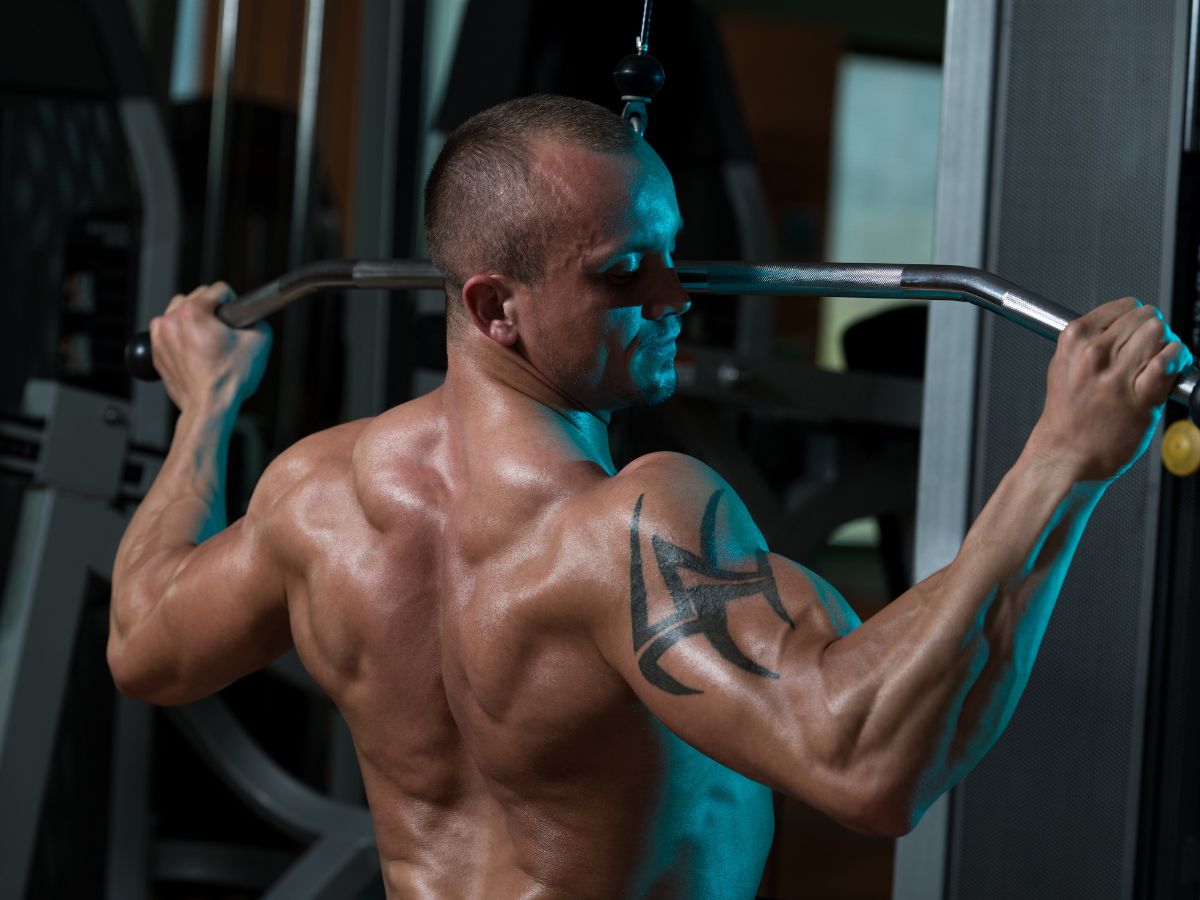
Anterior deltoid workout with tips for beginner

Introduction:  An anterior deltoid workout targets the front part of the shoulder muscles, which are crucial for various upper-body movements. To effectively engage these muscles, it’s important to perform exercises that focus on shoulder flexion and stabilization. Common exercises include front raises, using either dumbbells or a barbell, which isolate the anterior deltoid workout. Push presses and shoulder presses also effectively work these muscles, especially when performed with controlled movements. Beginners should start with lighter weights to ensure proper form and avoid injury.  As strength and proficiency increase, gradually increasing the weight will further challenge and develop the anterior deltoid workout. Consistency and proper technique are key for effective muscle growth and strength improvement in this area. Always consider warming up before and cooling down after workouts to maintain shoulder health and flexibility. Benefits of Anterior Deltoid Workout Anterior deltoid workout has several benefits, as mentioned below: Further developed Shoulder Feel: The front deltoids are a key muscle bunch for making a balanced, stylishly satisfying shoulder. When created, they add to a more extensive, more characterized chest area, which is many times an objective for those hoping to work on their physical makeup. Upgraded Chest area Strength: Solid foremost deltoids contribute fundamentally to general chest area strength. They are engaged with different pushing developments, for example, the seat press or push-ups, and reinforcing them can prompt enhancements in these and other compound activities. Better Utilitarian Execution: The foremost deltoids assume a vital part in regular developments, including lifting items or performing undertakings that include pushing or arriving at above. Reinforcing these muscles can make day-to-day exercises more straightforward and lessen the gamble of injury. Further developed Stance: Solid foremost deltoids, when offset with the advancement of the center and back deltoids, can assist with keeping up with great shoulder arrangement and Stance. This is especially significant for people who invest a ton of energy in a work area or before a PC. Injury Anticipation: Fortifying the foremost deltoids, alongside other shoulder muscles, can give better steadiness to the shoulder joint. This expanded security is vital for forestalling wounds, particularly during chest area activities and sports that include tossing or swinging. Upgraded Sports Execution: Competitors who participate in sports that require chest area strength and development, like swimming, baseball, tennis, or b-ball, can profit from more grounded foremost deltoids. These muscles aid strong arm development and can upgrade general athletic execution. Adjusted Muscle Improvement: For those who participated in lifting weights or general wellness, working the front deltoids is fundamental for adjusted muscle improvement around the shoulder. This equilibrium is significant for style as well as for keeping up with appropriate muscle capability and arrangement. Expanded Metabolic Rate: Like any obstruction preparation, resolving the front deltoids can add to an expanded metabolic rate. Muscle tissue consumes more calories and is still contrasted with fat tissue, so expanding bulk can support the weight of the board. 5 Best Anterior Deltoid Workout Name  Front Dumbbell Raises Arnold Press Push Press Incline Bench Front  Plate Front Raises Front Dumbbell Raises:   The front dumbbell raise is a neglected activity, frequently eclipsed by the above press and sidelong raise. In certain circles, it is even delegated pointless. However, as you continued looking for enormous shoulders, disregarding the front raise is a mix-up. As a matter of fact, it very well may be fundamental for your shoulder routine whenever done accurately. Probably the best jocks ever, including Arnold, Dorian Yates, and Jay Cutler, depended on them. How to do Front Dumbbell Raises? Pick Suitable Loads: Begin with dumbbells you can lift without stressing. Utilizing lighter loads with appropriate structures than heavier loads with unfortunate forms is better. Starting Position: Stand up, standing with your feet shoulder-width apart for security. Hold a dumbbell in each hand before your thighs, palms looking towards your body. Keep a slight curve in your elbows to forestall weight on the joints. Lift the Loads: Breathe out and lift the hand weights before you, keeping your arms straight. Raise the loads to bear level. Guarantee the lift is controlled and comes from your shoulder muscles, not force. Pause at the Top: Momentarily stop when the hand weights are at shoulder level. This respite can assist with expanding muscle commitment. Lower the Loads: Breathe in as you gradually bring down the hand weights back to the beginning position. This descending development ought to be controlled to expand muscle commitment. Reiteration: Rehash for the ideal number of reps. Regularly, 8-12 reps for 3-4 sets are normal in strength preparation. Arnold Press:   The Arnold press raises a ruckus around the town tops of the deltoids, which can assist you with lifting more grounded with regards to different lifts and fabricates all the more balanced shoulders. The average and back deltoids frequently get ignored in other arm exercises like press-ups and seat presses, though the scope of movement in the Arnold press helps work every one of the three deltoid muscles uniformly. A standing Arnold press likewise works your lower back muscles as your back attempts to settle your body as you move. A more grounded back can assist with working on your Stance and your exhibition during practices like deadlifts and columns. How to do Arnold Press? Starting Position: Sit on a seat with back help. Hold a dumbbell in each hand at shoulder level, with your palms confronting your body and elbows twisted. Initial Rotation and Press: As you press the free weights up, turn your palms so they look ahead when the dumbbells are above. Your arms ought to expand completely at the top. Top Position: At the highest point of development, your palms ought to confront away from you. Stop momentarily here. Invert the Development: Lower the dumbbells back to bear level while at the same time pivoting your palms back towards you, getting back to the beginning position. Redundancy: Rehash for the ideal number of reiterations. Normally, 8-12 reps for 3-4 sets are standard in a strength preparation routine. Push Press   The push-press is

Read More »
arm bodyweight workouts

Arm bodyweight workouts with tips for beginner

Introduction:  Arm bodyweight workouts are a pragmatic and compelling method for developing grit and toning muscles. These activities, which utilize your body weight as opposed, can be performed anywhere, making them a helpful expansion to any wellness schedule. They draw in various muscle gatherings, upgrading coordination and equilibrium. Activities, for example, push-ups and boards, increment bulk and further develop stance and lift digestion. No matter what your wellness level, consolidating bodyweight arm exercises into your routine can prompt huge upgrades in your wellness levels Benefits of arm bodyweight workouts Arm bodyweight workouts offer various advantages for people at all wellness levels. These activities are helpful, as they can be performed anyplace without the requirement for particular gear. They are likewise cheap, as no extra hardware is required. “arm bodyweight workouts” connect with various muscle gatherings, working on, generally speaking, wellness, coordination, and equilibrium. They can likewise assist with expanding digestion, prompting long-haul weight reduction and further developed well-being. Consolidating “arm bodyweight workouts” into your gym routine can assist with developing muscle fortitude and better bone thickness, lessen the gamble of wounds, and work on athletic execution. These activities can be effortlessly changed to suit your wellness level, considering movement as you gain strength. Furthermore, “arm bodyweight workouts” can be joined with cardiovascular activities to improve calorie consumption and general wellness. Some famous “arm bodyweight workouts” incorporate push-ups, rear arm muscles push-ups, boards, and arm circles. These activities target different arm muscles, assisting with conditioning and reinforcing the arms without the requirement for loads. By reliably consolidating “arm bodyweight workouts” into your daily gym routine practice, you can accomplish a very conditioned chest area and work on general wellness. Five best arm bodyweight workouts Bicep curl Dip Arm Circles Inchworm Triceps push-ups Bicep curl   The biceps curl is a profoundly conspicuous weight-lifting exercise that works the muscles of the upper arm and, less significantly, those of the lower arm. It’s a brilliant activity for bringing about strength and definition. Different gear and holds can be utilized for this exercise, including those utilizing barbells, kettlebell weights, dumbbells, opposition groups, or link machines. Twists are a run-of-the-mill exercise utilized in chest area strength preparation schedules. How to do Bicep Curl? Stand up straight with your feet shoulder-width apart. Hold a free weight in each hand, permitting your arms to hang by your sides, palms looking ahead. Keep your chest area still and draw in your center muscles for solidness. Start the twist by bowing your elbows and bringing the free weights towards your shoulders. Keep your upper arms near your body and your wrists straight. Keep on lifting the dumbbells until they are near your shoulders or until your biceps are completely contracted. Stand firm on the footing momentarily, crushing your biceps at the highest point of the development to expand the compression. Gradually lower the dumbbells back to the beginning position, keeping up with command over the development. Rehash the activity for your ideal number of reiterations. Normally, three arrangements of 8-12 redundancies are a typical reach for developing bicep grit and size. Tips for Beginners:  For effective bicep curls, maintain good form: stand with feet hip-width apart, soft bend in knees, and dumbbells in each hand. Focus on the eccentric phase, extending as slowly as possible. This causes greater micro-trauma, stimulating more muscle growth. Avoid rapid lifting and lowering for high rep counts. Incorporate seated concentration curls for maximum bicep activity. Remember to rest between sets to prevent burnout. Dips   Dips are a kind of solidarity preparing exercise that expects you to lift your body weight with your rear arm muscles, deltoids, pecs, and rhomboid muscles. One sort you can do is a seat plunge, where you support your body weight from behind. For a rear arm muscle plunge, go through equal bars to lift yourself and down. In the event that you can’t plunge your full body weight yet, relax. Most rec centers have a machine that can help with plunges, so you don’t need to help your entire body weight. Expect to do strength-preparing exercises like these 2-3 times each week. How to do Dip?   Find equal bars or a plunge station and handle the bars with your hands. Bounce up and fix your arms, supporting your body weight. Lean your middle somewhat forward and twist your knees if necessary. Bring down your body by bowing your arms and keeping your elbows near your body. Plunge until your shoulders are underneath your elbows. Push your body back up by fixing your arms and locking your elbows at the top. Tips for Beginners: Warm-up: Consistently start your plunge preparing with a warm-up daily practice. Light running or vigorous activity followed by shoulder stretches will get your body heated up. Proper Form: Keep your elbows near your sides to lessen the weight on the shoulders. Your head ought to be in accordance with your chest area, looking forward, not up, and your center locked in. Twist your legs at the knees while performing equal bar plunges. Scope of Movement: You ought to go somewhat beneath lined up on every rep, so your shoulders go down only somewhat underneath your elbows. Be that as it may, try not to go excessively low, as it can cause injury. Controlled Development: Try not to go excessively quick. It would help if you were slow and in charge during your plunge. At the point when you go excessively fast, the appropriate structure is frequently forfeited. Grip: Your hold ought to be a manageable length. Preferably, plunge bars ought to be separated a good ways off, identical to your lower arm with hand outstretched, from elbow to fingertips. More extensive bars will likewise stress the chest. Movement: Begin with simpler varieties like bowed knee seat plunges or straight legs seat plunges, and progressively continue toward additional difficult ones as your solidarity gets to the next level. At the point when you can complete three arrangements of 8, continue toward the following practice in the movement Arm Circles

Read More »
can rotator cuff heal itself

How can rotator cuff heal itself

Can rotator cuff heal itself?   ‘Can rotator cuff heal itself” means The rotator cuff can, at times, mend itself somewhat, particularly in instances of minor or halfway wounds. In any case, the degree of normal recuperating can change broadly contingent upon the seriousness of the injury, individual elements, and the individual’s age. An occasions of minor strains or aggravation, rest, non-nosy treatment, and moderating medications may be satisfactory to allow the rotator sleeve to recover in isolation. In such cases, the body’s normal recuperating cycles can fix the harmed tissue over the long haul. For additional serious wounds, for example, full-thickness tears or constant degeneration, complete self-recuperating might be more uncertain. In these cases, clinical mediation, like exercise-based recuperation, corticosteroid infusions, or, at times, careful fixing, might be important to advance mending and reestablishing capability. It’s fundamental to talk with medical services proficient for a legitimate assessment and therapy plan on the off chance that you suspect a rotator sleeve injury, as early intercession can frequently prompt improved results. They can give direction on the most fitting strategy in view of the particular injury and individual conditions. Six best rotator cuff exercises  External rotation Doorway stretch Scaption Prone external rotation Shoulder stretch Cable internal rotation External rotation   Connect the theraband at midriff level to a door handle or post. While remaining sideways to the entryway and confronting straight ahead, handle one finish of the band and pull the band as far as possible through until it is tight. The feet are shoulder-width separated, and the knees are somewhat flexed. The elbow is put close aside with the hand as hidden from plain view as could be expected (consider this elbow similar to a depend on a door). Taking the rope in the hand, ‘set’ the shoulder bone and move the hand away from the body to the extent that it feels good. Get back to the beginning position. How to do External rotation? Stand or sit with a great stance, keeping your back straight. Grasp an obstruction band or a light-free weight as an afterthought you need to work. The elbow ought to be bowed at a 90-degree point and near your body. Keep your lower arm lined up with the ground and your palm confronting the floor. Draw in your center and keep up with a legitimate stance all through the activity. Breathe out as you gradually pivot your lower arm outward, away from your body. This development ought to begin from the shoulder joint, not the wrist. Hold briefly toward the finish of the turn to feel the compression in your outside rotator muscles. Breathe in as you return to the beginning situation with control. Perform 2-3 arrangements of 12-15 redundancies on each side. Doorway stretch   A doorway stretch is a direct and practical activity that targets the chest and shoulder muscles. To perform it: Stand in a doorway with your arms twisted at a 90-degree point, setting your lower arms and palms against the door jamb. Delicately slant forward, allowing your chest to open and your shoulders to expand. Stand firm on this footing for around 20-30 seconds while breathing profoundly. This stretch lightens strain and snugness in the chest and shoulders, making it especially valuable for people who burn through broadened periods sitting or working in a work area. It can likewise further develop stance and adaptability in the chest area. How to do Doorway Stretch?   Stand confronting a doorway with your feet shoulder-width apart. Raise your arms to bear level and twist your elbows at a 90-degree point, framing a goal line shape with your arms. Put your lower arms and hands on the door jamb or entryway, with each lower arm lying on an alternate side of the edge. Delicately incline forward, permitting your chest to travel through the entryway while keeping your arms set up. You ought to feel a stretch in your chest and the front of your shoulders. Hold the stretch for 20-30 seconds while breathing profoundly and unwinding into the stretch. Gradually return to an upstanding position and rehash depending on the situation. Scaption   Scaption recommends raising your arms from your sides and somewhat forward. To a great extent, it’s implied as a scapular plane ascent. During scaption, you draw your shoulder bones toward the point of convergence of your spine, which helps with opening your chest. The improvement creates grit in the shoulders and back. Zeroing in on your construction during scaption can help with making body care. How to do Scaption? Stand or sit with a great stance, and it is directly to guarantee your back. Hold a free weight in each hand, palms looking in, and let your arms hang normally at your sides. Gradually raise the two arms, all the while lifting them forward and up at a 30-45 degree point. Envision making a “Y” shape with your arms. Keep your thumbs facing up as you lift. Lift until your arms are generally at shoulder level or somewhat beneath, yet abstain from going higher to forestall overstraining the shoulder joints. Stand firm on the raised foothold momentarily to feel the constriction in your shoulder muscles. Bring down the free weights back to your sides in a controlled way. Perform 2-3 arrangements of 12-15 redundancies with proper weight. Prone external rotation   Lie on your stomach on a bed with the involved arm out aside, off the edge of the bed, and elbow twisted to 90° with your thumb toward the body. Crush shoulder bone toward the spine and descending. Turn your lower arm up. How to do a Prone external rotation? Hold a dumbbell in one hand with your elbow bent at a 90-degree point, outlining an L-shape with your arm. Your lower arm should be agreed with the ground, and your palm should stand up to it. Attract your middle muscles to keep an impartial spine and settle your body. Breathe out as you remotely turn your arm, lifting

Read More »
best exercise for back thickness

6 Best exercise for back thickness

Introduction:  The deadlift is remarkable among the “best exercise for back thickness.” These compound activities connect with different muscle gatherings, including your latissimus dorsi, trapezius, rhomboids, and erector spinae, which are perfect for fostering your back. Your back muscles will become more grounded and thicker on the off chance that you follow the “best exercise for back thickness” accurately. Six best exercise for back thickness Bent-over row Seated cable rows Pulldown Machine row Pullup Straight-arm pulldown Bent-over row   Bent-over rows require great structure to diminish the chance of injury. Extraordinary construction may be challenging to achieve every step of the way. Notwithstanding, there are advantages to bent-over rows — like better stance and trunk dependability — that will additionally bring down your gamble of injury over the long run. Bent-over rows are regularly performed with a dumbbell and can be performed using a wide variety of resistance instruments (like a band, hand loads, or machines). Additionally, various assortments can be performed accepting that you have issues like back torture. How do you do a Bent-over row? Stand with your feet shoulder-width isolated, holding a hand weight or freeloads before you with an overhand handle. Twist your knees somewhat and pivot at your hips to incline forward, keeping your back straight and your center locked in. Your chest area ought to be lined up with the ground, and your arms ought to drape straight down toward the floor. Pull the load towards your lower ribcage by withdrawing your shoulder bones and bowing your elbows. Press your back muscles at the highest point of the development, then, at that point, gradually lower the load down to the beginning position. Seated cable rows   The seated cable row is a pulling exercise that, by and large, works the back muscles, especially the latissimus dorsi, a.k.a. “lats.” The rhomboid muscles between your shoulder bones likewise get an exercise with this move. Your trapezius muscles along the rear of your neck, shoulders, and upper back are additionally engaged with seated cable rows. This move likewise works the lower arm and upper arm muscles, as the biceps and rear arm muscles are dynamic stabilizers for this activity. Other balancing out muscles that become possibly the most important factor are the hamstrings and gluteus maximus. How to do Seated cable rows? Pull the handle and weight back toward the lower mid-region while doing whatever it takes not to utilize the force of the column a lot by moving the middle in reverse with the arms. Focus on the center to upper back by keeping your back straight and crushing your shoulder bones together as you column, keeping your chest out. Return the handle forward under strain to full stretch, making sure to hold that back straight despite the fact that it flexes at the hips.  Pulldown   The pulldown practice is a strength-preparing exercise intended to create the latissimus dorsi muscle. It carries out the roles of descending pivot and sorrow of the scapulae joined with adduction and expansion of the shoulder joint. The cable lat pulldown is done where the handle is moved through a link pulley, rather than doing pulldowns on an influence machine. How to do Pulldown? Take a seat at a cable pulldown machine with a wide, overhand hold connection on the high pulley. Change the knee cushion so it fits cozily over your thighs. Plunk down with your back straight, chest up, and feet level on the floor. Pull the bar down towards your upper chest by flexing your elbows and crushing your shoulder bones together. Stop briefly when the bar is hidden from everyone else, then leisurely deliver it back up to the beginning position. Keep your middle still, and utilize your lats to play out the development. Rehash for the ideal number of reps. Machine row   Your chest ought to be at the highest point of the cushion. Plunk down on the machine and handle the handles with a nonpartisan grasp. Focusing your chest on the cushion, eyes confronting advances, and elbows in at your sides, gradually pull the handles back beyond what many would consider possible. How to do Machine Row?  Machine Arrangement: Change the seat and chest cushion of the machine to your body level.  Grasp: Reach forward to hold the handles or the connection on the machine with two hands. Situating: Stay up with a straight back, chest out, and bear back. Broaden your arms completely before you. Execution: Pull the handles or connection towards your middle by twisting your elbows and crushing your shoulder bones together. Compression: At the pinnacle of the development, crush your back muscles to expand the commitment of your upper back. Return: Gradually expand your arms, returning the handles or connection to the beginning position. Relaxing: Breathe in as you expand your arms, and breathe out as you pull the handles or connection towards your body. Reiteration: Play out your ideal number of redundancies, keeping up with legitimate structure and control. Change the load to match your wellness level. Pullup   Pullups are a practical bodyweight practice that is perfect for developing chest area fortitude; notwithstanding, they are generally known as one of those hard-to-dominate exercises that can be interesting for fledglings. Maybe you’ve checked them out previously and thought,  In spite of normal misguided judgments, it’s feasible for anybody — even those without solid arm and back muscles — to defeat a pullup. You simply have to know where and how to begin, get familiar with the right structure, and set forth the energy and exertion. When you’re ready to perform pullup varieties (and, in the end, a full pullup), you’ll have the option to receive the actual rewards of major areas of strength for a body while having an extraordinary outlook on dominating a difficult activity. How to do Pullup?   Grasp a pullup bar with your palms confronting whichever bearing you like. As a rule, having your palms looking towards you is generally effective. At the

Read More »
anterior delt exercises

6 Best anterior delt exercises with tips

Introduction :  Anterior delt exercises are strength-preparing developments that explicitly focus on the foremost deltoid muscles in the shoulders. These activities include lifting loads or utilizing protection from work on the forward portion of the shoulder muscles. Normal foremost deltoid activities incorporate front free weight raises, shoulder presses, and pushups with a thin hand position. Fortifying the foremost deltoids can improve shoulder style, chest area strength, and, in general, shoulder joint steadiness, making them a significant part of a decent wellness schedule. The benefits of anterior delt exercises  Further developed Shoulder Appearance: Fostering the anterior deltoids can assist with making a fair and stylish shoulder appearance. Clear-cut front shoulders can upgrade your general chest area style. Improved Shoulder: Areas of strength for strength deltoids are fundamental for different chest area developments, like pushing works out (e.g., seat press, shoulder press) and front raises. Further developed shoulder strength can upgrade your presentation in these activities and add to better general chest area strength. Injury Avoidance: Reinforcing the foremost deltoids can assist with balancing out the shoulder joint, diminishing the gamble of wounds, especially toward the front of the shoulder. A solid front deltoid can add to more readily bear joint strength and capability. Practical Chest area Strength: The front deltoids assume an urgent part in regular exercises that include lifting, pushing, and coming to, for example, conveying food, pushing weighty entryways, and lifting objects above. Fostering these muscles can work on your capacity to play out these undertakings effortlessly. Adjusted Muscle Advancement: Zeroing in on the front deltoids in your shoulder preparation can assist with guaranteeing adjusted muscle improvement all through the shoulder complex. This equilibrium can lessen the gamble of muscle-lopsided characteristics and related issues, like unfortunate stances. Six best anterior delt exercises Dumbbell front raise Bench press Cable front raise Arnold press Decline pushup Dumbbell shoulder press Dumbbell front raise   The dumbbell front raise is a principal weight-lifting exercise that is perfect for individuals who need to develop grit or make more definition in the shoulders. You can utilize the dumbbell front raise in any chest area exercise; simply make certain to pick a weight you can lift with a legitimate structure. How do you do a Dumbbell front raise? Stand with your feet about shoulder-width separated. Allow your arms to drape before you with the hand weights before the thighs (palms confronting the thighs). Your back is straight, your feet are established level on the floor, and your muscular strength is locked in. Lift the loads while breathing in. Your arms are expanded, palms overcoming, with a slight twist in the elbows to diminish the weight on the joints. Stop momentarily when your arms are even on the floor. Bring down the hand weights to the beginning position (at the thighs) with a sluggish and controlled movement while breathing out. Tips:  For a powerful dumbbell front raise, keep a slight twist in your elbows, lift the loads straightforwardly before you, and abstain from swinging. Keep a controlled speed, breathe out on the way up, and center around the shoulder muscles. Begin with lighter loads to guarantee appropriate structure and progressively increment as strength moves along. Bench press   The bench press helps assemble many muscles in the chest area. You can do this activity with either a hand weight or free weights. Perform seat presses consistently as a feature of a chest area exercise for expanded strength and muscle improvement. How to do Bench Press? Step your shoulder bones back behind you to hold back from squeezing with adjusted shoulders. Handle the free weight utilizing an overhand hold, putting your thumbs outwardly of your shut clenched hand. Your arms are somewhat more extensive than shoulder-width separated, and the point of your upper arms is around 45 degrees to the body. Eliminate the hand weight from the rack, locking your elbows. (Try not to move the bar in that frame of mind from the rack straightforwardly to the chest position.) Breathe in while bringing the bar down to your chest at the areola line. Breathe out as you press the bar over your chest, broadening your arms. Try not to watch the bar — center around the roof. Bring down the bar, so it is simply over your chest. This is the beginning situation for the following seat press. Tips : Keep up with appropriate structure by keeping your back level and feet immovably on the ground. Hold the free weight shoulder-width separated for ideal chest commitment. Bring down the bar to your chest with control and press it back up dangerously. Utilize a spotter for security, and progressively increment weight to challenge your muscles. Cable front raise   The cable front raise is delegated a chest area disengagement practice, with the foremost top of the deltoid muscle bunch being the primary focal point of the exercise’s obstruction. Because of the way that the distal mark of the exerciser’s body remains solidly set up during the sum of the reiteration, the cable front raise is likewise named an open motor chain development, permitting people with frail or shaky stabilizer muscles to play out the exercise absent a lot of stress of injury. How to do Cable Front raise? Begin by setting up the cable machine with the pulley at the lowest position and connecting a handle. Then, at that point, stand with your back to the machine and the link between your legs. Then, get the handle with an overhand grasp and stand with your arms straight down and the bar before your thighs. Presently, leisurely lift the link and out while keeping your arms generally straight. Keep lifting until your arms are cable up with the floor or somewhat higher. Stop momentarily at the highest point of the development before leisurely letting the link down to the beginning situation in a controlled way. Rehash the activity for the ideal number of reiterations, normally 8-12 redundancies for each set for muscle development. Tips : Stand with feet

Read More »
kettlebell oblique

5 Best kettlebell oblique Exercise with Tips

Introduction :  Kettlebell oblique exercises can be one of the best means for preparing the obliques, as they make it extremely simple to prepare the opposing pivot and opposing horizontal flexion development designs. Preparing these development designs considers extraordinary enhancements in both the oblique rotational strength and static strength. The rundown beneath contains developments from both these development designs that you can integrate into your center work or full body obstruction instructional meetings. The Benefits of kettlebell oblique Center Strength: Portable weight diagonal activities assist with fostering your center strength, as the diagonal muscles are a vital piece of your center. A solid center is fundamental for settling your spine, further developing your stance, and decreasing the gamble of back torment. Further developed Security: Preparing your obliques with iron weights can upgrade your general strength and equilibrium. Solid sideways muscles help with keeping up with legitimate body arrangement and can assist with forestalling wounds during everyday exercises and sports. Better Stance: Reinforcing your obliques can assist you with keeping up with a better stance, as they assume a pivotal part in keeping your middle upstanding and forestalling slumping. Utilitarian Development: Iron-weight-angled practices impersonate genuine developments, making them exceptionally useful. Whether you’re lifting food, swinging a golf club, or getting your youngster, solid obliques add to better execution in regular exercises. Upgraded Athletic Execution: Competitors can profit from working on rotational power and soundness, the two of which are fundamental in sports like golf, baseball, tennis, and combative techniques. Fat Misfortune: Portable weight practices are much of the time focused energy and can add to consuming calories and advancing fat misfortune, particularly when joined with a balanced wellness normal and a legitimate eating routine. Adaptability: Kettlebell exercises for obliques can be adjusted to different wellness levels, from novices to cutting-edge competitors. You can increment or decline the heaviness of the portable weight and alter the developments to match your ongoing strength and expertise level. Time Proficiency: Portable weight exercises are, in many cases, time-proficient on the grounds that they connect with various muscle bunches on the double, including the obliques. This implies you can get a full-body exercise in a more limited measure of time contrasted with disconnected works. Assortment: There’s a wide variety of portable weight practices that focus on obliques, like Russian turns, windmills, side twists, and Turkish outfits. This assortment can assist with keeping your exercises fascinating and forestall fatigue. Injury Counteraction: Solid obliques can assist with balancing out the spine and decrease the gamble of lower back wounds, especially during exercises that include winding or bowing. Five best kettlebell oblique Exercise  Windmills Kettlebell Oblique Crunch Kettlebell Side Plank Russian Twist Side Swings Windmills   The windmill exercise is a full-body development that should be possible with a kettlebell, dumbbell, or no weight by any stretch of the imagination. Furthermore, when performed accurately, it can assist with reinforcing your center, hips, and shoulders. Actual advisor and ensured strength and molding expert Ernest Mill, operator, PT, DPT, CSCS, stroll us through this move and make sense of why your structure is so significant while doing the windmill workout. How to do Windmills Stand with your feet insignificantly greater than shoulder-width isolated. Turn the toes of your past by walking directly to the side at 90 degrees. Arrive at your right arm up to the roof and let your left-hand drape down next to you. Gaze toward your right hand. Draw in your center and push your hips toward your right side. Slide your left and give over your left leg toward your lower leg quite far without coming down on your leg — utilize your center to settle yourself. Your left arm ought to be opposite to the floor the whole time. The right leg ought to stay straight. You can permit a slight twist in your passed-on leg to try not to lock your knee. Stop, then, at that point, push down through your feet to ascend back up to begin, keeping your center drawn in and your spine long the entire time. Tips :  Keep up with appropriate structure: Keep your back straight and center-locked in. Warm up: Stretch your muscles and joints prior to beginning. Begin with low obstruction: Start at a simple level and step by step increment. Center around your breath: Breathe out on the work (pull) and breathe in on the delivery. Utilize a controlled movement: Don’t swing or snap the loads. Counsel a wellness proficient for direction. Kettlebell Oblique Crunch:   The Kettlebell Oblique Crunch is a center-fortifying activity that spotlights the diagonal muscles that run at the edges of your midsection. To play out this activity, lie on your back with your knees twisted and feet level on the floor. Hold a kettlebell carefully shrouded with two hands. Breathe out as you lift your chest area off the ground, at the same time curving your middle aside, meaning to contact the iron weight beyond your knee. Breathe in while getting back to the beginning position, then, at that point, rehash on the opposite side. This exercise assists work with coring solidness and definition in the diagonal muscles, adding to a more grounded and more conditioned waist. How to do Kettlebell Oblique Crunch   Breathe out as you lift your chest area off the ground, all the while contorting your middle aside. You want to contact the portable weight to the beyond your knee on that side. Contract your angled muscles during this movement to connect with them. Breathe in as you gradually bring down your chest area back to the mat and return to the beginning position. In the wake of finishing the ideal number of redundancies on one side, switch and play out the activity on the contrary side. Begin with a sensible weight and do 2-3 arrangements of 10-15 redundancies on each side. Tips :  Keep up with legitimate portable weight structure. Breathe out while crunching aside. Keep your center connected all through. Utilize controlled, purposeful developments. Begin with

Read More »
compound lifts for legs

5 best compound lifts for legs with benefits and Tips

Introduction :   Compound lifts for legs are one of the most mind-blowing ways of developing lower body fortitude, control, and power in a restricted measure of time. Compound leg exercises are developments that draw in different lower body muscle bunches on the double. These activities save you time in the rec center, yet additionally permit you to get heavier loads. The benefits of compound lifts for legs For solid competitors who are attempting to capitalize on a preparation program, compound lifts for leg exercise are, for the most part, suggested. Many individuals favor compound exercises since they mean normal development examples and work more muscles without a moment’s delay. Build practice permits you to get a full-body exercise significantly quicker, keeps your pulse up to offer cardiovascular advantages, and, for the most part, consumes more calories. Since it recreates true developments, it assists with developing fortitude for ordinary living. Five Best compound lifts for legs Romanian Deadlifts Box Jumps Hack Squat Leg Press Barbell hip thrust Romanian Deadlifts   Romanian Deadlifts are a compound strength practice that essentially focuses on the hamstrings, glutes, and lower back. To perform them, stand with your feet hip-width separated and knees marginally bowed. Hold a dumbbell or Barbell before your thighs. Pivot at the hips while keeping a straight back and a slight knee twist. Bring down the load along your legs, feeling a stretch in your hamstrings. Keep the weight near your body and return to the beginning situation by driving your hips forward. Romanian Deadlifts are magnificent for creating back chain strength and can be an important expansion to your lower body exercise routine daily schedule. How to do Romanian Deadlifts   Stand with your feet hip to bear width separated and toes pointing ahead. Play out a deadlift to get the bar off the floor. Position the hand weight over the midfoot. Squat down to the bar and get the bar with palms confronting you. Attract and support the abs. Lock the shoulder bones back and down and position the spine in an impartial. Drive the hips back and position the shins as upward as could be expected. Balance the weight equally over the foot. Drive into the floor to lift the bar, broadening the knees and keeping up with a middle position. Keep the bar near the body consistently. When the bar has passed, the knee presently plays out the RDL. Drive the hips forward through the bar until the glutes completely contract. Open the knees and converse the example, driving the hips back, bringing down the bar just to whatever extent can be achieved, and keeping up with a great stance until the hamstrings are at full length. Rehash. Keep up with the pose all through. Abstain from general or slumping the spine, letting the shoulder round forward, locking the knees, or overstretching the neck. Tips :  Stand with feet hip-width separated and knees marginally bowed. Hold a hand weight or freeloads before your thighs. Pivot at the hips while holding a straight back. Bring down the load along your legs. Keep a slight curve in your knees. Get back to the beginning position utilizing your hamstrings and glutes. Keep the weight near your body. Keep a nonpartisan spine. Box Jumps   Box jumps include hopping from the floor onto a container or other raised surface. They are an amazing method for upgrading touchy power, further fostering strength through your lower body, further developing vertical leap level, and, by and large, working on athletic execution. It’s critical to take note that container hops are a further developed exercise that ought to be embraced with some watchfulness. After you foster a decent gauge of leg strength and practice more fledgling, well-disposed hopping works out; you ought to feel open to rehearsing box bounces with a low step or box. The box should be possible in strength- or power-centered exercises and ought to be consolidated close to the start of the everyday practice after a strong warm-up. This guarantees the muscles they target will not be exorbitantly exhausted, making the activity more secure to perform. How to do Box Jumps   Stand confronting the box, your feet inside around six crawls of its side. Your feet ought to be about hip-distance separated, your knees and hips marginally twisted in an athletic position. Twist your knees and press your hips back as you swing your arms behind you in a smooth movement. Detonate through the bundles of your feet, hopping straight out of sight, swinging your arms up and advancing as you completely stretch out your knees and hips to get as much level as possible with your leap. At the level of your leap, twist your knees and hips to attract them forward to have the option to arrive on top of the container. Land with the two feet simultaneously on the crate, driving with the bundles of your feet, following with your impact points. Attempt to do this “delicately,” permitting your knees and hips to twist normally to assist with engrossing the shock of the arrival. Check your foot position — when on top of the crate, your feet ought to be generally hip-distance separated. Step — don’t jump — cautiously off the case and reset for the following reiteration. Tips :  Begin with a proper box level for your wellness level. Keep up with legitimate structure, zeroing in on a delicate landing. Warm up before performing box leaps to set up your muscles. Pick a steady surface for the case to forestall mishaps. Draw in your center for equilibrium and control. Land with twisted knees to diminish the joint effect. Hack Squat   The hack squat is a lower-body strength preparation exercise. Initially, weightlifters played out the hack squat by putting a stacked free weight behind their heels, hunching down, grasping the hand weight, and then, at that point, standing up. This is the way the activity got its name — “hack” comes from the German word “hack,”

Read More »
Read More : Best arm wrestling exercise Best lower lat exercises Best underbutt exercises Compound glute exercises Best upper glute exercises

8 Best Compound Exercise at Home with The Technique

Introduction:    Compound Exercise at Home has gained basic universality. These exercises are an underpinning of strong home activities, enabling individuals to capably zero in on different muscle packs with irrelevant equipment or even their body weight. By integrating compound activities into their wellness schedules, people can accomplish strength, muscle development, and by and large wellness from the solace of their own homes. In this aid, we will investigate the strategies and advantages of compound activities that can be performed without the requirement for an exercise center enrollment or costly hardware, enabling you to accomplish your wellness objectives helpfully and reasonably. The Importance of Compound Exercise at Home    Proficient Utilization of Time: Compound activities connect with numerous muscle bunches all the while, permitting you to deal with different body parts in a solitary development. This proficiency is particularly significant when time or space is restricted in a home exercise setting. Full-Body Commitment: Compound activities give a more complete exercise by focusing on significant muscle gatherings, which can assist with muscle improvement, practical strength, and calorie consumption. Useful Strength: These activities impersonate genuine developments, improving your capacity to perform day-to-day exercises easily. This utilitarian strength is essential for keeping up with general wellness and autonomy. Adaptability: Compound activities can be adjusted to various wellness levels by changing weight or power, making them reasonable for amateurs and experienced competitors the same. Insignificant Gear: Many compound activities should be possible with negligible or no hardware, making them available for home exercises. Equilibrium and Coordination: These activities require equilibrium and coordination, prompting further developed dependability and decreased chance of injury. 8 Best Compound Exercise at Home    Squat press     The Squat Press is an unbelievable strength-preparing full-body exercise that adds to creating strength in your legs, lower back, hips, stomach area, arms, and shoulders. Squats are probably the most valuable strength-preparing exercises one can perform, as they empower a huge measure of muscle development. Assuming you match up the ordinary squats with shoulder squeezes, you wind up delivering a muscle exercise that forms both your lower and chest area simultaneously. The squat press includes lifting either a couple of free weights, or a solitary dumbbell, from the level of the shoulders, and afterward squeezing it up over the head till your elbows are completely locked. While you are playing out this development, ensure that your back is kept straight instead of adjusted. The most ideal way to portray it is to push your chest out on your way up. On your way down, bring down the dumbbell to bear level, and afterward play out an entire 90-degree squat, driving the hand weight to the floor as you incline somewhat forward to keep your equilibrium. Squat-curl-press   The squat, curl, and press is a notable compound activity that works the legs, center, arms, and shoulders in a single unique development. This is a high-level activity that requires actual strength and soundness. Begin with lighter weights as you practice this development design prior to attempting heavier weights.   Stand with your feet only more extensive than your hips, and hold light to medium loads with your arms by your sides and palms confronting one another. Squat down touch the loads to the floor and turn your palms to look ahead. Keep your back straight and your abs pulled in and engaged. Side squat    Side squats are an activity that builds up the legs, glutes, and outside thighs for strong, carved legs and a fit, molded lower body. Squats resemble the failed-to-remember cousin, everything being equal. Frequently neglected for the more conventional essential squat or different adaptations, assuming you figure out how to do side squats you are figuring out how to add parallel development and additional solidarity to your external and internal thighs.   It’s implied that squats are an astonishing exercise for the legs. Each mentor and wellness proficient around will recommend squats for leg strength as well concerning calorie consumption, since working your bigger muscle bunches consumes more calories. Learning the essential squat is your most memorable objective on this front, however, when you have the rudiments, it is critical to stir up your exercises and add aspects to the moves. There are various sorts of squats, each including an alternate contort of the strength it gives. Side squats have several things that are special.   Push up    The press-up or the push-up practice is an extremely famous activity utilized in furthest point preparation. It is a shut dynamic chain practice that requires no devices and utilizations the body weight for obstruction. It has numerous varieties, so it very well may be changed by the wellness level. They work the back arm muscles, pectoral muscles, and shoulders. Utilizing appropriate structure, they can likewise fortify the lower back and center by drawing in (pulling in) the stomach muscles. Push-ups are a quick and successful activity for developing fortitude. plank    The plank is quite possibly one of the most well-known exercises in the rec center, a very straightforward static hold that shows up in practically every stomach muscle-preparing program you’re probably going to experience. Almost everybody can get down on the floor, stretch themselves out, and hold set up, so the move is a #1 for novices. It’s not difficult to step up for specialists by including development or a heap your back. Furthermore, you’re not simply preparing your abs — your entire center, which incorporates the glutes and lower back, as well — are completely locked in.   However, there’s more that goes into the plank, if you need to take full advantage of the exercise. The way into your center preparation is in keeping up with wonderful structure and discipline — which may be undeniably harder than you anticipate. Walking knee lunge   Walking lunges are a minor departure from the static rush exercise. Rather than remaining back upstanding subsequent to playing out a jump on one leg, as you would in a static bodyweight rush, you

Read More »

10 best compound exercises for legs with the benefits

Introduction :  With regards to severe areas of strength for building legs and accomplishing, generally speaking, lower-body wellness, compound activities stand apart as the absolute best devices in the wellness armory. These powerful developments draw in numerous muscle bunches, all the while conveying excellent outcomes concerning strength, muscle improvement, and helpful well-being. In this discussion, we will plunge into the universe of “compound exercises for legs”, investigating the various advantages they offer and giving bits of knowledge into explicit activities that can assist you with accomplishing your leg-related wellness objectives. The Benefits of Compound Exercises   Productivity: Compound exercises permit you to work numerous muscle bunches all the while, making your workouts additional time-effective. This implies you can accomplish a full-body or multi-muscle activity in a more limited measure of time.   Strength and Muscle Improvement: Since compound exercises draw in different muscle gatherings, they assist you with developing generally speaking fortitude and bulk quicker than confinement works out. Models incorporate squats, deadlifts, and seat presses. Proper Strength: Compound developments copy genuine exercises and work on your capacity to perform everyday errands and sports-related activities as they advance utilitarian strength and coordination. Calorie Consume: These activities require more energy and consume a more significant number of calories than seclusion practices since they enlist more bulk. This can support weight reduction or weight upkeep objectives. Hormonal Reaction: Compound activities invigorate the arrival of chemicals like testosterone and development chemicals, pivotal in muscle development and recovery. Joint Solidness: Many compound activities work on joint steadiness and adaptability since they require legitimate arrangement and equilibrium, lessening the gamble of wounds. Time-Productive Exercises: For those with occupied plans, compound activities can be a fantastic decision, as they permit you to work various muscle bunches in a single meeting, saving time. Further developed Stance: Fortifying numerous muscle gatherings can assist with further developing stance by addressing strong, uneven characters that might add to unfortunate views. Improved Center Strength: Many compound developments connect with the center muscles as stabilizers, assisting with fostering areas of strength for a steady center. Assortment: A wide assortment of compound activities to browse, permitting you to keep your exercises intriguing and testing as you progress. Productivity: Compound activities permit you to work numerous muscle bunches all the while, making your exercises additional time-effective. This implies you can accomplish a full-body or multi-muscle exercise in a more limited measure of time. Strength and Muscle Improvement: Since compound activities draw in different muscle gatherings, they assist you with developing, generally speaking, fortitude and bulk quicker than confinement workouts. Models incorporate squats, deadlifts, and seat presses. Proper Strength: Compound developments copy genuine exercises and work on your capacity to perform everyday errands and sports-related activities as they advance utilitarian strength and coordination. Calorie Consume: These activities require more energy and consume a more significant number of calories than seclusion practices since they enlist more bulk. This can support weight reduction or weight upkeep objectives. Hormonal Reaction: Compound activities invigorate the arrival of chemicals like testosterone and development chemicals, pivotal in muscle development and recovery. Joint Solidness: Many compound activities work on joint steadiness and adaptability since they require legitimate arrangement and equilibrium, lessening the gamble of wounds. Time-Productive Exercises: For those with occupied plans, compound activities can be a fantastic decision, as they permit you to work various muscle bunches in a single meeting, saving time. Further developed Stance: Fortifying numerous muscle gatherings can assist with further developing stance by addressing strong, uneven characters that might add to unfortunate views. Improved Center Strength: Many compound developments connect with the center muscles as stabilizers, assisting with fostering areas of strength for a steady center. Assortment: A wide assortment of compound activities to browse, permitting you to keep your exercises intriguing and testing as you progress. Ten best compound exercises for legs Calf raises   Standing calf raises initiate the two muscles that overview the rear of the lower leg: the gastrocnemius and soleus. These muscles are essential in lower leg flexion and augmentation, moving, running, and bouncing. The gastrocnemius likewise works with the hamstrings to control knee flexion, while the soleus keeps up with appropriate equilibrium and siphons blood from your leg back up to your heart. At the point when powerless, the lower leg muscles strain and tear all the more without any problem. Calf raises are a simple, low-influence technique for reinforcing the gastrocnemius and soleus. Solid, adaptable lower leg muscles bring about better strength and equilibrium, diminished hazard of foot and lower leg injuries, three and better readiness while running and bouncing. Barbell deadlift   The deadlift is an extraordinary method for building solid legs and butt. In a deadlift, you lift the load starting from the earliest stage thigh-level utilizing your leg and hip muscles, however, with the help of the vast majority of the enormous muscle gatherings of your body. Deadlifts are performed with a bar and plate or a decent free weight. However, you can likewise do it with free weights. It is a specialty of powerlifters that you should pay attention to overall wellness weight lifting. Make the deadlift a piece of your solidarity, preparing exercises to fabricate muscle and practical wellness. Leg press   The leg press is a compound weight lifting practice in which the singular drives a weight or opposition away from them utilizing their legs. The term leg press machine alludes to the gadget used to play out this activity. The leg press can assess a competitor’s general lower body strength. It can assist with developing squat fortitude. Whenever performed accurately, the slanted leg press can assist with creating knees to oversee heavier freeloads. Again, it can cause grave injury: the knees could twist the incorrect way on the off chance that they are locked during the activity. Romanian deadlift   The Romanian Deadlift, frequently referred to as an RDL, is a famous deadlift variety that focuses on the lower body muscles, especially the glutes, hamstrings, and erector spinae. The RDL starts standing

Read More »
wall mounted boxing workout

Wall Mounted Boxing Workout: Innovative Fitness Solutions

Introduction : Have you ever wanted to do boxing without leaving your home? Wall mounted boxing workout allows you to experience an intense full-body workout using just a punching bag mounted in your house. Wall mounted boxing workouts have exploded in popularity due to their effectiveness and accessibility. Whether you’re a boxing newbie or a veteran, wall mounted training enhances your skills, endurance, and overall fitness. This comprehensive guide will provide everything you need to know, from setting up your space to essential equipment, training tips, safety, and sample workouts for all levels.   Setting Up Your Space for Wall Mounted Boxing Workout Before starting a wall mounted boxing workout at home, it’s important to set up an appropriate, dedicated space for this activity. Optimizing your workout area is key for both safety and performance. Location Selection The first consideration is choosing a location within your home where there is enough open floor space for a best wall mounted boxing workout. Look for a room, corner, or area where you can securely mount your punching bag without obstruction. So, make sure there is enough clearance around the bag for you to move freely and punch from all angles. Clear Your Environment Before setting up, clear the area of any objects or furniture that could get in the way or pose a hazard. Remove items like fragile decor, low coffee tables, or clutter that might limit your movement around the wall mounted bag. Creating an open, unencumbered space allows you to train safely and effectively. Flooring Take flooring into consideration when designing your workout space. Cushioned, shock-absorbing surfaces are ideal for boxing to reduce impact on your joints and body. Invest in quality mats, padded turf, or rubber flooring. The proper flooring creates a stable, non-slip base that also helps minimize noise. Moreover, setting up a dedicated wall mounted boxing zone allows you to work out comfortably at home. Take the time to optimize your space for safety and performance before mounting your bag. Essential Equipment for Wall Mounted Boxing Workout To start wall mounted boxing training, there are a few key pieces of equipment you’ll need to purchase. Having the proper gear and setup is vital for both safety and getting the most out of your workouts. Boxing Gloves A quality pair of boxing gloves is essential protective gear. Look for gloves with adequate wrist support and padding to protect your hands and knuckles from injury when punching repeatedly. Make sure they fit snugly. Punching Bag Select a wall mounted punching bag designed for your space, goals, and experience level. Types include heavy bags, speed bags, angled bags, and uppercut bags. Choose one appropriately weighted and sized for your needs. Hand Wraps Hand wraps support your wrists and knuckles by wrapping around them before putting on gloves. They absorb sweat and cushion your hands from impact. Invest in hand wraps long enough to wrap both hands fully. Jump Rope A jump rope helps warm up your muscles before boxing and builds cardio conditioning. It’s an inexpensive but useful piece of equipment. Wall Mounted boxing Machine Purchase a reinforced wall mounted boxing machine or system designed for punching bags. Properly mounting your bag is crucial for stability and safety. Having the right boxing gear will maximize your training and prevent injury. Invest in quality equipment to optimize your wall mounted boxing workout.   Warm Up and Stretch Out for Wall Mounted Boxing Workout Before any intense physical training, it’s important to warm up muscles and joints to prevent injury. Take 5-10 minutes to warm up before wall mounted boxing workout sessions. Jumping Jacks Jumping jacks are a classic full-body movement to get your heart pumping and your muscles activated. Do 1-2 sets before boxing. Arm Circles Stand with feet shoulder-width apart and extend arms out to the sides. Gently make small circles that gradually increase in size to warm up the shoulders. Shoulder Rolls Roll shoulders backward and forward in a controlled motion to loosen up the upper back and shoulders. Neck Stretches Slowly tilt the neck from side to side, forward and back. Avoid overstretching. This releases tension. Leg Swings Standing near a wall, swing one leg front to back in a controlled manner to loosen hips, then switch legs. Be sure to include movements mimicking punches and footwork patterns you’ll do while boxing. Properly warming up makes training more effective and prevents strains. Basic Boxing Techniques To maximize your wall mounted boxing training, it’s important to learn proper boxing form and technique. Mastering just a few basic punches and footwork patterns will go a long way.  Boxing Stance Spread your weight equally across both feet and place your feet shoulder-width apart. Moreover, keep your dominant hand in front with your lead hand near your chin for defense. Jab The jab is a quick, straight punch thrown with your lead hand. Extend your arm fully, turning your fist vertically on impact for efficiency. Keep your elbow tucked in slightly and rotate your core as you jab. Cross The cross is a powerful straight punch with your rear hand. Rotate your hips and pivot your rear foot as you extend your fist across your body toward the target. Hook A hook is a horizontal punch thrown with your elbow bent at 90 degrees. Rotate your hips while swinging your elbow horizontally while pivoting on the ball of your lead foot. Uppercut The uppercut is a short, rising punch useful against opponents at close range. Bend your knees and explode upward, rotating your fist vertically at the last second. Furthermore, mastering these basic punches and applying proper technique makes your wall mounted boxing workout more effective.   Workout Routines from Beginner to Advanced Level Beginner Boxing Workout Routine When first starting with a wall mounted boxing workout, it’s important to begin with a tailored beginner-level exercise routine. The development of balance, coordination, and proper form is the main goal. Jump Rope Warm-up: 5 minutes Shadow Boxing: 3 rounds, 1 minute each

Read More »
Scroll to Top