Blogs

5 Exercises For Apple-Shaped Women To Transform Into Hourglass Figures

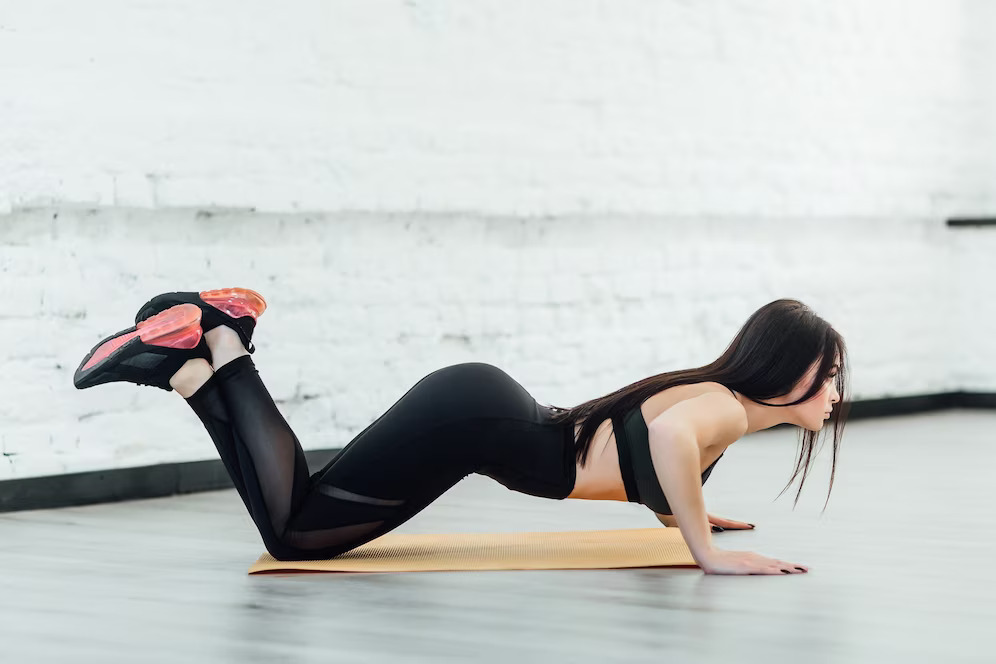
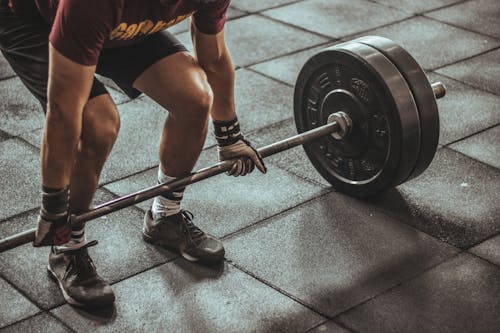
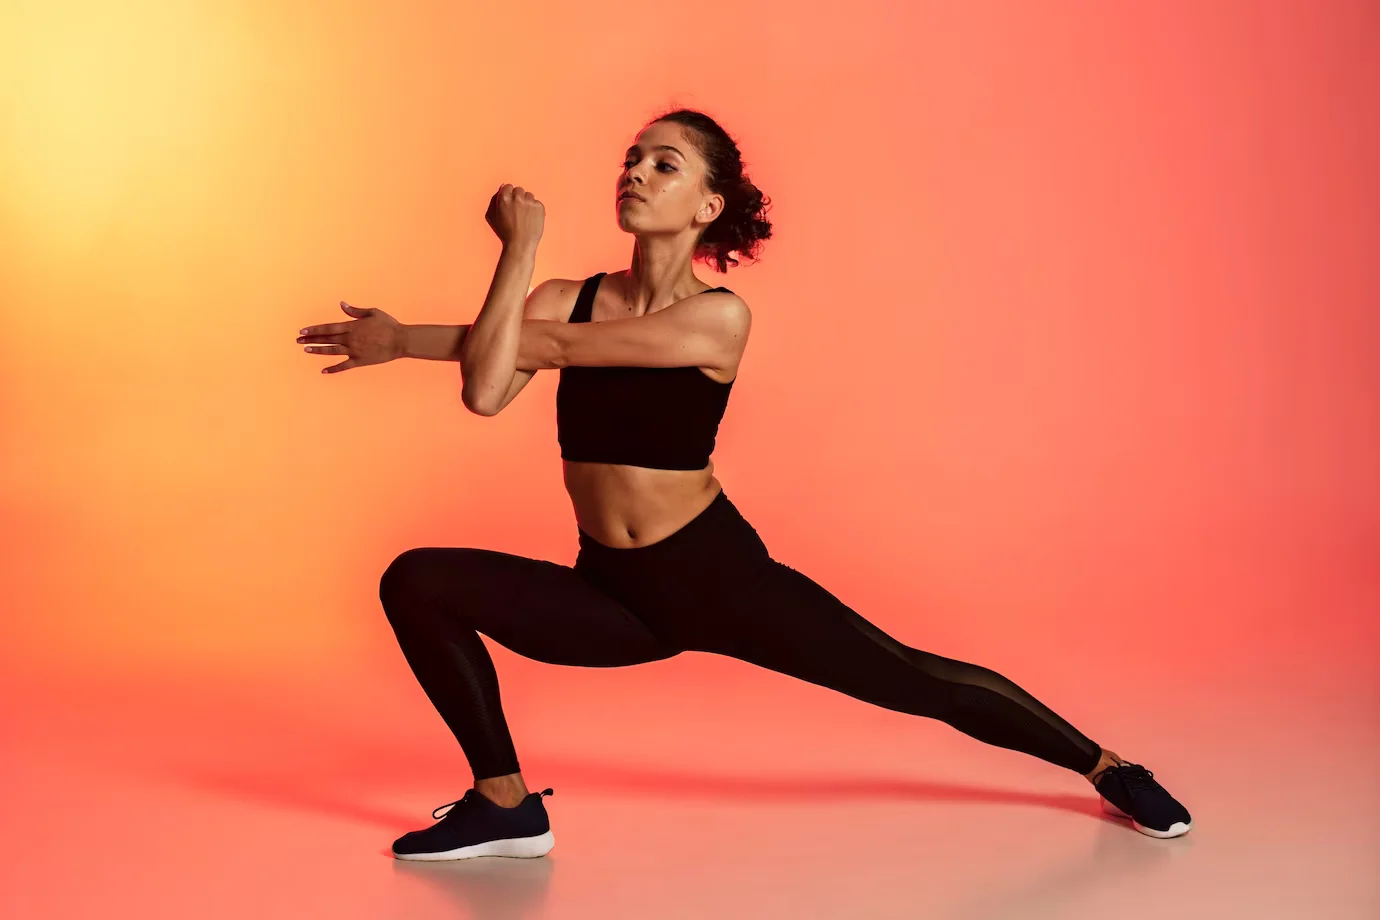
Hey there, fabulous apples! 🍎 So, you’re rocking that beautiful apple-shaped figure and want to keep it healthy and happy, right? Well, you’ve landed in the right orchard of fitness advice. We get it; those curves are your pride, and you’re not looking to become a pear or a banana any time soon. Fear not, because we’ve got your back, or should we say, your core? In this juicy blog post, we’re going to spill the beans on the best exercises for apple shaped women. We’ll help you whittle that waistline, boost your confidence, and have you feeling like the apple of everyone’s eye in no time. So grab a water bottle and a sweatband, because it’s time to crunch and squat our way to fitness glory: Best Workouts For Apple Shaped Body Let’s take a look at the best exercises that are tailor-made for apple-shaped women: 1.      Bicycle Crunches Image Source Bicycle crunches effectively target the abdominal muscles, helping to tone and strengthen the core. Engaging the core in this way can aid in reducing abdominal fat, which is a common concern for apple-shaped individuals. Step-By-Step Guide Lie on your back with your hands behind your head, fingers lightly supporting your head. Lift your legs off the ground and bend them at a 90-degree angle. Bring your right elbow and left knee toward each other while straightening your right leg. Simultaneously twist your torso to the right. Repeat on the opposite side, bringing your left elbow and right knee together while straightening your left leg. Continue this pedaling motion, alternating sides, for the desired number of repetitions. Mistakes To Avoid Neck Strain: Don’t pull on your neck with your hands; keep your hands lightly supporting your head, and focus on bringing your shoulder blades off the ground. Jerky Movements: Perform the exercise in a controlled, fluid motion to engage the core effectively and prevent straining the lower back. 2.      Russian Twists Image Source Russian twists are amongst the best exercises for apple-shaped bodies as they work the oblique muscles, helping to create a more defined waistline. Strengthening the obliques can also improve posture and spinal stability, which is important for those with excess weight in the midsection. Step-By-Step Guide Sit on the floor with your knees bent and your feet flat on the ground. Lean back slightly, keeping your back straight and your core engaged. Clasp your hands together in front of you or hold a weight with both hands. Lift your feet off the ground, balancing on your sit bones. Rotate your torso to the right, bringing the weight or your clasped hands toward the ground beside your right hip. Return to the center and then rotate to the left, bringing the weight or your hands beside your left hip. Continue alternating sides for the desired number of repetitions. Mistakes To Avoid Hunching Your Back: Maintain good posture by keeping your back straight and chest up; avoid rounding your back, which can strain your lower back. Using Excessive Weight: Start with a manageable weight to maintain proper form; using too heavy a weight can lead to poor technique. 3.      Dumbbell Row Image Source Dumbbell rows target the upper back and shoulders, helping to balance the overall physique. These compound exercises and workouts for apple shaped women engage multiple muscle groups, aiding in calorie burning and overall fat loss. Step-By-Step Guide Stand with your feet shoulder-width apart, holding a dumbbell in each hand. Bend your knees slightly and hinge at your hips, keeping your back straight. Let the dumbbells hang in front of you, arms fully extended. Pull the dumbbells toward your hips, squeezing your shoulder blades together. Lower the dumbbells back down with control. Repeat for the desired number of repetitions. Mistakes To Avoid Improper Form: Avoid using your lower back to lift the weights; instead, engage your upper back muscles while keeping your core stable. Overarching the Back: Keep your spine neutral; don’t arch or round your back during the exercise. 4.      Donkey Kicks Image Source Donkey kicks focus on the glutes, helping to lift and shape the buttocks, which can balance the body’s proportions. The leg movement involved also contributes to calorie expenditure. Step-By-Step Guide Start on your hands and knees in a tabletop position. Keep your wrists under your shoulders and your knees under your hips. Engage your core and lift your right knee off the ground, keeping it bent at a 90-degree angle. Push your right foot up toward the ceiling, straightening your leg. Lower your leg back to the starting position. Repeat for the desired number of repetitions on one side before switching to the other. Mistakes To Avoid Lifting the Leg Too High: Focus on lifting your leg to hip level, rather than arching your back or kicking too high. Neglecting Core Engagement: Keep your core engaged throughout the movement to support your lower back and maintain stability. 5.      Side Leg Lifts Image Source Side leg lifts target the hips and thighs, helping to tone and firm these areas. Working on the hips and thighs can enhance lower body symmetry, making this a result driven apple shaped body workout. Step-By-Step Guide Lie on your side with your legs straight and stacked on top of each other. Rest your head on your lower arm or use your hand for support. Lift your top leg as high as you can without moving your torso. Lower it back down with control. Repeat for the desired number of repetitions on one side before switching to the other. Mistakes To Avoid Lifting Too High: Lift your leg to a comfortable height; lifting too high can strain your lower back and hip. Using Momentum: Perform the exercise slowly and with control; avoid swinging your leg to prevent injury. Final Verdict Getting in shape and staying healthy isn’t about conforming to some one-size-fits-all ideal. It’s about understanding your unique body and giving it the love and attention it deserves. With these fabulous exercises for apple shaped body in

Read More »

5 Insane Compound Triceps Exercises: A Shortcut To Sculpted Arms

Are you tired of endlessly searching for the perfect triceps exercises to sculpt those killer arms? Well, we’ve got the ultimate triceps workout solution for you. In this blog post, we’re about to discuss compound triceps exercises – the secret sauce to achieving those toned and powerful arms you’ve always dreamed of. We get it; time is precious, and you want workouts that deliver maximum results in minimal time. Compound triceps exercises are here to save the day. These exercises target your triceps and engage multiple muscle groups, giving you a bang for your buck. Let’s try them out: Best At Home Compound Triceps Exercises Listed below are the best compound triceps workouts that are sure to become your new favorite: 1.      Parallel Bar Dips Image Source Parallel bar dips are an exceptional triceps compound exercise that targets the triceps and engages the chest and shoulders. By consistently performing this exercise, individuals can effectively increase triceps strength and size while also improving overall upper body strength. It’s particularly beneficial for enhancing the definition and tone of the triceps muscles. Setup: Find a set of parallel bars or dip bars. Stand between the bars, facing forward. Grip the bars with your palms facing down and your arms fully extended. Execution: Lower your body by bending your elbows until your upper arms are parallel to the ground or slightly below. Keep your torso upright and your chest up. Push yourself back up to the starting position by straightening your arms. Tips: Keep your shoulders down and back to avoid unnecessary stress on them. To increase difficulty, you can add weight using a dipping belt or hold a dumbbell between your feet. 2.      Diamond Push-Ups Image Source Diamond push-ups are a versatile no-equipment compound triceps exercise that isolates the triceps muscles. This exercise can be an excellent addition to a home or gym workout routine for those looking to sculpt and strengthen their triceps without the need for equipment. It’s a valuable exercise for enhancing muscular endurance and promoting well-defined triceps. Setup: Start in a standard push-up position with your hands close together, forming a diamond shape with your thumbs and index fingers. Keep your body in a straight line from head to heels. Execution: Lower your body by bending your elbows while keeping them close to your sides. Lower yourself until your chest is just above the diamond formed by your hands. Push yourself back up to the starting position. Tips: Keep your core engaged and maintain a straight line from head to heels throughout the exercise. If standard diamond push-ups are too challenging, you can start with your knees on the ground and gradually progress to full push-ups. 3.      Close-Grip Bench Press Image Source The close-grip bench press is a classic strength training exercise that focuses on the triceps, making it an indispensable addition to any chest and triceps workout. By using a narrower grip on the barbell, individuals can place greater emphasis on the triceps while still engaging the chest and shoulders. This exercise is particularly advantageous for building raw triceps strength and supporting overall upper-body development. Setup: Lie on a flat bench with your back, shoulders, and hips firmly on the bench. Grip the barbell with your hands closer than shoulder-width apart, palms facing forward. Lift the barbell off the rack and position it over your chest with your arms fully extended. Execution: Lower the barbell by bending your elbows while keeping them close to your body. Lower the barbell until it touches your chest. Push the barbell back up to the starting position, fully extending your arms. Tips: Maintain a tight grip on the barbell and keep your wrists straight. Use a spotter when lifting heavy weights to ensure safety. 4.      Dumbbell Tate Press Image Source The Tate press is a highly targeted compound triceps exercise with dumbbells that isolate the triceps brachii. This movement allows individuals to focus on the full extension of the triceps while minimizing involvement from other muscle groups. As a result, it is effective in sculpting well-rounded, strong triceps and can be instrumental in achieving a balanced upper body appearance. Setup: Lie on a flat bench with a dumbbell in each hand. Extend your arms over your chest, palms facing each other. Execution: Bend your elbows and lower the dumbbells to the sides of your chest. Keep your elbows bent and close to your sides throughout the movement. Extend your arms, pushing the dumbbells back up to the starting position. Tips: Maintain control throughout the exercise and avoid swinging the weights. Start with a light weight to ensure proper form before increasing resistance. 5.      Elevated Pike Push-Up Image Source The elevated pike push-up is an effective bodyweight exercise that primarily challenges the triceps, shoulders, and upper chest. By incorporating this exercise into their routine, individuals can enhance triceps endurance and develop shoulder strength. Moreover, it improves core stability and balance, making it a valuable addition to any calisthenics or bodyweight training regimen. Setup: Assume a push-up position with your feet elevated on a stable surface, such as a bench or step. Walk your hands closer to your feet, forming a pike position with your hips raised. Execution: Lower your body by bending your elbows. Lower yourself until your head is just above the ground or floor. Push yourself back up to the starting position. Tips: Maintain a strong core and engage your glutes to keep your body in a straight line. If the exercise is too challenging, you can perform it with your feet on the ground instead of elevated. Final Words No more wasting time with endless sets of isolation exercises when you can get more done with fewer moves. Compound triceps exercises save you time and deliver better overall results by engaging multiple muscle groups simultaneously.

Read More »
compound resistance band exercises

Looping Your Way To Fitness: 5 Best Compound Resistance Band Exercises

Are you tired of the same old gym routine? Looking to spice up your workouts without breaking the bank on fancy equipment? Well, you’re in for a treat because today, we’re about to discuss some of the best compound resistance band exercises. Forget about bulky machines and pricey gym memberships – these versatile bands are about to become your new best workout buddies. We’re about to show you how to turn those colorful bands into your secret weapon for a full-body, muscle-sculpting, calorie-burning extravaganza. It’s time to stretch, flex, and have a ton of fun while you’re at it! Let’s get started! 🚀 Best Compound Resistance Band Exercises Let’s take a look at the top compound resistance band workouts that will up your fitness game: 1.      Resistance Band Floor Press Image Source The Resistance Band Floor Press primarily targets the chest, triceps, and shoulders. This resistance band compound exercise is highly effective for building upper body strength and muscle definition. It also engages the stabilizer muscles as you work to control the resistance band’s tension throughout the movement. Additionally, resistance bands allow for a full range of motion, helping to improve muscle engagement and flexibility in the shoulders and chest. Muscles Targeted: Chest, Triceps, Shoulders Equipment Needed: Resistance band, sturdy anchor point Step-by-Step Guide Setup: Attach one end of the resistance band to a sturdy anchor point (e.g., a pole, door frame, or wall) at chest height. Lie on your back with your knees bent and your feet flat on the floor. Band Placement: Hold the other end of the resistance band in each hand, making sure it’s even on both sides. Your hands should be slightly wider than shoulder-width apart. Press: With your elbows bent and your palms facing away from you, press the band upward until your arms are fully extended. Squeeze your chest muscles at the top of the movement. Lower: Slowly lower the band back to the starting position, keeping your elbows at about a 90-degree angle. Repetitions: Perform the desired number of repetitions, maintaining control throughout the movement. 2.      Single-Leg Banded Deadlift Image Source The Single-Leg Banded Deadlift is an excellent exercise for targeting the hamstrings, glutes, and lower back while also enhancing balance and stability. By isolating one leg at a time, it helps to address muscular imbalances that can occur in the lower body. The resistance band adds resistance throughout the entire range of motion, making this exercise particularly effective for strengthening the posterior chain and improving hip mobility. It’s a valuable addition to any lower body workout routine and can help prevent injuries related to weak glutes and hamstrings. Muscles Targeted: Hamstrings, Glutes, Lower Back Equipment Needed: Resistance band Step-by-Step Guide Setup: Stand on the center of the resistance band with your feet hip-width apart. Hold the band’s handles in each hand. Single Leg: Shift your weight to one leg while keeping a slight bend in the knee of your non-weight-bearing leg. This is your starting position. Hinge Forward: Keeping your back straight, hinge at your hips and lower your torso toward the ground. As you do this, extend your non-weight-bearing leg behind you for balance. Stretch: Feel the stretch in your hamstrings and maintain a straight back throughout the movement. Return: Push through your heel and return to an upright position while squeezing your glutes at the top. Repetitions: Perform the desired number of repetitions on one leg before switching to the other. 3.      Resistance Band Push-Ups Image Source Resistance Band Push-ups are a dynamic variation of the classic push-up, adding an extra challenge to your chest, shoulders, triceps, and core. These exercises intensify the effort required in both the push-up and the push-up return phases due to the band’s resistance. As a result, they promote greater muscle activation and development in the upper body. By adjusting the band’s tension, you can easily customize the difficulty level, making it a suitable compound resistance band workout for various fitness levels. Incorporating resistance bands into push-ups can help individuals progress toward performing more traditional push-ups with perfect form. Muscles Targeted: Chest, Shoulders, Triceps, Core Equipment Needed: Resistance band Step-by-Step Guide Setup: Place the resistance band around your back, just below your shoulder blades. Hold one end of the band in each hand, and get into a push-up position with your hands shoulder-width apart. Push-up: Lower your chest toward the ground while keeping your body in a straight line. The resistance band provides added tension as you push up. Push-up Variation: You can vary the resistance by adjusting the placement of the band on your back or using a thicker band. Repetitions: Perform the desired number of push-ups while maintaining proper form. 4.      Banded Side Plank Pull Image Source The Banded Side Plank Pull is an outstanding exercise for strengthening the obliques, shoulders, and core. By incorporating a resistance band, it adds a unique challenge to the side plank position, making it more effective for building stability and muscle endurance in the core and shoulders. This exercise is particularly beneficial for athletes involved in rotational sports or anyone looking to improve core strength and posture. It also enhances shoulder mobility and can aid in preventing lower back pain by reinforcing the muscles responsible for lateral stability. Muscles Targeted: Obliques, Shoulders, Core Equipment Needed: Resistance band Step-by-Step Guide Setup: Lie on your side and loop the resistance band around your top foot. The band should be anchored on the bottom foot, and you should be in a side plank position with your elbow directly beneath your shoulder. Side Plank: Lift your hips off the ground, keeping your body in a straight line. Pull: Reach your free arm over your head and grab the band. Pull the band down toward your hip while keeping your core engaged and your body in a straight line. Return: Slowly release the band and return to the starting side plank position. Repetitions: Perform the desired number of repetitions on one side before switching to the other. 5.      Banded X

Read More »

Quick & Effective: 5 Chest Warm-Up Stretches You Shouldn’t Skip

Are you tired of your workouts feeling like a chilly morning jog through a snowstorm? Well, you’re in for a treat because today, we’re going to thaw out those icy chests and get you prepped for a fiery workout session. We’ve all been there – the struggle of attempting to lift weights or nail that push-up when your chest feels tighter than a clamshell. But fear not, my friends, because we’ve got a solution that’s hotter than a jalapeño on a summer day. In this blog post, we’re going to present some of the top-notch chest warm-up stretches. These stretches aren’t just your run-of-the-mill “touch your toes” routines; we’re talking about the kind of stretches that’ll make your chest muscles feel like they just got a front-row seat at a rock concert – pumped up and ready to rock and roll. Let’s fire up those chest muscles and get ready to conquer your workouts like a true fitness champ: Best Chest Warm Up Stretches At Home Let’s take a look at some of the warm up stretches and exercises for chest: 1.     Child’s Pose Image Source  Child’s Pose is a gentle stretch that offers several benefits for the chest. When you sink your chest toward the floor and extend your arms forward, this pose helps open up the front and shoulders. It’s particularly effective at relieving tension and tightness in the pectoral muscles, which can be especially beneficial if you spend long hours at a desk or in front of a computer. Child’s Pose also promotes relaxation and deep breathing, allowing you to release stress and improve your overall posture. Step-By-Step Guide Start by kneeling on the floor with your big toes touching and knees spread apart. This is your starting position. Sit back on your heels, ensuring that your toes remain touching and your knees are comfortably spread. Reach your arms forward on the floor, extending them as far as you can. Lower your chest and forehead toward the ground while keeping your arms extended. Allow your forehead to rest on the floor and relax your neck completely. Keep your hips pressed back towards your heels. Hold this stretch for 20-30 seconds or longer, focusing on deep, rhythmic breathing. Feel the gentle stretch in your lower back, shoulders, and arms. To release, gently walk your hands back towards your body, lifting your upper body, and return to a kneeling position. 2.     Thread the Needle Stretch Image Source  Thread the Needle Stretch targets the chest and shoulders with precision. As you thread one arm under the other while in a tabletop position, you stretch and release tension in the upper chest and shoulder area. This chest warm up stretch can be particularly helpful for individuals who experience tightness in their chest due to activities like weightlifting or carrying heavy loads. It provides relief and greater flexibility in the chest muscles, promoting a better range of motion in the shoulders. Step-By-Step Guide Begin on your hands and knees in a tabletop position, with your wrists under your shoulders and knees under your hips. Inhale and reach your right arm up toward the ceiling, opening your chest to the right. Exhale and thread your right arm under your left arm, lowering your right shoulder and cheek to the floor. Keep your left hand on the ground for support and gently slide it forward. Feel the stretch in your right shoulder and upper back. Hold the stretch for 20-30 seconds, allowing your body to relax into it. To release, slowly unwind by lifting your right arm back up to the ceiling, then placing it back on the ground. Repeat the stretch on the opposite side. 3.     Shoulder Blade Squeeze The Shoulder Blade Squeeze is less of a stretch and more of an isometric exercise for chest muscles. By actively squeezing your shoulder blades together, you engage the muscles of the upper back and open up the chest. This movement promotes better posture and can alleviate the effects of slouching or sitting hunched over a computer. It also strengthens the muscles that support the chest and shoulders, reducing the risk of developing poor posture-related issues. Step-By-Step Guide Stand up straight with your feet shoulder-width apart, and let your arms hang naturally by your sides. Take a deep breath in, expanding your chest. As you exhale, gently draw your shoulder blades together. Imagine trying to pinch a pencil between your shoulder blades. Hold the squeeze for 5-10 seconds, maintaining good posture with your shoulders down away from your ears. Release the squeeze while inhaling. Repeat this stretch 5-10 times. 4.     Doorway Stretch Image Source The Doorway Stretch is a targeted stretch for the chest and front shoulder muscles. By pressing your forearms against a door frame and leaning forward slightly, you create a deep stretch in the chest area. This is especially helpful for individuals who may have tightness in the chest due to activities like weightlifting or excessive sitting. Regularly practicing the Doorway Stretch can increase chest flexibility and reduce the risk of developing rounded shoulders. Step-By-Step Guide Stand in a doorway with your feet shoulder-width apart. Raise your arms to shoulder level and bend your elbows at 90-degree angles. Place your forearms and palms on the door frame, one on each side. Step one foot forward, leaning into the doorway, allowing your chest to open up. You should feel a deep stretch in the front of your shoulders and chest. Hold the stretch for 20-30 seconds, maintaining a slight lean forward. Focus on your breathing; inhale deeply and exhale fully. Step back to release, and repeat the stretch several times, gradually moving your arms higher on the door frame for different angles of stretch. 5.     Cat-Cow Stretch Image Source  Cat-Cow Stretch is a dynamic yoga sequence that benefits the chest in a different way. In the Cow Pose, the chest is expanded, and the shoulder blades draw together, promoting openness in the chest and improved posture. In contrast, the Cat Pose rounds

Read More »

Booty Boot Camp: 5 Cheeky Butt Exercises For Men To Build A Stronger Rearview

We’re about to discuss a topic that often gets overshadowed in the world of fitness: butt exercises for men. Sure, we’ve all seen those impressive biceps and chiseled chests gracing the covers of fitness magazines, but let’s not forget about the powerhouse that is your posterior. Whether you’re looking to enhance your athletic performance, rock those fitted jeans, or simply have a stronger backside, we’ve got your back… well, your butt, to be precise. In this no-nonsense guide, we’ll present the best butt exercises for men that sculpt those glutes and provide a slew of functional benefits. So, grab your workout gear and get ready to give your backside the attention it deserves. But remember, the road to a killer booty is paved with sweat, determination, and yes, a dash of humor. So, let’s get cheeky: How To Improve Buttocks For Male At Home? Listed below are the best glute workouts for men: 1.     Glute Bridges Image Source Glute bridges are the unsung heroes of butt workouts. By targeting your gluteus maximus and hamstrings, they not only help sculpt a rounder, firmer butt but also provide functional benefits. Strong glutes can enhance your athletic performance, improving your speed and power in activities like running and jumping. Additionally, they play a crucial role in stabilizing your pelvis and lower back, reducing the risk of lower back pain and injury. How To Do It? Lie flat on your back with your knees bent at a 90-degree angle and your feet hip-width apart. Ensure that your feet are flat on the ground. Place your arms by your sides, palms facing down, and your fingertips lightly touching your heels. Take a deep breath in and exhale as you engage your core muscles. Push through your heels to lift your hips off the ground while keeping your upper back and shoulders on the floor. Continue lifting until your body forms a straight line from your shoulders to your knees, with your knees and hips in alignment. At the top of the movement, make sure to squeeze your glutes tightly to maximize the contraction. Hold the bridge position for a moment, feeling the tension in your glutes. Slowly lower your hips back down to the ground, one vertebra at a time, while maintaining control. Complete the desired number of repetitions, aiming for 3 sets of 12-15 reps. 2.     Romanian Deadlifts Image Source  Romanian deadlifts are a powerhouse butt exercise for men that will produce results for your posterior chain, including your glutes, hamstrings, and lower back. They help shape your butt, improve your posture, and reduce the risk of back pain. These deadlifts enhance your hip hinge movement pattern, essential for lifting heavy objects and maintaining a strong, functional core. Strengthening your lower back and hamstrings can also lead to improved balance and stability, making everyday movements feel more effortless. How To Do It? Stand with your feet hip-width apart and your toes pointing forward. Hold a barbell or dumbbells in front of your thighs with an overhand grip, hands shoulder-width apart. Keep your knees slightly bent, maintaining a natural arch in your lower back. Initiate the movement by pushing your hips back while keeping your chest up and your back straight. Lower the weights along the front of your thighs, maintaining a slight bend in your knees throughout the movement. Continue lowering the weights until you feel a stretch in your hamstrings, or your back starts to round. Your back should remain flat throughout. Once you’ve reached the bottom of the movement, reverse it by driving your hips forward and standing back up. Squeeze your glutes at the top of the movement to fully engage them. Aim for 3 sets of 8-10 reps with proper form. 3.     Step-Ups Image Source Step-ups are not just about building an impressive butt; they also boost your lower body’s overall strength and stability. This men glute at-home exercise engages your glutes, quadriceps, and calves while challenging your balance and coordination. Beyond aesthetics, step-ups can enhance your functional fitness, making activities like climbing stairs or hiking more manageable. They also target each leg independently, helping to correct any muscle imbalances and reducing the risk of injuries related to strength disparities between your legs. How To Do It? Find a sturdy bench or platform that is knee-high. Stand in front of it with your feet hip-width apart. You can choose to hold dumbbells at your sides for added resistance. Step onto the bench with one foot, ensuring that your entire foot is on the platform. As you step up, push through your heel to lift your body up. Bring your other foot up to join the first one, fully extending your knee. Stand straight at the top of the step, with both feet on the bench. Step back down with one foot at a time, returning to the starting position. Alternate legs for each repetition. Aim for 3 sets of 10-12 reps per leg. 4.     Donkey Kicks Image Source Donkey kicks are the secret sauce for isolating your glutes and building that coveted roundness. They’re fantastic for targeting the gluteus maximus, and their range of motion allows for a deep contraction in each repetition. Plus, these kicks improve your hip mobility and flexibility, making them a valuable addition to your lower body routine. How To Do It? Start on all fours, with your hands directly under your shoulders and your knees under your hips. Ensure your wrists, elbows, and shoulders are aligned, and your knees, hips, and ankles are in line as well. Keep your knee bent at a 90-degree angle and flex your foot on one leg. Lift one leg up, keeping it bent, until your thigh is parallel to the ground. Focus on squeezing your glutes at the top of the movement. Lower your leg back down without touching the ground to maintain tension in your glutes and hamstrings. Repeat the lift for the desired number of reps. Complete the set on one leg before switching to the

Read More »

No Pull-Up Bar? No Problem! 5 Dumbbell Lat Exercises For A Strong Back At Home

When it comes to building a well-defined and powerful back, one of the key areas to focus on is the latissimus dorsi, commonly known as the “lats”. These muscles contribute to a V-shaped torso and play a crucial role in maintaining good posture and overall upper body strength. Whether you’re a fitness enthusiast or a beginner taking your first steps into the world of exercise, incorporating dumbbell lat exercises into your routine can be a game-changer. In this guide, we’ll walk you through a selection of easy-to-understand and effective dumbbell exercises that will help you target and transform your lats: Top Lat Exercises with Dumbbells Listed below are the dumbbell lat workouts that are sure to do wonders: 1.     Bent Over Dumbbell Row Image Source  The Bent Over Dumbbell Row is a classic compound exercise that offers exceptional benefits for developing the lats. By targeting the latissimus dorsi muscles, this exercise promotes enhanced width and thickness in the upper back. As you pull the dumbbells toward your hips, the lats engage in a powerful contraction, promoting muscle growth and strength. Additionally, this movement contributes to improved posture and spinal stability, as it engages the muscles responsible for maintaining an upright position. Incorporating the Bent Over Dumbbell Row into your routine can lead to a well-defined and formidable back, while also aiding in overall functional strength. Step-By-Step Guide Stand with your feet shoulder-width apart, holding a dumbbell in each hand, palms facing your torso. Hinge at your hips and bend your knees slightly to lean forward. Keep your back straight and chest up. Let the dumbbells hang at arm’s length toward the floor, with your arms fully extended. Engage your core, retract your shoulder blades, and pull the dumbbells towards your hips while exhaling. Focus on using your back muscles to initiate the movement. Squeeze your shoulder blades together at the top of the movement and hold for a brief moment. Slowly lower the dumbbells back to the starting position while inhaling. Perform the desired number of repetitions, maintaining proper form throughout. 2.     Dumbbell Renegade Row Image Source The Dumbbell Renegade Row is a dynamic and challenging dumbbell lat exercise that not only engages the lats but also involves the core and stabilizing muscles. By performing rows in a high plank position, this exercise requires optimal muscle engagement to control the movement and prevent rotation. The lats work synergistically with the core to stabilize the body, enhancing both upper-body strength and core stability. This exercise is particularly beneficial for those seeking functional strength, as it mimics movements required in everyday activities. Integrating the Dumbbell Renegade Row into your routine can lead to a balanced and strong physique while enhancing overall body control. Step-By-Step Guide Start in a high plank position with a dumbbell in each hand, wrists aligned with shoulders, and core engaged. Keep your body in a straight line from head to heels. Feet should be slightly wider for stability. Perform a row with one dumbbell, pulling it towards your hip while keeping your elbow close to your body. Focus on squeezing your lat muscles. Lower the dumbbell back to the ground and perform a row with the other arm. Alternate rows, making sure to stabilize your body and avoid excessive twisting. Continue alternating rows for the desired number of repetitions on each side. 3.     Dumbbell Pullover Image Source The Dumbbell Pullover is an underrated exercise that targets the lats while also engaging the chest and triceps. By elongating the lat muscles through a controlled stretch, this movement contributes to improved flexibility and mobility in the upper body. As you pull the dumbbell back up, the lats contract, facilitating muscle growth and definition. The Dumbbell Pullover can also help enhance your ribcage’s expansion capacity, potentially improving breathing mechanics. Including this exercise in your regimen can lead to a more sculpted back and a greater range of motion in the shoulders. Step-By-Step Guide Lie flat on a bench with your upper back and shoulders supported. Hold a single dumbbell with both hands, palms gripping the inside of the weight plate. Extend your arms over your chest, keeping a slight bend in your elbows. Keeping your core engaged and maintaining a slight arch in your lower back, slowly lower the dumbbell behind your head in an arc-like motion. Feel the stretch in your lats as you lower the dumbbell as far as your flexibility allows. Engage your lats to pull the dumbbell back up to the starting position, exhaling as you do so. Repeat for the desired number of repetitions, maintaining control throughout the movement. 4.     Dumbbell Reverse Fly Image Source The Dumbbell Reverse Fly is specifically designed to target the often-neglected rear deltoids and upper back muscles, including the lats. By focusing on the posterior muscles, this exercise helps balance out the shoulder girdle, which is crucial for overall shoulder health and posture. Engaging the lats during the movement assists in achieving a strong and well-rounded upper body aesthetic. Additionally, the Dumbbell Reverse Fly contributes to improved shoulder stability, which is essential for various upper body movements. Incorporating this exercise into your routine can lead to a more symmetrical and functionally strong upper back. Step-By-Step Guide Stand with your feet hip-width apart, holding a dumbbell in each hand by your sides, palms facing each other. Hinge at your hips to lean forward slightly, keeping your back straight and a slight bend in your knees. With a slight bend in your elbows, raise the dumbbells out to your sides until they reach shoulder level. Keep your arms slightly lower than your shoulders. Squeeze your shoulder blades together at the top of the movement to engage your rear deltoids. Slowly lower the dumbbells back to the starting position in a controlled manner. Perform the desired number of repetitions while focusing on maintaining proper form. 5.     Dumbbell Kroc Row Image Source The Dumbbell Kroc Row is an advanced variation of the bent over dumbbell row that offers intense benefits for lats development. By

Read More »
Best morning exercises

5 Best Morning Exercises For Energy To Kickstart Your Day On A High

If you’ve ever felt the struggle to jumpstart your morning with energy and vitality, you’re not alone. Mornings can be tough, but incorporating a few simple exercises into your routine can make a world of difference. In this blog post, we’ll explore some of the best morning exercises that are specifically designed to boost your energy levels and set a positive tone for the rest of your day. Whether you’re a fitness enthusiast or just starting your journey towards a healthier lifestyle, these exercises can be easily integrated into your morning routine, helping you feel more awake, focused, and ready to conquer whatever comes your way: Morning Exercises For A Boost Of Energy For those of you who feel down and out early in the day, we have brought the top 5 energy-filled morning exercises: 1.      Sun Salutations Image Source Sun Salutations, also known as Surya Namaskar, are a series of yoga poses that stretch and strengthen your muscles and engage your breath and focus. This rhythmic flow of movements helps to wake up your body by increasing blood circulation and oxygen intake. You gently massage internal organs as you move through the poses, promoting better digestion and detoxification. The meditative aspect of Sun Salutations calms your mind, reducing morning grogginess and providing a mental boost that lasts throughout the day. Step-By-Step Guide Stand at the front of your mat with your feet together and your hands in prayer position at your chest (Tadasana). Inhale, raise your arms overhead, arch your back slightly, and look up (Urdhva Hastasana). Exhale, fold forward from your hips, keeping your back straight (Uttanasana). Inhale, step your left leg back into a lunge, with your right knee directly above your right ankle, and look up (High Lunge). Exhale, step your right leg back to plank position. Lower your knees, chest, and chin to the floor (Ashtanga Namaskara). Inhale, slide forward into Cobra pose, lifting your chest off the ground. Exhale, lift your hips and push back into Downward Facing Dog pose (Adho Mukha Svanasana). Inhale, step your left foot forward into a lunge. Exhale, step your right foot forward and fold into Uttanasana. Inhale, rise up with a flat back, reaching your arms overhead. Exhale, bring your hands back to your chest in prayer position. Repeat the sequence, starting with the opposite leg in step 4, for a complete round of Sun Salutations. 2.      Mountain Climbers Image Source Mountain climbers are a dynamic morning workout for energy that combines cardiovascular activity with full-body engagement. Performing rapid alternating leg movements in a plank position elevates your heart rate and boosts circulation, increasing energy levels. This exercise effectively activates multiple muscle groups, including your core, legs, and shoulders, thereby enhancing overall strength and endurance. The intense nature of mountain climbers releases endorphins, the body’s natural mood lifters, helping you start your day with a positive and energetic mindset. Step-By-Step Guide Begin in a push-up position with your arms straight and your hands directly under your shoulders. Engage your core and bring your right knee towards your chest while keeping your hips down. Quickly switch legs, extending your right leg back and bringing your left knee towards your chest. Continue alternating your legs in a running motion while maintaining a strong plank position. Perform this exercise for a desired amount of time (e.g., 30 seconds to 1 minute). 3.      Bicycle Crunches Image Source Bicycle crunches are a potent core workout that engages both your abdominal muscles and obliques. This exercise mimics the motion of pedaling a bicycle while also involving a twisting motion, effectively working on your waistline. Strengthening your core improves posture and provides a stable foundation for other movements throughout the day. These muscles’ rhythmic contraction and relaxation stimulate blood flow to your brain, increasing alertness and mental clarity, making bicycle crunches an excellent morning exercise for energy boost. Step-By-Step Guide Lie on your back with your hands gently touching the sides of your head and your knees bent. Lift your head, shoulders, and feet off the ground. Straighten your right leg while simultaneously twisting your upper body to bring your left elbow towards your right knee. As you bring your left elbow to your right knee, extend your left leg out diagonally. Switch sides, bringing your right elbow towards your left knee while extending your right leg out. Continue alternating sides in a pedaling motion, like riding a bicycle. Perform this exercise for a desired amount of time or repetitions. 4.      Sit Ups Image  Source Sit ups are a classic exercise that primarily targets your abdominal muscles, providing a foundational core workout. By involving a range of motion from lying flat to sitting up, this exercise engages your abs, hip flexors, and lower back. Improved core strength contributes to better balance and stability, which is essential for a confident and active morning. Sit ups also promote blood flow to your brain, enhancing cognitive function and helping you shake off morning drowsiness. Step-By-Step Guide Lie on your back with your knees bent and your feet flat on the floor. Cross your arms over your chest or place your hands behind your head (avoid pulling on your neck). Engage your core and lift your upper body off the ground, curling your spine as you come up. Keep your feet grounded and use your abdominal muscles to perform the movement. Lower your upper body back down with control, but don’t fully rest your head on the ground before the next repetition. Perform this exercise for a desired number of repetitions. 5.      Jumping Jacks Image Source Jumping jacks are a simple yet effective way to elevate your heart rate and increase circulation rapidly. The explosive motion of jumping while simultaneously moving your arms overhead engages your cardiovascular system, helping to awaken your body. This energy-boosting morning exercise also encourages deeper breathing, delivering more oxygen to your muscles and brain. The rhythmic and energetic nature of jumping jacks acts as a natural stimulant, making them an excellent choice to

Read More »
Calisthenics Chest exercises

5 Travel-Friendly Calisthenics Chest Exercises From Anywhere, Anytime

When it comes to building a strong, chiseled upper body, it’s hard to overlook the importance of a well-developed chest. The chest muscles, also known as pectorals, contribute to an impressive physique and play a crucial role in functional strength and overall posture. While many individuals hit the gym and resort to heavy weights for chest workouts, there’s an incredibly effective and versatile alternative that requires nothing more than your own body weight – calisthenics. Calisthenics, the art of using your own body as resistance, has gained immense popularity in recent years due to its simplicity, accessibility, and incredible results. In this comprehensive guide, we’re going to dive into the best calisthenics chest exercises that will help you sculpt a powerful chest without the need for fancy equipment or weights. Whether you’re a calisthenics enthusiast or a beginner looking to explore the world of bodyweight training, you’re about to discover the key to unlocking your upper body potential: Calisthenics Chest Exercises Without Equipment Don’t you have any equipment, and you still want to build your dream chest? Hold your horse, we have got you covered with the best calisthenics chest workouts that don’t require any special equipment whatsoever: 1.      Decline Push-Ups Image Source Decline push-ups are a valuable variation of the classic push-up that emphasizes the upper chest and shoulders more. Elevating the feet and assuming a declined position creates a more challenging angle for the chest muscles to work against. This exercise helps strengthen the upper chest region, enhance muscle definition, and improve overall pushing strength. Decline push-ups also engage the core muscles as they work to maintain proper body alignment during the movement. Incorporating decline push-ups into your routine can lead to well-rounded and balanced chest development, making it a valuable tool for calisthenics enthusiasts. Setup Find a stable elevated surface, like a bench or a step. Place your feet on the elevated surface and assume a push-up position with your hands on the ground slightly wider than shoulder-width apart. Execution Lower your body by bending your elbows until your chest is close to the ground. Push yourself back up to the starting position by straightening your arms. Keep your body in a straight line from head to heels throughout the movement. Tips Maintain a controlled tempo and focus on squeezing your chest muscles. You can adjust the intensity by changing the height of the surface. 2.      One Arm Knee Push-Ups Image Source One-arm knee push-ups serve as a progressive step towards achieving full one-arm push-ups. This exercise not only targets the chest but also engages the stabilizing muscles of the core and shoulders. By distributing your body weight onto a single arm, you asymmetrically challenge your chest muscles, promoting balanced development. One-arm knee push-ups are particularly beneficial for building the necessary strength and stability required for advanced unilateral movements. As a foundational exercise, they provide a solid platform for those aspiring to perform more challenging bodyweight maneuvers, making them a valuable component of a comprehensive calisthenics chest workout. Setup Start in a standard push-up position with your hands slightly wider than shoulder-width apart. Place one hand on the ground and the other hand on your knee. Execution Lower your body by bending your elbow until your chest is close to the ground. Push yourself back up to the starting position by straightening your arm. Keep your core engaged and your body aligned. Tips Begin with a solid and balanced foundation. Place your supporting hand firmly on the ground, and spread your fingers for better stability. Keep your knees, hips, and shoulders aligned in a straight line to ensure proper body mechanics. Prioritize control over momentum. Lower yourself slowly and steadily, feeling the engagement in your chest and core. 3.      Archer Push-Ups Image Source  Archer push-ups are a dynamic calisthenics movement that fosters unilateral strength development in the chest, shoulders, and triceps. This exercise encourages a deep stretch in the working chest muscle while engaging the opposite side for controlled movement. The alternating pushing motion uniquely challenges your muscles, promoting enhanced muscle recruitment and muscle-mind connection. Archer push-ups are versatile for addressing muscle imbalances and enhancing overall chest symmetry. By incorporating this exercise, you can add diversity to your training routine and work towards achieving a well-rounded chest development through a full range of motion. Setup Start in a standard push-up position. Move one hand out wider than shoulder-width, fingers pointing forward. The other hand is positioned closer to your body with fingers pointing slightly outward. Execution Lower your body toward the side with the wider hand, bending your elbow. As you lower, allow your chest to lean towards the wider hand while keeping the other arm straight. Push yourself back up to the starting position, engaging your chest and arm muscles. Tips Start with a wider hand placement and a smaller lean before gradually increasing the range of motion as you get stronger. Maintain a strong core and stable hips throughout the movement. Calisthenics Chest Exercises At Home Listed below are the moist dynamic bodyweight chest exercises that are sure to get the results you are after: 4.      Chest Dips Image Source Chest dips are an excellent calisthenics exercise that primarily targets the chest muscles while also engaging the triceps and shoulders. By performing dips, you can effectively build upper body strength and muscular endurance. The dipping motion allows for a deep stretch in the chest muscles, promoting muscle growth and flexibility. Additionally, dips are a versatile calisthenics chest workout that can be adjusted to target different muscle groups based on body positioning. Setup Find parallel bars or dip bars. Place your hands on the bars with your palms facing down. Hang with your arms fully extended, and your body slightly leaned forward. Execution Lower your body by bending your elbows until your shoulders are below your elbows or you feel a good stretch in your chest. Push yourself back up to the starting position by straightening your arms. Keep your core engaged and maintain proper

Read More »

Transform Your Body With These 5 Best Posterior Chain Exercises

When it comes to building a strong and balanced physique, it’s easy to get caught up in the glamour of bicep curls and chest presses. However, true functional strength and athletic prowess stem from a well-developed posterior chain – the muscles that span from your upper back down to your glutes and hamstrings. These muscles play a crucial role in your posture, stability, and overall physical performance. Whether you’re an athlete aiming to enhance your athletic performance or an individual striving for a well-rounded fitness routine, understanding and incorporating posterior chain exercises into your regimen is a game-changer. In this comprehensive guide, we’re going to discuss the top posterior chain exercises that are too good to be true: Best Posterior Chain Exercises At Home Let’s take a look at these posterior chain exercises that are sure to produce results: 1.     Kettlebell Swing Image Source The kettlebell swing is a dynamic exercise that provides numerous benefits to the posterior chain and cardiovascular system. As you swing the kettlebell, you engage your glutes, hamstrings, and lower back muscles. This posterior chain movement pattern helps build strength and muscular endurance and enhances explosive hip power. Furthermore, the kettlebell swing is a highly effective exercise for improving your overall conditioning and metabolic rate, making it a fantastic addition to fat-burning workouts. By mastering proper form and incorporating kettlebell swings into your routine, you can develop a more resilient posterior chain, improve your posture, and experience full-body, functional movement advantages. Step-By-Step Guide Setup: Place a kettlebell a short distance in front of you. Stand with your feet slightly wider than shoulder-width apart, toes pointing slightly outward. Execution: Hinge at your hips and bend your knees slightly to grab the kettlebell handle with both hands, maintaining a flat back. Swing the kettlebell back between your legs, keeping your arms extended. Explosively drive your hips forward, generating momentum to swing the kettlebell up to chest level. Your arms should be nearly parallel to the ground. Allow the kettlebell to swing back down between your legs while keeping the hinge in your hips. Continue the swinging motion, using the hip thrust to power the movement. Common Mistakes and Tips: Mistake: Using your arms excessively. Tip: Focus on using your hips and glutes to generate power. Mistake: Rounding the back. Tip: Maintain a neutral spine throughout, engaging your core for stability. Mistake: Swinging too high. Tip: The kettlebell should reach chest level, not higher. 2.     One-Arm Dumbbell Row Image Source  By performing this movement, you can develop a strong and well-defined back that enhances your appearance and supports healthy posture and spine alignment. The unilateral nature of the exercise helps to address muscle imbalances between the left and right sides of the body, contributing to improved functional symmetry. The one-arm dumbbell row is a versatile exercise that provides targeted benefits to the upper back muscles, including the lats, rhomboids, and trapezius. Additionally, the one-arm dumbbell row engages the core muscles to stabilize the body, providing the added benefit of core strengthening. Step-By-Step Guide Setup: Place a dumbbell on the ground next to a bench. Position the bench parallel to the dumbbell and place one knee and the same-side hand on the bench for support. Execution: With your free hand, pick up the dumbbell and let it hang down towards the floor. Pull the dumbbell towards your hip while retracting your shoulder blade and keeping your elbow close to your body. Lower the dumbbell back down in a controlled manner, fully extending your arm. Repeat the movement for the desired number of repetitions, then switch sides. Common Mistakes and Tips: Mistake: Rounding the back. Tip: Maintain a neutral spine throughout the exercise. Mistake: Using too much momentum. Tip: Control the movement both on the way up and down. Mistake: Using improper grip. Tip: Use a firm grip and avoid excessive wrist rotation. Top Posterior Chain Exercises These are the most result-driven posterior chain workouts: 3.     Glute-Ham Raise The glute-ham raise is an exceptional exercise for targeting the posterior chain muscles, primarily focusing on the hamstrings, glutes, and lower back. You can enhance your strength, stability, and overall athletic performance by engaging these muscle groups. This exercise is particularly beneficial for improving hamstring flexibility, reducing the risk of hamstring injuries, and enhancing your ability to generate power from the hips. Incorporating glute-ham raises into your routine can contribute to well-rounded lower body development, better posture, and increased functional strength. Step-By-Step Guide Setup: Adjust the glute-ham developer (GHD) machine to your height. Set the footpads and knee pads to a comfortable position. Kneel on the machine facing downwards, securing your ankles under the footpads. Position your upper thighs on the padded support. Cross your arms over your chest or place your hands behind your head. Execution: Keeping your core engaged and maintaining a neutral spine, slowly lower your upper body forward by bending at the hips. Continue lowering until your upper body is nearly parallel to the ground, feeling a stretch in your hamstrings. Contract your hamstrings and glutes to raise your upper body back up until it’s aligned with your legs. Lower yourself back down in a controlled manner and repeat the movement. Common Mistakes and Tips: Mistake: Rounding the lower back. Tip: Keep your back straight and avoid excessive curvature to prevent strain. Mistake: Using momentum. Tip: Perform the movement slowly and deliberately to engage the muscles fully. Mistake: Allowing the hips to rise. Tip: Focus on maintaining a straight line from head to heels throughout. 4.     Pendlay Row Image Source The Pendlay row is a remarkable exercise for building a strong, well-developed upper back. Targeting the lats, rhomboids, and lower back muscles contributes to improved posture, enhanced pulling strength, and better overall back aesthetics. Engaging in this posterior chain workout helps balance out the upper body’s muscles, which is crucial for preventing imbalances that can lead to shoulder and posture issues. This exercise is particularly effective in promoting upper back thickness and strength, essential for deadlifting, rowing, and

Read More »

Best Upper Glute Exercises: Achieve Glute Perfection With These Workouts

A well-rounded and shapely backside is a goal that many fitness enthusiasts aspire to achieve. So, are you interested in learning about the best upper glute exercises? Although the entire gluteal region is essential for giving our motions stability and power, our workouts frequently neglect to focus on the upper glutes. However, neglecting this area can lead to an imbalanced and incomplete physique. Therefore, some of the best upper glute exercises are necessary. This comprehensive guide discusses best upper glute exercises, unveiling the best techniques to effectively engage and sculpt this often-overlooked region. Best Upper Glute Exercises Would you like to know “How to build upper glutes of dreams”? If so, we have got you covered with these detailed exercises: 1.     Standing Hip Abduction The Standing Hip Abduction exercise is a targeted movement that primarily engages the upper glutes, with a particular focus on the gluteus medius muscle. This exercise helps improve hip stability and balance, crucial for overall functional movement and injury prevention. Strengthening the glute medius contributes to better alignment of the pelvis and helps alleviate strain on the hips and knees. Performing the Standing Hip Abduction exercise can aid in developing a well-rounded gluteal structure and promoting symmetry in the lower body. How To Perform? Stand up straight with your feet hip-width apart. You can place your hands on your hips or hold onto a sturdy surface for balance. Shift your weight onto your left leg while keeping a slight bend in your left knee. Engage your core for stability and lift your right leg out to the side. Keep your right knee straight and your toes pointed forward. Lift your right leg as high as you comfortably can while maintaining control and balance. Slowly lower your right leg back down to the starting position. Complete the desired number of repetitions on your right side before switching to your left leg. Mistakes To Avoid Avoid using momentum to lift your leg; focus on controlled movements. Do not lean excessively to the side while lifting the leg; keep your torso upright. Ensure that your knee and toes are pointed forward during the movement to maintain proper alignment. 2.     Sumo Squat   Image Source The Sumo Squat is a compound glute exercise that targets the entire lower body, including the upper glutes. The wide stance and deep squatting motion engage the upper glutes as you power through your heels to stand up. In addition to enhancing the size and strength of your glutes, the Sumo Squat also targets the hamstrings and inner thighs. This exercise promotes better muscle balance and development while building lower body strength. It’s an effective way to work on glute activation, leading to improved posture and overall lower body aesthetics. How To Perform? Stand with your feet wider than hip-width apart, and turn your toes out at a comfortable angle. Keep your chest lifted, shoulders back, and core engaged throughout the exercise. Begin to lower your body by bending your knees and pushing your hips back, as if you’re sitting into an imaginary chair. Keep your weight on your heels as you descend, allowing your knees to track over your toes. Aim to lower your body until your thighs are parallel to the ground or as low as your flexibility allows. Press through your heels and engage your glutes to return to the starting position. Mistakes To Avoid Avoid letting your knees extend beyond your toes to prevent excessive strain. Do not round your back; maintain a neutral spine throughout the movement. Ensure your knees track in line with your toes to prevent unnecessary stress on the joints. 3.     Weighted Hip Thrust   Image Source The Weighted Hip Thrust is a cornerstone exercise for glute development, particularly in the upper glutes. This exercise is highly effective for maximizing glute activation and growth. The Weighted Hip Thrust also aids in improving hip extension mechanics, which can positively impact other compound movements. Additionally, this upper glute workout can contribute to better lower back health as it strengthens the muscles that support the lumbar region. How To Perform? Sit on the floor with your upper back against a bench or platform. Bend your knees and place your feet flat on the floor. Position a barbell or weight across your hips and secure it in place. Roll the barbell toward your hips and lean against it for stability. Plant your feet firmly on the floor, hip-width apart. The barbell should be directly above your hips. Brace your core and drive through your heels to lift your hips off the ground. Your body should form a straight line from your shoulders to your knees. Squeeze your glutes at the top of the movement and hold for a brief pause. Lower your hips back down to the floor with control. Mistakes To Avoid Do not use your lower back to lift the weight; focus on engaging your glutes. Avoid excessive hyperextension of your lower back at the top of the movement. Ensure the barbell is positioned correctly and does not cause discomfort or pain. 4.     Fire Hydrant Kicks   Image Source  Fire Hydrant Kicks are a valuable isolation exercise targeting the upper glutes and engaging the hip abductors. However, incorporating this upper flute exercise into your routine enhances hip mobility and flexibility. Furthermore, the movement helps in strengthening the glute medius, a muscle often overlooked but essential for hip stability. Moreover, engaging the glute medius and gluteus minimus can contribute to improved performance in activities like running and lateral movements and can even help in reducing the risk of injuries related to hip and knee alignment. How To Perform? Begin on your hands and knees in a tabletop position. Your wrists should be directly under your shoulders, and your knees under your hips. In fact, keep your core engaged and your spine in a neutral position. Moreover, lift your right knee out to the side while keeping your knee bent at a 90-degree angle. Your thigh should be parallel to

Read More »
Scroll to Top