Blogs

Lift, Sculpt, Repeat: 5 Dynamic Barbell Back Exercises To Target Every Angle

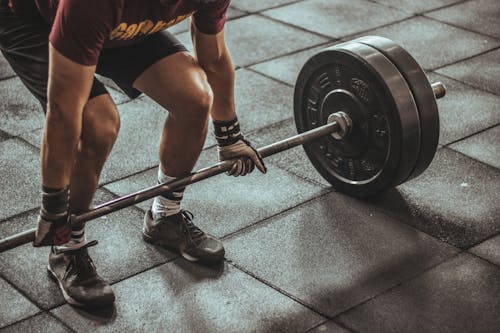
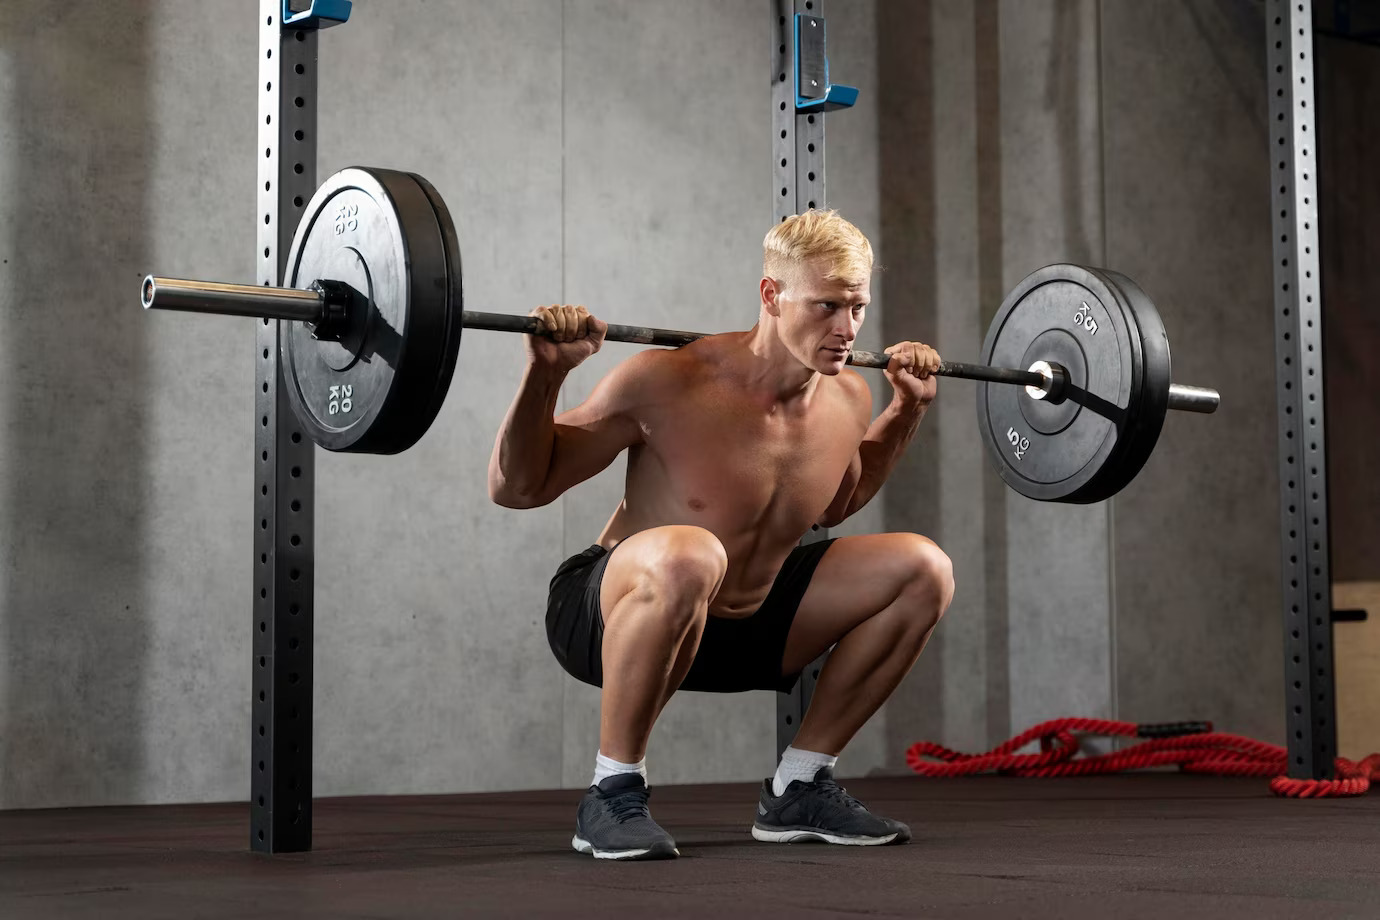
If you’re like most back thickness lovers out there, then you know that nothing makes a statement quite like an awe-inspiring set of lats. And while fancy machines in the gym can be tempting, few are as effective at achieving this goal as barbell back exercises. Whether your aim is to increase strength and power or define those muscles for a well-defined look, barbells offer solid results over time when paired with proper form and commitment. Don’t believe us? Keep reading to learn more about the best barbell back exercises all lifters should try: Barbell Back Workouts At Home Do these workouts at home, and you’ll have the shredded back you’ve been craving to have: 1.      Deadlift Image Source The deadlift is a fundamental compound movement that offers numerous benefits. It primarily targets the lower back, glutes, and hamstrings, helping to build a strong and resilient posterior chain. The deadlift also engages the core, promoting overall stability and balance. By lifting heavy weights off the ground, it stimulates muscle growth and strength development throughout the body. This barbell back exercise is unparalleled for enhancing functional strength, improving posture, and promoting bone density. Step-By-Step Guide Approach the barbell with your feet hip-width apart. The bar should be centered over your feet. Bend your hips and knees to grip the barbell with both hands, using a double overhand or mixed grip. Your grip should be slightly wider than shoulder-width. Keep your back straight, chest up, and engage your core. Take a deep breath and brace your core. Begin to lift the barbell by pushing through your heels and extending your hips and knees simultaneously. As you lift, keep the barbell close to your body and maintain a neutral spine position. Once you’re standing upright, lock out your hips and knees at the top of the movement. To lower the barbell, hinge at your hips and slowly bend your knees while keeping the bar close to your body. Lower the barbell to the ground while maintaining a controlled movement. Repeat for the desired number of repetitions. 2.      Barbell Pullovers Image Source Barbell pullovers are a versatile intermediate to advanced barbell back exercise that targets both the lats and chest muscles. This movement can contribute to a more defined upper body, as it stretches and works the muscles across the chest and back simultaneously. As a result, it aids in expanding the ribcage, promoting better lung function. By strengthening the lats, shoulders, and triceps, barbell pullovers improve overall upper-body strength and can contribute to enhanced athletic performance. Step-By-Step Guide Lie on your back on a bench with your head and upper back hanging off the edge. Grip a barbell with both hands using an overhand grip, slightly wider than shoulder-width apart. Hold the barbell over your chest, arms extended. Keep a slight bend in your elbows and slowly lower the barbell behind your head while maintaining a neutral spine. As you inhale, lower the barbell until you feel a stretch in your lats and chest. Exhale as you use your lats and chest muscles to pull the barbell back up to the starting position. Repeat for the desired number of reps. Barbell Back Exercises For Mass Adding these back exercises to your fitness result will surely result in back mass: 3.      Meadows Rows Image Source Meadows rows provide a unique angle to target the upper back muscles, particularly the lats. By isolating these muscles with a unilateral movement, you can achieve better muscle imbalances and promote symmetry. This exercise helps create a wider back appearance, making it a favorite among bodybuilders. Additionally, Meadows rows are among the mid and upper-back barbell workouts, which engage the core for stability, improve grip strength, and contribute to a stronger, well-rounded back. Step-By-Step Guide Set up a barbell in a landmine attachment or a corner of a room. Load it with an appropriate weight plate. Stand perpendicular to the barbell with your feet shoulder-width apart. Bend at your hips and knees to grip the free end of the barbell with one hand. Your torso should be slightly leaned forward, and your opposite hand can rest on your knee or a support for stability. Initiate the row by retracting your shoulder blade and pulling the barbell towards your hip while keeping your elbow close to your body. Squeeze your back muscles at the top of the movement and then slowly lower the barbell back down. Complete the desired reps on one side before switching to the other. 4.      Narrow Grip Barbell Rows This exercise helps develop a powerful back appearance while emphasizing the muscles that contribute to proper posture and spinal support. Narrow grip barbell rows are excellent for building thickness in the middle and lower portions of the back. With an emphasis on the lats, rhomboids, and traps, narrow grip rows improve muscle balance and stability, reducing the risk of imbalances that can lead to injuries or discomfort. Step-By-Step Guide Stand with your feet shoulder-width apart and grip a barbell with a narrower than shoulder-width overhand grip. Bend at your hips and knees to lean forward while keeping your back straight and chest up. Allow the barbell to hang in front of you with your arms fully extended. Initiate the row by pulling the barbell towards your lower ribcage, keeping your elbows close to your body. Squeeze your back muscles at the top of the movement, then slowly lower the barbell back down. Maintain a controlled motion throughout the exercise. Complete the desired number of repetitions. 5.      Single Arm Landmine Row Image Source The single-arm landmine row offers a unilateral movement pattern that effectively targets the lats, traps, and rhomboids. By isolating each side of the back separately, this exercise helps address any muscular imbalances, leading to a more symmetrical physique. It’s a barbell back exercise that also enhances stability and core engagement as you perform the rowing motion, contributing to overall functional strength. Incorporating single-arm landmine rows into your routine can promote better muscle development, improved

Read More »

Sculpting A V-Taper: Ultimate Lower Lat Exercises For A Broad Back

Best lower lat exercises are the key to building a strong, sculpted back that exudes power and athleticism. Want to sculpt a strong, V-shaped back and perform pull-ups with ease? Developing your lower lats is the key. By strengthening the lower fibers of the lats with targeted exercises, you can build an enviable torso with widened lats and excellent functional strength. This article will provide an overview of the best lower lat exercises to take your back training to the next level. Let’s explore the most effective movements to build lower lat strength and power with best lower lat exercises for unmatched aesthetics and performance. Importance of Lower Body Strength Developing strength in the lower body muscles through the best lower lat exercises provides immense benefits for your overall fitness, body composition, performance and posture. Moreover, the lats play a crucial role in numerous compound and functional exercises, from pull-ups to rows to twisting movements. By honing in on the lower lat fibers with targeted training, you can reap the following advantages: Wider, thicker lats for an enviable V-tapered back Improved performance on pull-ups and pulldowns Enhanced strength for powerful rowing motions Better posture through a strengthened upper back Increased rotational power for sports like golf, baseball More muscle activation and development through the back Added definition along the lower lats Greater stability through the shoulders and upper body Balanced development between upper and lower lats In addition to sculpting an aesthetically pleasing, proportional back, best lower lat exercises also provide functional improvements in daily life. You’ll be able to twist and rotate with ease. Moreover, yard work and household chores requiring pulling motions will feel easier. Most importantly, a strong lower back created with the best lower lat exercises helps reduce risk of injury through added stabilization. Best Lower Lat Exercises At Home Cannot go outside for workouts? Hold your horses, we have got you covered with these at-home lower late workouts: 1.      Dumbbell Row To Hips The Dumbbell Row to Hips is an exceptional exercise for targeting the lower lats, contributing to the development of a broader and more defined back. It also engages the middle and upper back muscles, providing an overall improvement in back aesthetics and strength. Additionally, this exercise helps enhance grip strength and activates stabilizer muscles, promoting a well-rounded and functional upper body. Step-by-Step Guide Stand with your feet shoulder-width apart and hold a dumbbell in each hand, palms facing your body. Bend at your hips and knees, maintaining a slight arch in your lower back. Your upper body should be almost parallel to the floor. Let the dumbbells hang straight down toward the floor, arms fully extended. Pull the dumbbells up towards your hips by bending your elbows, keeping them close to your body. Squeeze your shoulder blades together at the top of the movement and hold for a brief pause. Lower the dumbbells back down to the starting position in a controlled manner. Mistakes to Avoid Avoid using momentum to lift the weights; keep the movement controlled. Don’t round your lower back; maintain a neutral spine throughout the exercise. Avoid pulling the weights too high, as it can engage the traps more than the lats. 2.      Barbell Row   Image Source The Barbell Row is a fundamental at-home lower lat exercise that targets the lats in particular, contributing to both back thickness and width. This compound movement also engages the core and lower back muscles, promoting stability and reducing the risk of lower back injuries. Additionally, the Barbell Row enhances grip strength and reinforces proper posture, making it a valuable addition to any back-focused workout routine. Step-by-Step Guide Stand with your feet hip-width apart and slightly bend your knees. Hold a barbell with an overhand grip, hands wider than shoulder-width. Hinge at your hips while keeping your back straight and chest up, creating a slight forward lean. Pull the barbell towards your lower abdomen by retracting your shoulder blades and bending your elbows. Keep your elbows close to your body throughout the movement. Squeeze your lats at the top of the movement, then slowly lower the bar back down. Mistakes to Avoid Avoid using your lower back to lift the weight; keep the movement focused on the lats. Don’t round your back or shoulders; maintain a neutral spine. Avoid using excessive momentum to lift the barbell; prioritize control. Best Lower Lat Exercises For Mass Add mass with these peak workouts that can target your lower lats at will: 1.      Wide-Grip Lat Pulldowns   Image Source The Wide-Grip Lat Pulldown isolates the lower lats, playing a pivotal role in achieving a broader and more defined back appearance. It allows for the use of heavier resistance, fostering muscle growth and strength gains. As a compound movement, it also strengthens the upper back and arms as secondary muscles, contributing to a well-balanced upper body development. Step-by-Step Guide Sit at a lat pulldown machine and grab the bar with a wide overhand grip. Keep your chest up and your back slightly arched. Pull the bar down towards your upper chest while squeezing your shoulder blades together. Pause briefly at the bottom of the movement to feel the contraction in your lats. Slowly release the bar back to the starting position with control. Mistakes to Avoid Avoid leaning back excessively as you pull the bar down; keep your torso stationary. Don’t use your biceps to initiate the movement; focus on engaging your lats. Avoid using too much momentum to complete the repetitions. 2.      Seated Cable Row   Image Source The Seated Cable Row is a versatile exercise that works the lower lats and contributes to a well-rounded back development. Its constant tension on the muscles throughout the movement stimulates muscle growth and endurance. In addition to its primary focus on the lats, this lower lat workout for mass also improves posture by strengthening the upper back muscles, making it a valuable exercise for overall upper body aesthetics and function. Step-by-Step Guide Sit at a

Read More »

Goal-Getter’s Guide: 5 Best Soccer Exercises To Improve Scoring Precision

Soccer, also known as football in many parts of the world, is a sport that captivates the hearts of millions. With its fast-paced action, strategic gameplay, and breathtaking moments, it’s no wonder why soccer is the most popular sport globally. Whether you’re a seasoned player looking to take your skills to the next level or a passionate newbie eager to kickstart your journey, mastering the fundamental soccer exercises is essential. This blog post presents the ultimate guide to soccer exercises that will help you develop the agility, strength, and finesse needed to dominate the pitch. Get ready to elevate your game and become a force to be reckoned with on the soccer field: Related Blog:  Best Mobility Exercises For Athletes Best Exercises For Soccer Players At-Home Don’t you like going to the gym? No worries, you can stay fit and active with these at-home soccer exercises: 1.     Box Jumps Image Source Box jumps develop explosive power in the lower body, which can improve jumping ability for headers and increase kicking power. It is one of the at-home soccer le workouts that enhances proprioception and balance, which is important for landing safely after aerial challenges or when avoiding opponents on the field. Strengthening the leg muscles helps reduce the risk of common soccer injuries, such as ACL tears and sprained ankles. Step-By-Step Guide Box selection: Choose a sturdy box or plyometric platform that is around knee to hip height. Ensure it can support your weight and won’t tip over during the exercise. Warm-up: Perform a thorough warm-up that includes light jogging, dynamic leg swings, and hip rotations to prepare your lower body for explosive movements. Starting position: Stand facing the box with your feet shoulder-width apart, toes slightly turned out. Position your arms at your sides or in front of you for balance. Jumping technique: Bend your knees and hips to initiate the jump, swinging your arms backward for added momentum. Explosive jump: Jump forcefully off both feet, extending your hips, knees, and ankles simultaneously to propel yourself onto the box. Land softly: Land with your knees slightly bent to absorb the impact, and immediately go into a squat position to reduce stress on your joints. Step down or jump down: Step back down one foot at a time, or jump down with control, landing softly with both feet on the ground. Repetitions and sets: Aim for 12-15 box jumps per set. Perform 2-3 sets with a brief rest between each set. Mistakes to Avoid Avoid using a box that is too high for your current ability, as it can increase the risk of injury, especially if you cannot land safely. Ensure you have sufficient space around the box to land safely and never perform box jumps on a hard surface like concrete, as it can put extra stress on your joints. 2.     Burpee Pull-Ups Image Source Burpee pull-ups provide a total-body soccer workout that improves upper body and core strength, crucial for throwing, shooting, and winning physical battles on the field. The combination of push-ups and pull-ups enhances functional strength, enabling players to perform various soccer movements more efficiently. This exercise simulates quick transitions, helping players switch between attacking and defensive roles during a match. Step-By-Step Guide Equipment setup: Ensure you have a stable pull-up bar that can support your body weight. Place it at a height that allows you to hang with your arms fully extended overhead. Warm-up: Perform a full-body warm-up, including jumping jacks, arm circles, and dynamic stretching to prepare your muscles for the intense exercise. Starting position: Stand with your feet shoulder-width apart, ready to drop into a squat position. Squat and kick back: Drop into a squat, placing your hands on the ground in front of you. Kick your feet back into a push-up position, keeping your body in a straight line from head to heels. Perform a push-up: Lower your chest to the ground by bending your elbows, then push yourself back up to the starting push-up position. Explosive jump: From the push-up position, explode upwards into a jump, reaching for the pull-up bar with your hands. Pull-up: As you reach the bar, perform a pull-up by pulling your chin above the bar. Lower yourself back down with control. Repetitions and sets: Start with 6-8 burpee pull-ups per set. Complete 2-3 sets, allowing sufficient rest between each set. Mistakes To Avoid Ensure that the pull-up bar is securely fixed and can withstand your body weight to avoid injuries from falling. Beginners should focus on proper technique before attempting high volumes. Start with a lower number of repetitions and gradually increase them as you gain strength and confidence. Agility & Speed Workouts For Soccer Players Let’s get things going with these soccer exercises for speed and agility: 3.     Uphill Sprints Image Source Uphill sprints build explosive power and speed, which are essential for accelerating quickly to beat opponents and chase down the ball. The incline adds resistance, making it a more challenging workout for your lower body, including the glutes, hamstrings, and calves. This soccer exercise for speed also helps enhance cardiovascular endurance, allowing players to maintain high-intensity efforts throughout the game. Step-By-Step Guide Find a suitable hill: Look for a hill with a moderate incline that is free from obstacles, debris, and traffic. Ideally, the hill should be around 30-50 meters long. Warm-up: Begin with light jogging for 5-10 minutes to raise your heart rate and warm up your muscles. Follow this with dynamic stretches, such as leg swings, high knees, butt kicks, and hip circles, to increase flexibility and mobility. Starting stance: Stand at the base of the hill with your feet shoulder-width apart. Keep your body upright and your gaze forward. Explosive start: Drive your knees up toward your chest as you pump your arms vigorously to gain momentum. This will help you initiate the sprint with power. Sprint uphill: Explode into a full sprint, using short and quick strides. Focus on maintaining an upright posture and driving your arms to

Read More »

Sculpt Your Triceps: Top 5 Dumbbell Triceps Exercises For Maximum Muscle Growth

When it comes to achieving well-defined and sculpted arms, few muscle groups play as crucial a role as the triceps. These three-headed muscles, situated on the back of the upper arm, contribute to arm strength and play a significant role in overall upper-body stability. If you’re looking to develop strong and toned triceps without hitting the gym, look no further than your trusty set of dumbbells. Dumbbell exercises offer versatility, convenience, and the ability to effectively target different parts of the triceps. In this blog post, we’ll dive into the best triceps exercises you can perform with dumbbells. Whether you’re a fitness enthusiast looking to add some variety to your workout routine or a beginner seeking effective ways to build triceps strength, these exercises will undoubtedly take your arm training to new heights. Let’s get started: Dumbbell Triceps Workouts At Home These dumbbell triceps movements at home will help you build the triceps of dreams: 1.      Dumbbell Kickbacks Image Source By performing this dumbbell triceps movement, you engage the triceps brachii, the three-headed muscle located at the back of your upper arm. The primary benefit of dumbbell kickbacks is the isolated and concentrated activation of the triceps, leading to enhanced muscle definition and increased overall arm strength. As you extend your forearm back against resistance, you engage the triceps through a full range of motion, helping to develop both the lateral and long heads of the muscle. This exercise also assists in improving muscular endurance and stability in the arms, which can be particularly beneficial in daily activities and other strength training routines. Step-By-Step Guide Stand with your feet shoulder-width apart, and hold a dumbbell in each hand. Bend your knees slightly and hinge forward at the hips, keeping your back straight and parallel to the ground. Bring your upper arms close to your sides, with your elbows bent at 90 degrees and your forearms pointing towards the ground. Inhale and extend your arms backward until they are fully straightened, squeezing your triceps at the top of the movement. Exhale as you slowly lower the dumbbells back to the starting position with controlled movement. Repeat the movement for the desired number of repetitions. 2.      Dumbbell Deficit Push Up Image Source This exercise isolates and challenges the triceps, helping to improve their strength, endurance, and overall definition. Additionally, the engagement of the chest and shoulder muscles further complements the triceps’ development, promoting balanced upper-body strength. Dumbbell deficit push-ups are a versatile bodyweight exercise for triceps that can be adjusted to suit individual fitness levels, making them an excellent choice for anyone aiming to build impressive triceps and achieve a more well-rounded upper body physique. Step-By-Step Guide Place two dumbbells on the floor, shoulder-width apart, and in line with your shoulders. Assume a plank position with your hands on the dumbbells and your feet on the ground. Your body should form a straight line from your head to your heels. Inhale and lower your chest towards the floor by bending your elbows, keeping your body straight and engaging your core. Lower yourself until your chest is just above the ground or as far as your flexibility allows. Exhale and push yourself back up to the starting position, fully extending your arms. Repeat the movement for the desired number of repetitions. Triceps Dumbbell Exercises For Beginners If you are a beginner and you’d like to work your triceps like never before, start doing the following dumbbell triceps exercises: 3.      Narrow Grip Dumbbell Press Image Source The Narrow Grip Dumbbell Press is an effective exercise for targeting and developing the triceps muscles. Firstly, the narrow grip places more emphasis on the lateral head of the triceps, helping to build overall arm size and strength. Secondly, it allows for a deeper range of motion compared to traditional bench presses, engaging the triceps more effectively and promoting muscle activation throughout the entire movement. As a compound exercise, it recruits other supporting muscles like the shoulders and chest, leading to greater upper body strength and stability. Additionally, the use of dumbbells in this exercise requires each arm to work independently, helping to correct any strength imbalances between the triceps. Step-By-Step Guide Sit on a flat bench with your feet firmly planted on the ground, and a dumbbell in each hand. Position the dumbbells on your thighs, and then with the help of your knees, lift them one at a time to shoulder level. Your palms should be facing each other, and your elbows should be bent at a 90-degree angle. Inhale and press the dumbbells upward simultaneously, extending your arms fully without locking your elbows. Keep your wrists straight and the dumbbells balanced. Exhale as you lower the dumbbells back down in a controlled manner, slightly above your shoulders, while maintaining tension in your chest and triceps. Repeat the movement for the desired number of repetitions. 4.      Seated Dumbbell Overhead Triceps Extension Image Source By performing this dumbbell triceps exercise regularly, individuals can expect to experience enhanced triceps strength and definition. As the triceps are the primary muscles responsible for extending the elbow joint, this exercise promotes improved arm function and stability, which is essential for various daily activities and sports performance. Moreover, engaging in the seated variation ensures proper isolation of the triceps, minimizing the involvement of other muscle groups and maximizing the focus on the target area. This exercise also aids in improving overall upper body strength and contributes to a more balanced physique. Step-By-Step Guide Sit on a bench with back support and hold a dumbbell in each hand. Plant your feet flat on the ground and position the dumbbells on your thighs. Lift the dumbbells to shoulder height, keeping your palms facing upward and your elbows bent. Inhale, and as you exhale, extend your arms overhead until the dumbbells are directly above your head. Your palms should now be facing each other. Keeping your upper arms close to your ears, lower the dumbbells behind your head by bending your elbows. Feel a

Read More »

5 Smokin’ Gluteus Minimus Exercises To Fire Up Your Booty Game 🍑

While most people focus on their gluteus maximus for those Instagram-worthy curves, another essential player in the glute family often goes unnoticed—the gluteus minimus. This hidden gem plays a crucial role in stabilizing your hips, supporting your pelvis, and enhancing overall lower body strength. It’s time to shine the spotlight on the gluteus minimus and explore the best exercises for the gluteus minimus to awaken its potential. Say goodbye to weak glutes and hello to a firm, toned, and mighty booty: Gluteus Minimus Exercises For Strength Let’s add strength to your gluteus minimus with these pro exercises: 1.     Clamshells Image Source Clamshells primarily target the gluteus minimus by engaging the external rotators of the hip. This exercise helps to strengthen the glute muscles, improve hip stability, and alleviate lower back pain caused by muscle imbalances. It also enhances the mind-muscle connection, ensuring that you can activate and utilize the gluteus minimus effectively during other exercises and daily movements. Step-By-Step Guide: Lie on your side with your hips and knees bent at a 45-degree angle. Keep your feet together and your heels touching while you rest your head on your arm or use a pillow for support. Slowly lift your top knee while keeping your feet together, focusing on using your glute muscles to lift the leg. Hold the lifted position for a moment, feeling the contraction in your gluteus minimus. Lower the knee back down with control and repeat for the desired number of repetitions on each side. 2.     Single-Leg Bridges Image Source Single-leg bridges are unilateral exercises that simultaneously challenge the gluteus minimus and maximus. Lifting one leg off the floor forces your body to stabilize and strengthen each glute independently, addressing any muscle imbalances. This gluteus minimus workout enhances glute strength, core stability, and coordination. Step-By-Step Guide: Lie on your back with your knees bent and feet flat on the floor, hip-width apart. Lift one leg off the floor, extending it straight in front of you. Push through the heel of the foot on the ground and raise your hips toward the ceiling until your body forms a straight line from shoulders to knees. Hold the bridge position momentarily, squeezing your glutes, and then lower your hips with control. Complete the desired number of repetitions on one leg before switching to the other. 3.     Step-Ups Image Source Step-ups are a functional exercise that targets the gluteus minimus while also engaging the quadriceps and hamstrings. This compound glute movement improves lower body strength, balance, and coordination. It also simulates real-life activities like climbing stairs or stepping onto elevated surfaces, making your daily movements more efficient and powerful. Step-By-Step Guide: Stand in front of a sturdy step or bench. Place one foot on the step, ensuring your entire foot is planted firmly. Push through the heel of the foot on the step and lift your body up until both legs are straight. Lower yourself back down with control, and step back to the starting position. Complete the desired number of repetitions on one leg before switching to the other. Gluteus Minimus Exercises At Home Do these at-home gluteus minimus workouts and thank us later: 4.     Side-Lying Leg Raises Image Source Side-lying leg raises effectively isolate the gluteus minimus and activate the entire glute region. By performing this gluteus minimus exercise, you can improve hip abduction strength, which is essential for lateral movements and stability. Additionally, it helps tone and shape your glutes‘ outer part, creating a rounder, firmer appearance. Step-By-Step Guide: Lie on your side with your legs straight and stacked on top of each other. Support your head with your lower arm, and place your upper hand on the floor in front of you for stability. Engage your core and lift your top leg toward the ceiling, leading with your heel. Avoid rolling your hips backward or forward during the movement. Slowly lower the leg back down to the starting position with control. Complete the desired number of repetitions on one side before switching to the other. 5.     Banded Walks Image Source Banded walks are a fantastic way to engage both the gluteus minimus and medius. These lateral movements target the smaller stabilizing muscles of the hips, promoting better balance and preventing potential injuries. The resistance band adds extra tension, intensifying the glute activation and making it an effective strengthening exercise. Step-By-Step Guide: Place a resistance band around your lower legs, just above your ankles. Assume a half-squat position with your feet hip-width apart, and maintain tension in the band throughout the exercise. Take small steps sideways, leading with one foot while aligning your hips and shoulders. Repeat the sideway steps for the desired number of repetitions in one direction before switching to the other. Wrapping Up Your gluteus minimus might be small, but it plays a mighty role in maintaining your lower body’s stability and strength. Don’t overlook this powerhouse muscle any longer; include these targeted exercises in your workout routine, and watch your glutes transform before your eyes. Remember, a strong and sculpted lower body enhances your physical appearance and improves your athletic performance and daily movements. So, let’s raise the bar, fire up those gluteus minimus muscles, and unleash the full potential of your glutes.

Read More »

5 Middle Back Exercises For A Lean & Defined Upper Body

A strong and well-developed back enhances your posture and plays a crucial role in overall functional fitness. While the upper and lower back muscles often receive more attention, neglecting the middle back can lead to imbalances and potential injury. The middle back, also known as the thoracic region, supports the spine, stabilizes the shoulders, and aids in various daily movements. If you’re looking to build a robust and balanced back, you’ll want to target the middle back with effective exercises. In this blog post, we’ll introduce you to some of the best middle-back exercises that will help you achieve a powerful and resilient mid-back region. So, let’s get off the ground: Top Middle Back Exercises Let’s take a look at the most result-driven middle back workouts for insane results: 1.     Bent-over Barbell Row Image Source The Bent-over Barbell Row is another excellent exercise for targeting the middle back muscles, particularly the lats, rhomboids, and traps. It also engages the biceps and rear deltoids. Step-By-Step Guide Set up the barbell: Load the desired weight onto the barbell. Start with a weight that allows you to maintain proper form and gradually increase it as you become more comfortable with the exercise. Stand in front of the barbell with your feet shoulder-width apart. Grip the barbell: Bend at the hips and knees to lower your body until your upper body is nearly parallel to the ground. Maintain a slight bend in your knees throughout the exercise. Reach down and grip the barbell with both hands using an overhand grip (palms facing down) slightly wider than shoulder-width apart. Start the movement: With your back straight and your core engaged, take a deep breath, and brace your core for stability. Keep your head in a neutral position, looking down at the floor a few feet in front of you. Perform the row: Exhale as you pull the barbell up towards your lower chest or upper abdomen. Keep your elbows close to your body and focus on squeezing your shoulder blades together as you lift the weight. The movement should be controlled and smooth. Peak contraction: At the top of the movement, squeeze your back muscles and hold the position for a brief moment to maximize the engagement. Lower the barbell: Inhale and slowly lower the barbell back down to the starting position with control. Make sure not to let the weight pull you forward, and keep your back straight throughout the descent. Repeat the movement: Perform the desired number of repetitions while maintaining proper form. Mistakes To Avoid Using momentum: Avoid using momentum to lift the barbell. The movement should be controlled and driven by your back muscles, not by swinging or jerking the weight up. Lifting too heavy: As with any exercise, choosing an appropriate weight that allows you to perform the movement with the proper form is essential. Using excessively heavy weights can compromise your technique and lead to injury. Neglecting core engagement: Engage your core muscles throughout the exercise to stabilize your body and protect your lower back. Bouncing the weight: Avoid bouncing the weight off the floor at the bottom of the movement. This can strain your lower back and disrupt the flow of the exercise. 2.     Half-Kneeling Lat Pulldown Image Source The Half-Kneeling Lat Pulldown is a result-driven middle back workout that targets the latissimus dorsi (lats), rhomboids, rear deltoids, and other muscles in the back and shoulders. Performing this exercise from a half-kneeling position adds an element of stability and challenges your core muscles. Step-By-Step Guide Adjust the cable machine: Begin by setting up the cable pulldown machine. Adjust the pulley attachment to a height above your head. Attach the lat pulldown bar to the cable. Kneeling position: Position yourself in a half-kneeling stance in front of the cable machine. Place one knee on the ground with the foot of the opposite leg positioned in front, creating a 90-degree angle at the knee of the front leg. Your back knee should be directly below your hip, and your front foot should be flat on the ground. Grab the bar: Reach up and grab the lat pulldown bar with both hands using an overhand grip (palms facing away from you). Your hands should be wider than shoulder-width apart to engage the lats effectively. Set your posture: Engage your core and keep your chest up. Your back should be straight, and your shoulders should be pulled down and back. Perform the pulldown: Inhale and then exhale as you pull the bar down towards your upper chest or collarbone. Focus on driving your elbows down and back, squeezing your shoulder blades together to engage the back muscles fully. Keep your upper arms parallel to the ground throughout the movement. Pause and squeeze: At the bottom of the movement, pause for a brief moment and squeeze your back muscles to maximize engagement. Control the release: In a controlled manner, slowly release the bar back to the starting position with your arms fully extended. Repeat the movement: Perform the desired number of repetitions before switching to the other side to work both sides equally. Mistakes To Avoid Arching the back: Avoid arching your lower back excessively. Keep your core engaged and maintain a neutral spine throughout the exercise. Pulling with the arms: While your arms are involved in the movement, remember that the primary focus is on engaging the back muscles. Initiate the movement by driving your elbows down and back. Rushing the exercise: Perform the exercise at a controlled pace to ensure proper form and muscle engagement. Rounded Shoulders: Keep your shoulders back and down during the pulldown to avoid rounding your upper back. Rounding the shoulders can put unnecessary stress on the neck and shoulders and reduce the effectiveness of the exercise. 3.     Meadow Landmine Row Image Source The Meadow Landmine Row is a variation of the traditional one-arm dumbbell row, using a landmine attachment to the end of a barbell. This mid-back exercise targets the lats, rhomboids, rear deltoids, and

Read More »

5 Game-Changing Mobility Exercises Every Athlete Should Incorporate

As an athlete, your body is your greatest asset, and maximizing your performance requires more than just strength and speed. One often overlooked aspect of athletic prowess is mobility – the ability to move freely and efficiently through a full range of motion. Whether you’re a professional athlete or a fitness enthusiast, incorporating mobility exercises into your training regimen can enhance your performance, prevent injuries, and promote overall well-being. In this blog post, we’ll dive into some of the best mobility exercises that athletes can incorporate into their routines. These exercises are designed to target key muscle groups, improve joint flexibility, and enhance overall athletic performance. So, let’s get off the ground: Most Effective Mobility Exercises For Athletes Listed below are some of the best mobility workouts for athletes that are certain to produce results: 1.      Spiderman Lunges Image Source Spiderman Lunges, also known as Spiderman Crawls, is a dynamic mobility exercise that targets the hips, thighs, and core muscles. They mimic the crawling movements of Spiderman, hence the name. Follow these steps to perform Spiderman Lunges correctly: Warm-Up Start with a brief warm-up to get your body ready for exercise. Perform some light cardio, such as jogging in place or jumping jacks, to increase your heart rate. Do some dynamic stretches for the hips, like leg swings and hip circles, to prepare the hip joints for the lunges. Starting Position Stand with your feet shoulder-width apart and your arms at your sides. Engage your core muscles to stabilize your spine. Perform the Lunge Take a step forward with your right foot, lunging into a regular forward lunge. Your right knee should be directly above your right ankle, forming a 90-degree angle. As you lunge forward, simultaneously bring your left hand down to the ground on the inside of your right foot. Keep your left leg extended behind you, with the toes pointing down, like the starting position of a crawling movement. Ensure your chest is lifted and your back is straight. Return to Starting Position Push through your right foot’s heel to bring your right leg back to the starting position. Simultaneously lift your left hand off the ground and return it to your side. Switch Sides Repeat the same sequence on the opposite side. Step forward with your left foot, lunge, and bring your right hand to the ground inside your left foot. Perform the required number of repetitions or continue alternating sides in a fluid motion. Breathing Inhale as you step forward into the lunge. Exhale as you return to the starting position. Pro Tips Engage your core: Keep your abdominal muscles engaged throughout the exercise to stabilize your spine and enhance the effectiveness of the movement. Maintain proper form: Ensure your front knee is aligned with your ankle and doesn’t go past your toes during the lunge to protect your knee joint. 2.      Cossack Squat Image Source The Cossack Squat is a powerful lower-body exercise for athletes that targets the hips, thighs, and groin while enhancing flexibility and balance. It is an excellent movement for building strength in the legs and improving mobility. Follow these steps to perform the Cossack Squat correctly: Warm-Up Begin with a warm-up to increase blood flow to your muscles. For a few minutes, Perform light cardio exercises like jogging or jumping jacks. Do dynamic stretches for the hips, such as leg swings and hip circles, to prepare for the squatting movement. Starting Position Stand with your feet much wider than shoulder-width apart. Toes should be pointing slightly outward. Keep your back straight, shoulders relaxed, and chest lifted. Extend your arms straight in front of you for balance. Perform the Cossack Squat Shift your weight to one side as you begin to bend that knee, lowering yourself into a deep squat on that side. Keep your other leg straight, with the foot flat on the ground and the toes pointing upward. Try to keep your extended foot’s heel on the ground as you squat down to ensure proper form. Lower your body as much as you can comfortably, but avoid going beyond a point where you feel strain or pain. Return to the Starting Position Push through the heel of the bent leg to rise back up to the starting position. As you return to the upright position, keep your back straight and your core engaged for stability. Switch Sides Repeat the same sequence on the opposite side, shifting your weight to the other leg and performing a squat on that side. Continue alternating sides for the desired number of repetitions or times. Pro Tips Gradually increase depth: Start with shallow squats and gradually work your way into deeper squats as your flexibility and strength improve. Use your arms for balance: Extend your arms in front of you or place your hands on your hips to help maintain balance during the squat. Mobility Workouts For Athletes Let’s take a look at some mobility exercises for athletes that will take your athletic performance to new heights: 3.      Pigeon Pose Image Source Pigeon Pose, also known as Eka Pada Rajakapotasana, is a great mobility workout for athletes that provides a deep stretch for the hips and thighs. It is essential to approach this pose with mindfulness and respect for your body’s limitations. Follow these steps to practice Pigeon Pose correctly: Preparation Find a comfortable yoga mat or a soft surface to practice on. Start with a warm-up to prepare your body for the pose. Perform some gentle stretches for the hips, thighs, and lower back. Starting Position Begin in a tabletop position with your hands and knees on the mat. Ensure your wrists are under your shoulders and knees under your hips. Slide your right knee forward, placing it behind your right wrist. The right foot should be positioned near your left wrist. Leg Positioning Extend your left leg straight back, keeping the hips squared to the front of the mat. Ensure your left thigh is parallel to the long edge of the

Read More »
Compound Leg Exercises

Power Up Your Lower Body With These 6 Must-Try Compound Leg Exercises

Is your leg workout feeling a bit lackluster? Are you dreading another round of squats and lunges just to get some semblance of definition in those gams? You’ve come to the right place. With these compound leg exercises, you’ll be able to redefine your workouts – and what better way than with some exercise that will bring out both strength AND definition at once?! As they say, two birds with one stone. So, strap on those bracelets of commitment and prepare yourself for an effective workout: Related Blogs: Compound Chest Exercises   Compound Leg Exercises At Home Do these compound leg exercises at home, and up your leg workout right away: 1.     Bulgarian Split Squat Image Source The Bulgarian Split Squat is a bodyweight compound leg workout that primarily targets the quads, hamstrings, and glutes. It also engages the stabilizer muscles in the core and lower body, improving balance and coordination. This exercise helps build unilateral leg strength, which can address muscular imbalances. Step-Wise Guide: Stand with one foot placed about two feet in front of the other. Rest the top of your rear foot on a bench or step. Keep your torso upright, engage your core, and maintain a neutral spine. Lower your body by bending your front knee and hip until your front thigh is parallel to the ground. Push through your front heel and return to the starting position. Repeat the movement on the other leg. Continue alternating legs for the desired number of repetitions. Mistakes to Avoid Avoid leaning too far forward or letting your front knee go past your toes, as this can strain your knee joint. Keep your torso upright throughout the movement, and maintain a controlled pace to maximize the exercise’s effectiveness. 2.     Walking Lunges Image Source Walking Lunges target the quadriceps, hamstrings, glutes, and calves and provide a superb lower-body workout overall. They enhance leg strength, balance, and coordination. This exercise also engages the abdominal muscles, thereby enhancing balance and proprioception. Step-Wise Guide: Stand tall with your feet hip-width apart. Take a step forward with your right leg, ensuring a comfortable stride length. Lower your body by bending your right knee and hip until your right thigh is parallel to the ground. Your left knee should nearly touch the floor. Push through your right heel and bring your left foot forward to meet your right foot. Repeat the movement, stepping forward with your left leg this time. Continue alternating legs and walking in a controlled manner for the desired distance or number of repetitions. Mistakes To Avoid Avoid allowing your front knee to collapse inward or extend excessively beyond your toes. Maintain an upright posture by engaging your core muscles for stability. Take measured steps and keep a steady cadence to avoid losing your balance or straining your joints. Related: Calisthenics Leg Exercise 3.     Heel Elevated Goblet Squat Image Source Elevating the heels emphasizes quadriceps engagement and can improve ankle and leg mobility. This exercise enhances lower body strength, stability, and overall squat mechanics. Step-Wise Guide: Stand with your feet shoulder-width apart, toes slightly angled outward. Hold a dumbbell or kettlebell close to your chest with your elbows pointing down. Place weight plates or a raised surface under your heels, elevating them slightly. Keep your chest up, engage your core, and maintain a neutral spine. Descend into a squat position by bending your knees, pushing your hips back, and keeping your torso upright. Lower yourself until your thighs are parallel to the ground or slightly below. Push through your heels, engage your glutes, and return to the starting position. Repeat the movement for the desired number of repetitions. Mistakes To Avoid Avoid leaning too far forward or letting your knees collapse inward during the squat. Keep your chest up and maintain a neutral spine. Focus on pushing through your heels and engaging your glutes throughout the movement. Start with lighter weights to ensure proper form and gradually increase the load as your strength and technique improve. Compound Leg Exercises For Mass These exercises will result in leg mass. Let’s do them now: 4.     Barbell Hip Thrust Image Source The Barbell Hip Thrust focuses on the glutes, legs, and hamstrings, encouraging muscle development and posterior chain strength. It’s one of the best compound leg exercises for mass that aids in enhancing hip extension and general lower body power. Additionally, because it puts less strain on the spine, this exercise may be helpful for people with lower back problems. Step-Wise Guide: Sit on the ground with your upper back against a bench. Place a barbell across your hips, ensuring it is stable and centered. Plant your feet firmly on the ground in front of you, hip-width apart. Drive through your heels, activate your glutes, and lift your hips off the ground. Squeeze your glutes at the top position and hold for a second. Lower your hips back down to the starting position. Repeat the movement for the desired number of repetitions. Mistakes To Avoid Avoid arching your lower back excessively, as it can lead to discomfort or injury. Maintain a neutral spine throughout the movement. Ensure your feet remain flat on the ground and engage your glutes fully at the top position to maximize the benefits. 5.     Leg Press Image Source  It is an effective exercise for building leg strength and muscle mass, particularly when using heavy loads. The Leg Press also allows for more controlled movement than squats, making it a suitable compound leg exercise for beginners or individuals with certain mobility limitations. Step-Wise Guide: Sit on a leg press machine with your back flat against the backrest. Place your feet shoulder-width apart on the footplate. Ensure your knees are aligned with your toes and pointing in the same direction. Release the safety handles and push the footplate away by extending your knees until your legs are straight. Slowly bend your knees and lower the footplate back down toward your body. Repeat the movement for the desired number of repetitions. Mistakes To

Read More »
Compound Glute Exercises

Ignite Your Booty Transformation With These Compound Glute Exercises 🔥🍑

Are you prepared to advance your lower body exercises? If you’re tired of endless hours spent on isolated glute exercises that yield minimal results, it’s time to explore the world of compound glute exercises. These powerhouse movements not only target your glutes but engage multiple muscle groups, providing a more efficient and effective way to build strength and sculpt your lower body. Whether you’re a fitness enthusiast, an athlete, or someone looking to enhance their overall physical performance, incorporating compound glute exercises into your routine can yield tremendous benefits. These workouts offer a holistic approach to glute training that can transform your physique and unleash your true strength potential: Related Blogs: Compound Back Exercises Compound Chest Exercises Compound Shoulder Exercises Best Compound Glute Exercises For Bigger Buttocks Let’s have a look at the compound glute workouts that are sure to bring muscle to your glutes: 1.        Weighted Lunges   Image Source Weighted lunges are an excellent compound glute exercise that targets multiple muscle groups, including the glutes, quads, and hamstrings. By holding dumbbells in each hand and taking alternating steps forward, the lunges engage these key lower-body muscles. This underbutt workout not only builds strength but also helps improve balance and stability as you work to maintain proper form and control throughout the movement. Step-Wise Guide: Stand with your feet hip-width apart and hold a dumbbell in each hand. Take a step forward with your right foot, keeping your upper body straight. Lower your body until your right thigh is parallel to the ground, with your right knee directly above your ankle. Push through your right heel to return to the starting position and repeat with the left leg. Mistakes To Avoid Avoid leaning too far forward, as it can put excessive strain on your knees. Ensure proper form by keeping your chest lifted and your core engaged throughout the movement. Advantages Works glutes, quads, hamstrings for complete lower body workout. Challenges balance and stability. Disadvantages:  Can be hard on the knees if not done properly. Use caution if you have knee issues. 2.      Sumo Squat   Image Source The sumo squat is a compound exercise that targets multiple muscle groups, providing an effective workout for the glutes, inner thighs, and quads. This glute isolation workout not only helps build lower body strength but also contributes to enhanced hip mobility. By consistently incorporating sumo squats into your fitness routine, you can strengthen and tone your glutes, inner thighs, and quads while reaping the benefits of improved lower body strength and increased hip mobility. Step-Wise Guide: Stand with your feet wider than shoulder-width apart, toes pointing out at a 45-degree angle. Hold a dumbbell or kettlebell with both hands in front of your body. Lower your body by bending your knees and pushing your hips back, keeping your chest upright. Descend until your thighs are parallel to the ground, then push through your heels to return to the starting position. Mistakes To Avoid Avoid letting your knees collapse inward during the squat. Keep your knees in line with your toes and maintain proper alignment throughout the movement. Advantages Targets inner thighs, glutes, quads. Improves hip mobility. Disadvantages Can be challenging for those with tight hips/poor mobility. 3.      Barbell Hip Thrusts   Image Source Barbell hip thrusts have to be on your list of top compound exercises for glutes as they activate and strengthen them. Moreover, it also works several important muscle groups, including hamstrings, and lower back. By incorporating this exercise into your routine, you can enhance posterior chain strength and power, leading to improved athletic performance and overall functional fitness. With consistent practice and attention to proper form, barbell hip thrusts can be an effective tool in strengthening your glutes, hamstrings, and lower back while enhancing posterior chain strength and power. Step-Wise Guide: Sit on the ground with your back against a bench or elevated platform. Place a barbell across your hips. Bend your knees and position your feet flat on the floor, hip-width apart. Brace your core and drive through your heels, pushing your hips up until your thighs are parallel to the ground. Squeeze your glutes at the top, then lower your hips back down, maintaining control. Mistakes To Avoid: Avoid overarching your lower back at the top of the movement. Focus on maintaining a neutral spine throughout the exercise. Ensure that your weight is evenly distributed across your feet. Advantages: Targets glutes, hamstrings, lower back. Builds posterior chain strength. Can use heavy loads. Disadvantages: Set up can be cumbersome/awkward. Requires barbell. 4.       Frog Kicks   Image Source This targeted exercise routine focuses on engaging and strengthening the glutes, outer thighs, and core, offering numerous benefits such as enhanced glute activation and improved hip mobility. By incorporating specific movements and techniques, this compound glute workout effectively targets these areas to promote muscle activation and development. The glutes, which are comprised of three major muscles, are specifically targeted to enhance their strength and shape. Step-Wise Guide: Start by getting down on your hands and knees, with your wrists aligned with your shoulders and knees below your hips. Extend your right leg straight back, keeping it parallel to the ground. Bend your right knee and bring it out to the side, aiming to touch your right foot to your right glute. Extend your right leg back out and repeat the movement for the desired number of repetitions before switching sides. Mistakes To Avoid: Avoid overarching your lower back or sagging your hips during the movement. Keep your core engaged and maintain stability throughout. Advantages: Targets glutes, thighs and core stability. Works on hip mobility. No equipment required. Disadvantages : Balance can be challenging. Must maintain core/spine neutrality. 5.       Step-Up   Image Source To improve lower body strength, stability, and balance, try this exercise programme that concentrates on the glutes, quadriceps, and hamstrings. People can get a complete lower-body workout by concentrating on these specific muscle groups. Step-Wise Guide:

Read More »
Compound Chest Exercises

6 Compound Chest Exercises For A Sculpted & Toned Upper Body

When it comes to chest workouts, most of us immediately think of the standard bench press or dumbbell fly. While these exercises have their merits, it’s time to take your chest training to the next level. Compound exercises target multiple muscle groups simultaneously, allowing you to work smarter, not harder. By engaging the chest, shoulders, and triceps together, these exercises give you a comprehensive upper-body workout that yields remarkable results. So, get ready to ignite your chest muscles, challenge your strength, and elevate your fitness game. This blog post’ll guide you through some of the most effective compound chest exercises. Whether you’re a beginner or a seasoned gym-goer, there’s something here for everyone. Let’s get going: Related Blog: Compound Back Exercises Compound Chest Exercises At Home These at-home compound chest workouts are sure to help you build chiseled chest: 1.     Deficit Push-Ups Image Source The muscles in your chest, shoulders, and triceps all get a workout when you do deficit push-ups. The elevated position enhances the range of motion, making chest development more difficult and effective. Additionally, it’s a bodyweight compound chest exercise that also improves shoulder stability and upper body strength. Step-Wise Guide Place your hands on raised surfaces, such as blocks or steps, with your body in a push-up position. Position your hands slightly wider than shoulder-width apart. Lower your chest towards the ground by bending your elbows, keeping your body straight. Push yourself back up to the starting position by extending your arms fully. Repeat for the desired number of repetitions. Pro Tips Maintain a straight line from your head to your heels throughout the exercise. Engage your core and squeeze your glutes to keep your body stable. If the exercise is too difficult, start with a shallower deficit or perform regular push-ups until you build enough strength. 2.     Dumbbell Pullover Image Source Dumbbell pullovers are one of the finest compound chest dumbbell exercises that primarily target the chest muscles but also engage the lats, shoulders, and triceps. They help develop upper body strength, increase chest and shoulder flexibility, and improve overall posture. This exercise can enhance the appearance and size of the chest while promoting a strong mind-muscle connection. Step-Wise Guide Lie on a flat bench with your head and upper back supported. Hold a dumbbell with both hands, palms facing up, and extend your arms straight above your chest. Lower the dumbbell in an arc behind your head, maintaining a slight bend in your elbows. When you feel a stretch in your chest and shoulders, bring the dumbbell back up to the starting position. Repeat for the desired number of repetitions. Pro Tips Keep your core engaged and slightly bend your elbows throughout the movement. Avoid excessive arching of the lower back. Focus on feeling the stretch in your chest and shoulders, and control the weight to avoid swinging or jerking motions. 3.     Dumbbell Fly Image Source Dumbbell fly exercises generally target the chest muscles, notably the pectoralis major (outside chest). They also work the shoulders and the triceps. Dumbbell flies assist in isolating the chest muscles, increase the range of motion, and improve the definition of chest muscles. They work effectively to shape a well-rounded and contoured chest. Step-Wise Guide Lie on a flat bench with a dumbbell in each hand. Start with your arms extended above your chest, palms facing each other. Lower the dumbbells out to the sides in a wide arc, keeping a slight bend in your elbows. When you feel a stretch in your chest, bring the dumbbells back up to the starting position by squeezing your chest muscles. Repeat for the desired number of repetitions. Pro Tips Maintain a slight bend in your elbows throughout the movement to avoid excessive strain on the joint. Focus on contracting your chest muscles and maintaining control over the weights. Avoid using excessively heavy weights that may compromise proper form and increase the risk of injury. Best Compound Chest Exercises List This list of best compound chest exercises will produce the results you are after: 4.     Barbell Bench Press Image Source The barbell bench press has to be on your list of compound chest workouts as it primarily targets the chest muscles (pectoralis major and minor) and also works the shoulders and triceps. It helps increase upper body strength, muscle mass, and overall power. This is a staple exercise for building a strong and well-defined chest. Step-Wise Guide Lie down flat on a bench and put your feet firmly on the floor. Hold the load with your hands just a little wider than shoulder-width apart. Take the barbell off the rack and hold it straight above your chest with your arms fully extended. Bring the barbell down to your chest by bending your elbows 45 degrees and keeping them bent. When the barbell hits your chest, take a short break. Extend your arms fully and push the barbell back up to the starting position. Repeat for the appropriate number of repetitions. Pro Tips Keep your back flat on the bench throughout the exercise and avoid excessive arching or lifting your hips off the bench. It’s important to perform the Barbell Bench Press with controlled movements throughout the entire range of motion. Avoid bouncing the bar off your chest or using momentum to lift the weight. 5.     Chest Press Machine Image Source The chest press machine also works the chest muscles, shoulders, and triceps. It provides a controlled and stable movement, making it a suitable compound chest exercise for beginners or those with limited stability. It helps strengthen the chest muscles and can be used for building muscle endurance or as part of a rehabilitation program. Step-Wise Guide Adjust the seat height so that the handles are at chest level. Sit with your back against the backrest and grip the handles with your palms facing forward. Push the handles away from your chest by extending your arms fully. Slowly bring the handles back towards your chest while maintaining control. Pause briefly when the

Read More »
Scroll to Top